Contact LisaLise

Please use the form on the right to contact LisaLise.

Majestic Court 5, St. Mary's Street
Mellieha
Malta

LisaLise offers online education of natural plant-based cosmetics via e-books and courses

LLBlogHEADER2020-3.gif

Shop Blog

A look inside the LisaLise natural cosmetics lab with free formulas, DIY how-to's, ingredients tips, sneak peeks, and more.

Filtering by Category: Tips and Tricks

Why Raw Honey Never Goes Bad

Lise

Ever wonder why the raw honey you have in your kitchen can sit in the cupboard for months on end (or even years) without going bad?

It's because of GOx.

GOx is short for glucose oxidase.

Protein With a Punch

Glucose oxidase is an enzyme that oxidizes glucose into glucolactone which converts oxygen into hydrogen peroxide in the process.

What this means is: it acts as a preservative.

In short, GOx is an all natural bactericide – built right into the all natural chemical composition of raw honey.

Apart from keeping honey from going bad, it has scads of other uses. In fact, glucose oxidase has so many uses, it plays a major role in the biotech industry.

GOx Rocks

Among many other things, glucose oxidase is used for measuring blood glucose (REF ). It works by turning the glucose in blood (which is difficult to measure) into hydrogen peroxide (which is easy to measure). This makes it an ideal biosensor for diabetes.

Here's a short-list of some of its other uses.

GOx Uses:

  • Food preservative

  • In baking: helps increase dough consistency and quality

  • Color stabilizer

  • In wine production (lowers alcohol content and adds bactericidal effect)

  • Antimicrobial agent in oral hygiene products

  • Acidity regulator in food production

  • Biofuel cells

  • In packaging: removes oxygen from food packaging

Honey on The Skin and Hair

Raw honey is fabulous for skin. You can use it straight up to wash your face or leave it on as a moisturising, cleansing mask. I have used it as the base for my morning cleanser for many years.

Try applying and leaving honey on the skin (and in the hair!) for as long as you please as an all natural nourishing mask. I've experimented with the leave-on time, and a 2 hour honey mask is a real treat for the skin.

Worried about stickiness? Keep in mind honey easily dissolves in water, so the mask rinses out like a dream.

Bonus Tip: if you decide to do a lengthy honey mask, don't be tempted to steam iron anything while you are wearing the mask (so I learned after having to re-wash my freshly ironed, honey-dripped tablecloth)

Extra bonus tip: Pop a blank sheet mask over the freshly applied honey to keep dripping at a minimum.

Unlike Some, Honey Doesn't Like it Hot

Sometimes raw honey will crystallize and some will recommend heating honey to decrystallize it. The problem is, heat compromises the glucose oxidase activity, so do stick to storing and using honey at room temperature. Here’s a link to a study that examines how the glucose oxidase in honey reacts when it is heated (PDF ARTICLE ON RESEARCHGATE)

Do Tell

Do you work with honey in your cosmetics? If so, how? Please pop in a comment below.

Links to More Info about Honey and Glucose Oxidase

Glucose oxidase, applications, sources and recombinant production (LINK)

Glucose oxidase: an enzyme ferrari (LINK)

PubMed: glucose oxidase (LINK)

PubChem: glucolactone (LINK)

American Bee Journal: Inhibine and glucose oxidase in honey - a review (1966) (LINK)

Club Highlights

The formulas section has a selection of natural skincare and haircare formulas that are free for all members. Look forward to a self-preserving, honey-rich formulation during the next couple of weeks if you’re a member. Not a member yet? Check out what the Club has to offer by clicking the picture below.

PS: The book below shows you how to use honey as one of the main ingredients to make a series of self preserving facial cleansers.

Jump Starting the Formulation Process

Lise

I was recently chatting with Marie of Humblebee & Me about how the process of creating a formula can feel a bit daunting and we both decided to share this insiders secret with our respective readers.

If there was a shortcut available for formulators, this is probably as close as you can get. Many cosmetic bloggers use this method, and while some might call it cheating, others consider it a necessity.

What am I talking about?

I’m referring to jump-starting a formulation process by using free formulations supplied by many ingredient manufacturers.

Free Formulations?

Yes indeed. There are lots of options. If you are a member of, say, UL Prospector , you can browse free formulas to your hearts content from any of the companies in their database. There are other member-based sites as well, but many of them require you either have a company or are working professionally in the field of cosmetics.

But you’ll also find free formulas where you don’t need to be a member. Some manufacturers will make their development formulations freely available for download directly from their website - some even offer ingredient samples. Sometimes you’ll need to be subscribed to their newsletter as the only requirement.

Pros and Cons

There are pros and cons to using ‘ready-made’ formulations as you may imagine. While a clear pro is having an instantly available formulation, cons include things such as:

  • Not all listed ingredients are generally available to DIY’ers or even artisan-sized companies.

  • There are generally disclaimers along the lines of “this formulation has not been tested with manufacturing in mind and it is your responsibility to undertake necessary blah blah and yada yada to ensure stability and safety” In short, the formulation may very well be untested.

  • The method descriptions often call for industry standard equipment (magnetic stirrers, etc etc)

Nonetheless, it can be a great exercise to use a development formula to jump start a formulation exercise, so that’s what we’re going to do today.

I shopped around a bit to find something where most of the ingredients would be readily available and chose this beard balm formula from Alchemy ingredients. It features an ingredient they make: Sapogel.

Sapogel is a natural emulsifier that works without the need of heat (cold-mix) and can produce stable results both with an overhead mixer but also by hand. Mind you, working by hand is a bit of a process, but it’s definitely doable. I’ve made many successful and stable Sapogel emulsions and oleogels using nothing more than a spatula and a bowl.

If you can source Sapogel, you should be able to adjust this beard balm formula to your preference.

Substitutions

If you want to replace any of the oils or butters, I recommend using ingredients with similar properties to achieve a texture similar to the listed formulation.

Examples: shea butter could be replaced with mango butter and cocoa butter with cupuaçu. Avocado oil might be replaced with apricot kernel oil or sweet almond oil. I would probably keep the fractionated coconut oil as it is the only really ‘light’ ingredient in this balm.

Phase C ingredients could be swapped out entirely with other extracts or fragrances/essential oils.

Finally, if I were going to adjust and change this formulation, I would in all likelihood start by making the formulation with as few changes as possible to get an idea of what Alchemy’s original formula feels like.

Final Tip

Many ingredients manufacturers have a suggested usage rate for their ingredients that is great to use as starting point, but don’t necessarily take it as scripture. Many times an ingredient can be used at a far higher or lower percentage and still produce a stable and functional formula.

A couple of examples: surfactants otherwise used in a liquid shampoo can be used at a much higher percentage in a solid shampoo bar. Also, some emulsifiers can produce beautifully stable emulsions with much less than the recommended usage rate.

In short: don’t be afraid to experiment. If you are formulating something untried - start with a small batch and see what happens. You may end up tossing your batch, but you may also end up with something fabulous. Either way, you’ve learned something new and useful you can take forward in developing your future formulas.

Enjoy!

Do Tell

Have you ever used a development formulation to jump start your formulating process?

Speaking of balms, the book below has loads of balm formulas you might find inspiring (and I do include suggestions for substitutions where relevant.

Easy Rose Exfoliating Paste

Lise

This simple exfoliant ticks all of my favourite boxes:

  • All natural (read: plant-based and organic)

  • Vegan-friendly

  • Beginner-friendly

  • Gentle

  • Effective

  • Planet friendly

  • Reasonably priced

The best part? It contains a mere 3 ingredients – one of which I know you have already guessed.

Are you ready to make your own rose exfoliant?

It Starts With Rose-Infused Oil

This product begins with your own rose-infused oil, so if you don't happen to have one brewing, you can learn how to make one right here.

If you have followed me for a while, you will probably know I have been making rose-infused oils for many years.

With that in mind, I'm almost embarrassed to tell you this next part.

Up until 2018, I discarded the spent plant material after straining my rose infusions.

(insert shock-faced emoji here)

But when my batches (finally) started resulting in the most heavenly fragranced oil, it became physically impossible for me to toss the spent material.

Then it hit me: Repurpose!

Instead of tossing the roses, I turned them into a luxuriously fragrant exfoliant. Here’s how easy it is to make your own.

Making Rose Exfoliating Paste

After straining your rose infusion, you are left with a straining cloth full of roses with some residual oil.

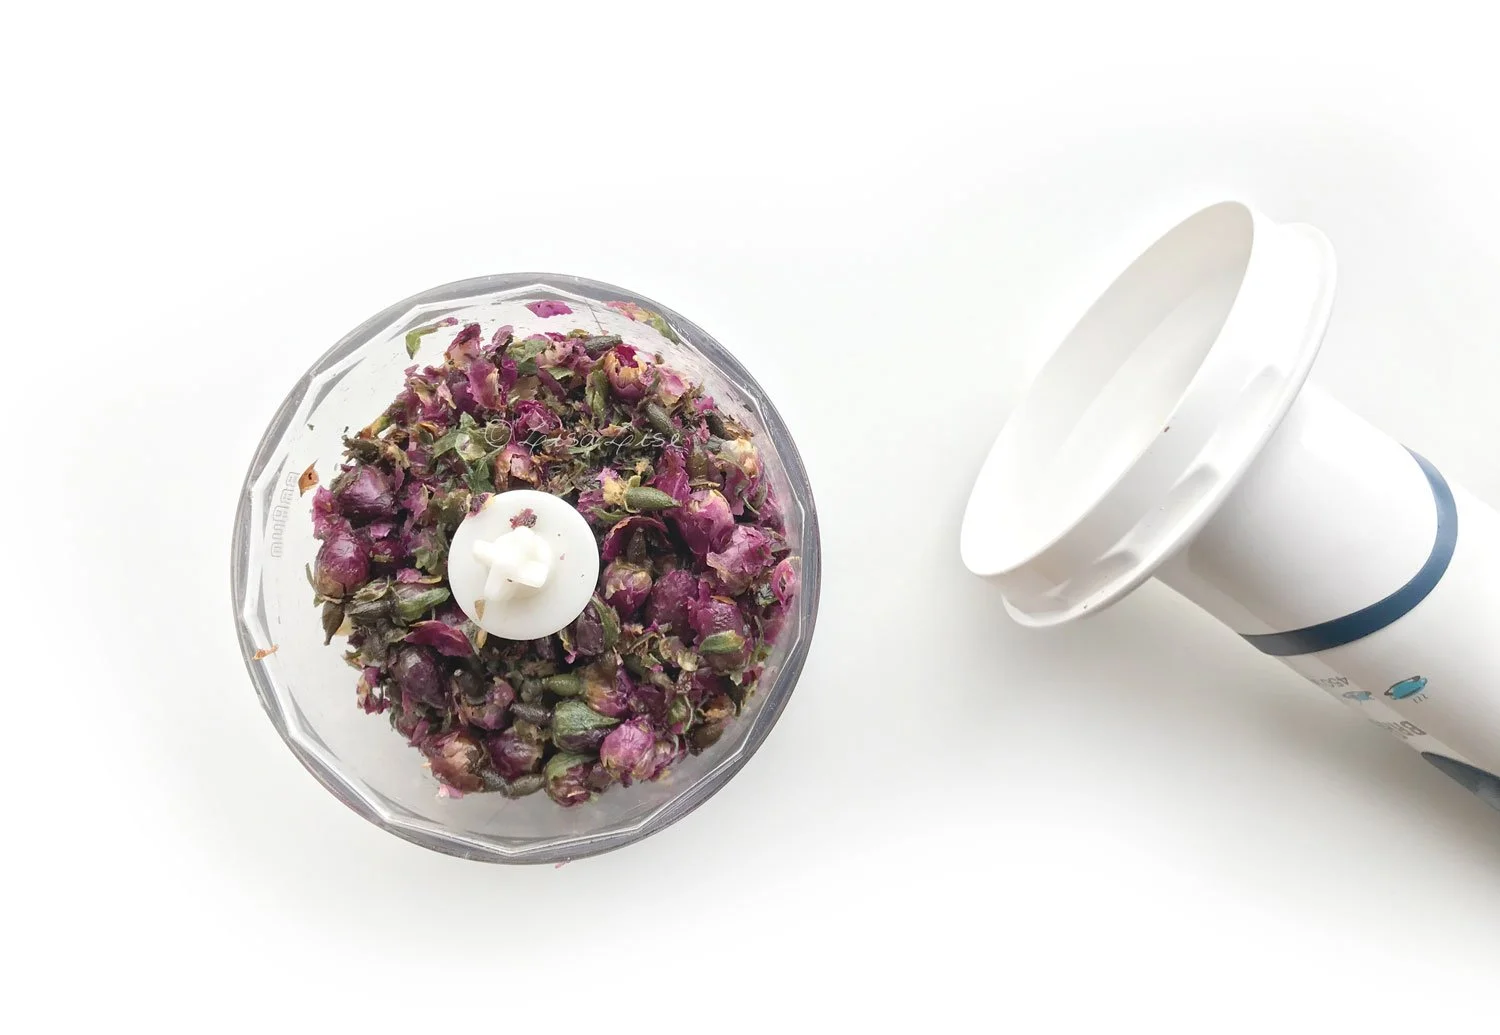
  1. Place the oily roses into a chopper/grinder

  2. Pulse until you have a paste

  3. Test the texture for the skin feel you like and if necessary, keep pulsing/grinding until you are happy with the texture

  4. Transfer the paste to a jar

  5. Label and date the jar

  6. Keep the contents free of moisture and use within 3 months (alternatively, add a preservative if you want to be able to dip wet fingers into the jar and use with abandon)

Here's what it looks like straight out of the jar. This paste makes a lovely hand exfoliant without the addition of anything else, but you could also add some fine himalayan pink salt to extend the amount and turn it into a luxurious rose body exfoliant.

Enjoy!

Do Tell

What do you do with the spent plant material from your oil infusions?

Want to incorporate your essential oil blends safely into a series of fabulous bath products? The e-book below might be just the thing!

Almost Accidental Jasmine Enfleurage

Lise

Look what happened to be growing over the fence from my neighbour around the end of August. These beautifully fragrant jasmine flowers were picked the same day they flowered. I know because I had been eyeing (what I could see of the plant) with great interest.

This ‘haul’ of 10 blossoms was carefully spread out to dry in my lab. The next day, a new bunch showed up and was promptly plucked. This went on for a little more than a week (I stopped counting). I picked every blossom I could with a clear conscience as only a very small area of the plant had decided to grow near enough for me to reach.

The entire batch was a relatively modest amount (about 100 flowers in total), but the fragrance was quite powerful.

And as I brought them into the lab to dry, there were other lab things going on… like little swatches of freshly made balms undergoing a bit of scrutiny.

The Enfleurage Urge

It has long been one of my desires to learn proper enfleurage. I’ve read a bit about it and listen with great interest to those who practice it and are willing to share their wisdom and experience with me.

Enfleurage originated in France in the 1700’s and is a perfuming technique used to capture the scents of plants that are otherwise hard to capture by distillation or maceration. There are several different enfleurage methods that can be employed. One method calls for freshly picked blossoms being placed ‘face down’ on – or very near – a thin layer of neutral smelling fats in a special container/tray. They then ‘breathe’ their fragrance molecules onto the fat layer. Blossoms are replaced regularly until the fat is satisfactorily fragrant.

With this method in mind, a couple of balm swatches became impromptu fat layers for some jasmine flowers.

Guess what?

Even without the correct equipment, the scent transferred beautifully.

To be sure my own nose wasn’t playing tricks on me, I brought one of the balm swatches (sans flowers) to my husband and asked him what he thought it smelled like. He immediately said jasmine (wrinkling his nose a bit as he doesn’t much like jasmine).

Doing proper enfleurage just got bumped up my to-do list.

Do Tell

Have you ever tried enfleurage? Which flowers and method did you use?

More Enfleurage Stuff

The inspirational Jade Forest on Enfleurage (LINK)

My interview with Jade (Jade Grows her Own Perfume) on this blog

A previous enfleurage attempt using lilacs in coconut oil (LINK)

Want to make your own balms? Below is my ebook about natural balms. Click the picture to learn more about what’s included.

Plant Butters: Melting Points and Hardness

Lise

There's a world of fabulous plant-based butters available to cosmetic formulators these days, so there's no need to limit yourself when it comes to plant butters. Each butter has its own benefits so depending on the properties you are looking for, you can find the perfect match for your project.

The chart I've made below gives you an overview of a few useful plant butter characteristics.

Butter vs Oil

All butters and oils are made up of fatty acids, so if you want to get real persnickety, butters could be referred to as solid oils. What makes butters solid and oils liquid is the different proportions of the fatty acids they are made up of.

Butters have a higher content of saturated fatty acids such as

  • Stearic acid

  • Palmitic acid

  • Myristic acid

  • Lauric acid

(there are many more saturated fatty acids - check the link below for a complete list)

What Melting Point Means

Melt point temperature doesn't mean the butter will be completely liquid the moment it reaches the listed temperature. Melt point is exactly as it states: the point where the butter begins to melt. You may find when you are melting butters for your project that the temperature will be somewhat higher by the time everything is fully melted. That's worth taking into consideration if you are including heat sensitive oils in your formula.

Butter Melting TIP

  • If you are making lotion bars, balms, or other solid cosmetics, ensure your butter is in small, even-sized pieces before turning on the heat. This can help avoid the mixture reaching a higher temperature than desired.

Butter Chart

Below is an overview of skin-loving plant butters and their approximate melting points (MP) in both Celsius (MP-C˚) and Fahrenheit (MP-F˚)

LisaLise's Plant Butter Melting Point and Hardness Chart

Butter INCI Name MP-C° MP-F° Hardness
Bacuri Platonia Insignis Seed Butter 35° 95° Semi Soft
Cocoa Theobroma Cacao Seed Butter 35° 95° Hard
Cupuaçu Theobroma Grandiflorum Seed Butter 32-36° 90-97° Hard
Illipe Shorea Stenoptera Seed Butter 36° 97° Hard
Kokum Garcinia Indica Seed Butter 38-41° 100-106° Very Hard
Kombo Pynanthus Angolensis Nut Oil Butter 43° 109° Soft
Kpangnan Pentadesma Butyracea Seed Butter 35° 95° Semi-Soft
Mango Mangifera Indica Seed Butter 35° 95° Semi-Soft
Murumuru Astrocaryum Murumuru Seed Butter 33° 91° Semi-Soft
Sal Shorea Robusta Seed Butter 35° 95° Semi-Hard
Shea Butyrospermum Parkii Seed Butter 32° 90° Soft
Shea Nilotica Butyrospermum Parkii Seed Butter (sp. V. nilotica) 25-30° 77-86° Soft
Tucuma Astrocaryum Tucuma Seed Butter 31° 88° Semi-Soft
Ucuuba Virola Surinamensis Seed Butter 53° 127° Very Hard

What About Composed Butters

Although you may have seen some of the butters listed below, checking the INCI and ingredient list will reveal that none of these are true plant butters, but products that are created with shea butter and/or hydrogenated vegetable oil with the addition of the 'star ingredient' oil.

It's perfectly fine to use composed butters as an ingredient in cosmetics. Just be mindful that the characteristics (and ingredients) may differ from supplier to supplier.

A Few Composed Butters

  • Matcha

  • Coffee

  • Macadamia

  • Lime

  • Grapeseed

  • Avocado

  • Apricot

  • Almond

Super Soft 'Butters'

The following are oils that are (generally) solid at room temperature which can (for some products) be handled and processed as if they were butters.

  • Palm Kernel Oil (unrefined): approximate melting point: 28˚C / 82˚F

  • Coconut Oil: approximate melting point: 24˚C / 75˚F

This post has been updated from the original post of February 2, 2015

More about Butters

Visit the Lipid Web

Learn more about fatty acids and oils at the Lipid Academy

The Power of the Seed by Susan M Parker

Fairly Traded Butters from the Amazon (LINK to Rainforest Chica)

List of Saturated Fatty Acids (LINK)

If you’re a butter lover, you might just love the e-book pictured below. It contains several formulas featuring butters.

Herbal Tea: Health and Skincare Inside and Out

Lise

Throughout this summer, I have been enjoying herbal tea as a refreshing all-day cool drink. Almost every herbal tea functions equally well hot or cold. Come to think of it, I can’t recall a single herbal brew I didn’t enjoy equally as an iced tea.

This particular blend has been my go-to during the past months. I happened to serve up a glass to a family member who popped by on a very hot day and it was instant hit. When I offered her some to bring home, the reply was “I thought you’d never ask”.

If you happen to work with botanicals and have a selection of dried herbs in stock, it’s pretty easy to make your own herbal blends. The advantages are multiple as you are getting the (water-soluble) benefits of the botanicals as you enjoy your refreshing drink.

I’ve made quite a few blends over the years and have discovered there are a few things you can do to take your creations to the next level.

Today, I’m sharing a few tips that have worked for me. You might already know some of these, but hopefully there is a bit of inspiration too.

How to Make Your Own Herbal Tea Blends

In my experience, composing an herbal tea is a bit reminiscent of creating a fragrance blend. If you compose a blend of only top notes, it’s going to lack depth and ‘roundness’.

It can make quite a difference to the taste (and herb synergy) if you choose a few ‘background’ herbs to function a bit like a taste-and-fragrance anchor. These may be (super beneficial) herbs that may seem a little boring-tasting on their own, or could be herbs you normally wouldn’t consider using in a blend at all. (Can you tell I’ve experimented quite a bit over the years?)

As an example, here’s are some of the ‘background herbs’ I am using in my current blend

  • Horsetail

  • Red Clover

The ‘middle and top note’ herbs

  • Lemon verbena

  • Wild rose

  • Hibiscus

  • Chamomile

  • Rose

Choosing Proportions

I am very instinctive when making herbal tea blends. Nothing is weighed or measured, but merely mixed into a large bowl in proportions that suit me at that moment. Herbs are chosen from my stock ‘instinctively’ as well. Gazing into the stock cupboard is inspirational for me as I have quite a collection of dried botanicals.

If this sounds a little daunting and you haven’t tried this before, may I suggest using about 1/3 of the blend as ‘background herbs’ and 2/3 with the herbs you want to be dominant in taste.

In the blend above, I am using a proportionately larger amount of chamomile and rose petals as I like these to stand out. The lemon verbena gives these dominant ‘flowery herbs’ a bit of crispness and depth. Hibiscus was added after my first few batches because I wanted a pinker brew. It also adds to the experience if the color of the brew matches the taste.

How to Make an All Day Herbal Brew

To have enough to sip on all day (and serve to lovely guests who happen to pop by), make a potful (I make 1 liter) at a time.

  1. Fill a large tea filter with your chosen amount of herb blend (I generally use about 5-8 grams)

  2. Pour boiling water over the herbs and allow to infuse. While most herbal brews generally take between 5-10 minutes to infuse, I usually infuse between 15-20 minutes.

  3. Sweeten if desired (I generally add a spoon/dipper of raw honey)

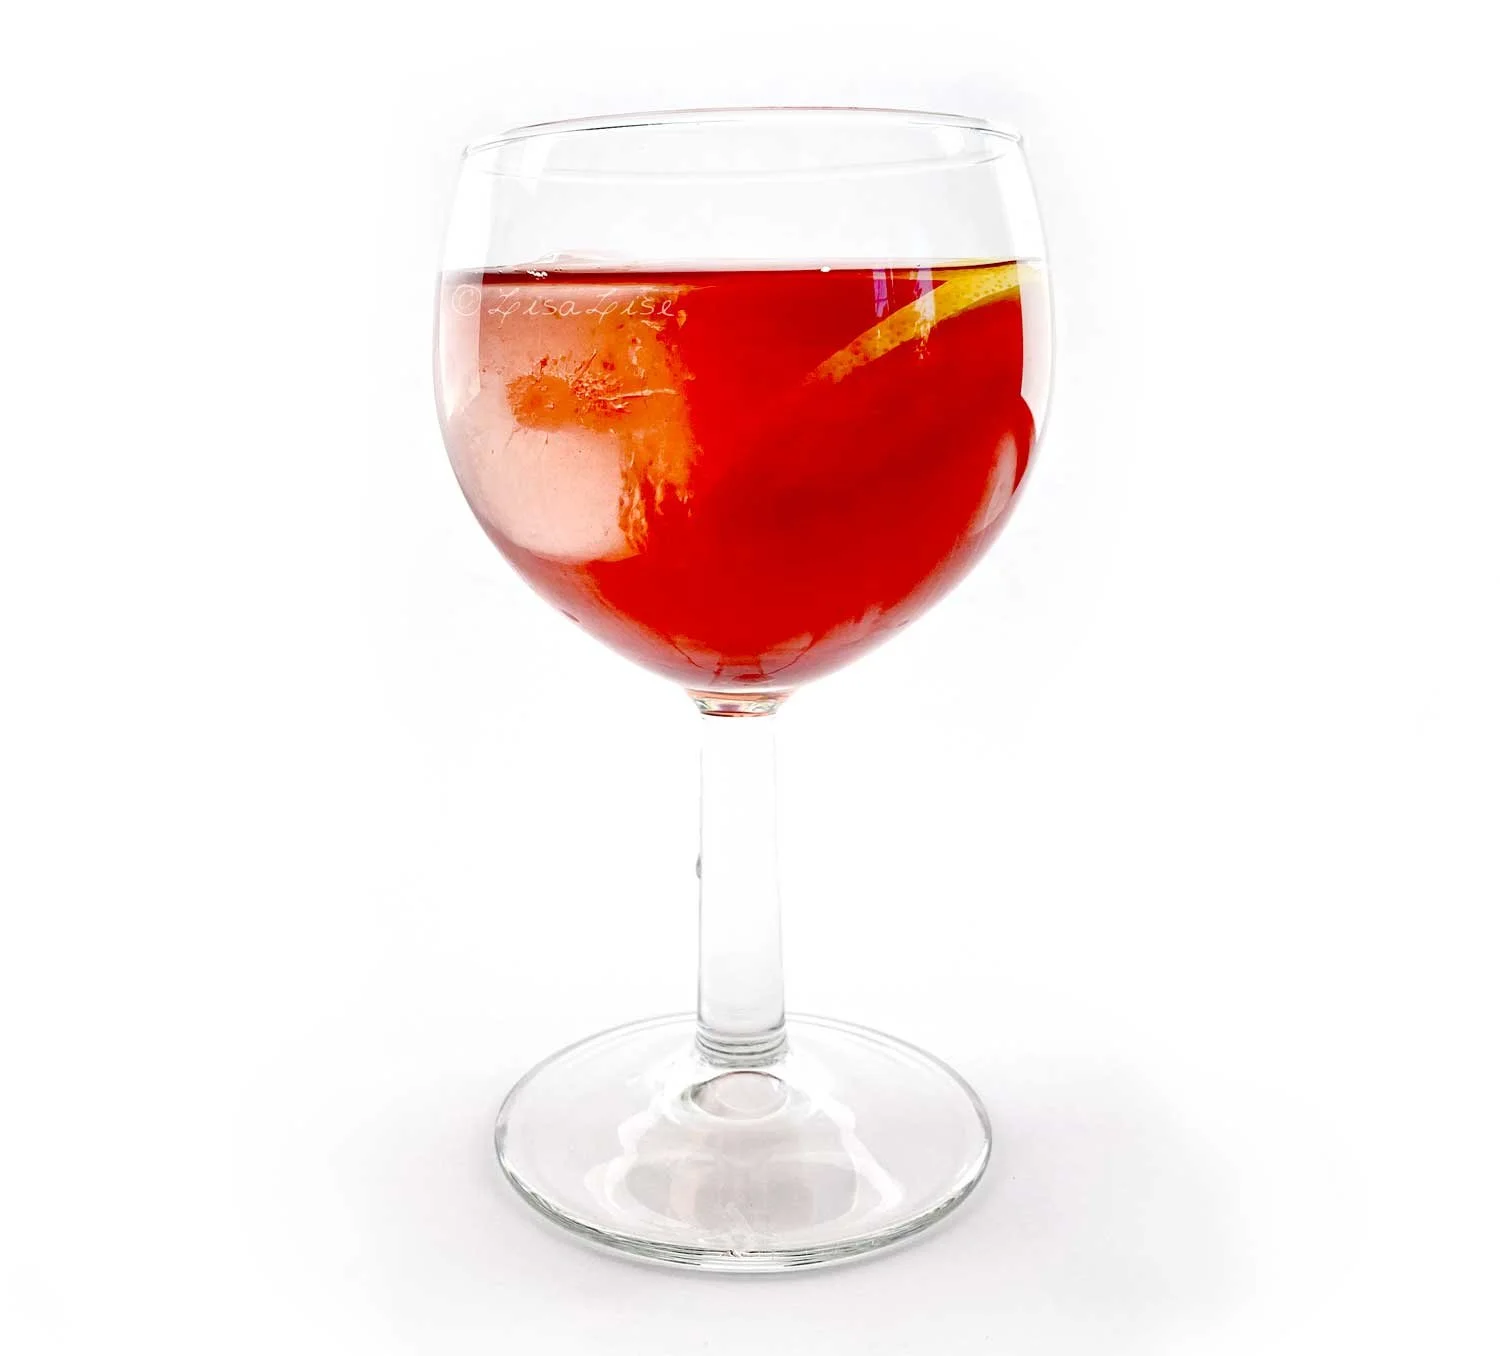
  4. Drink some immediately and/or allow to cool and serve over ice with a slice of lemon.

And if you want to get a little fancy, serve up in a stemmed glass.

Enjoy!

Bellow is my latest publication that shows you how to compose your own bi-phase cleansers and make-up removers.