Contact LisaLise

Please use the form on the right to contact LisaLise.

Majestic Court 5, St. Mary's Street
Mellieha
Malta

LisaLise offers online education of natural plant-based cosmetics via e-books and courses

LLBlogHEADER2020-3.gif

Shop Blog

A look inside the LisaLise natural cosmetics lab with free formulas, DIY how-to's, ingredients tips, sneak peeks, and more.

Filtering by Category: Botanicals

What I Learned After a Year Doing Laundry with Soapnuts

Lise

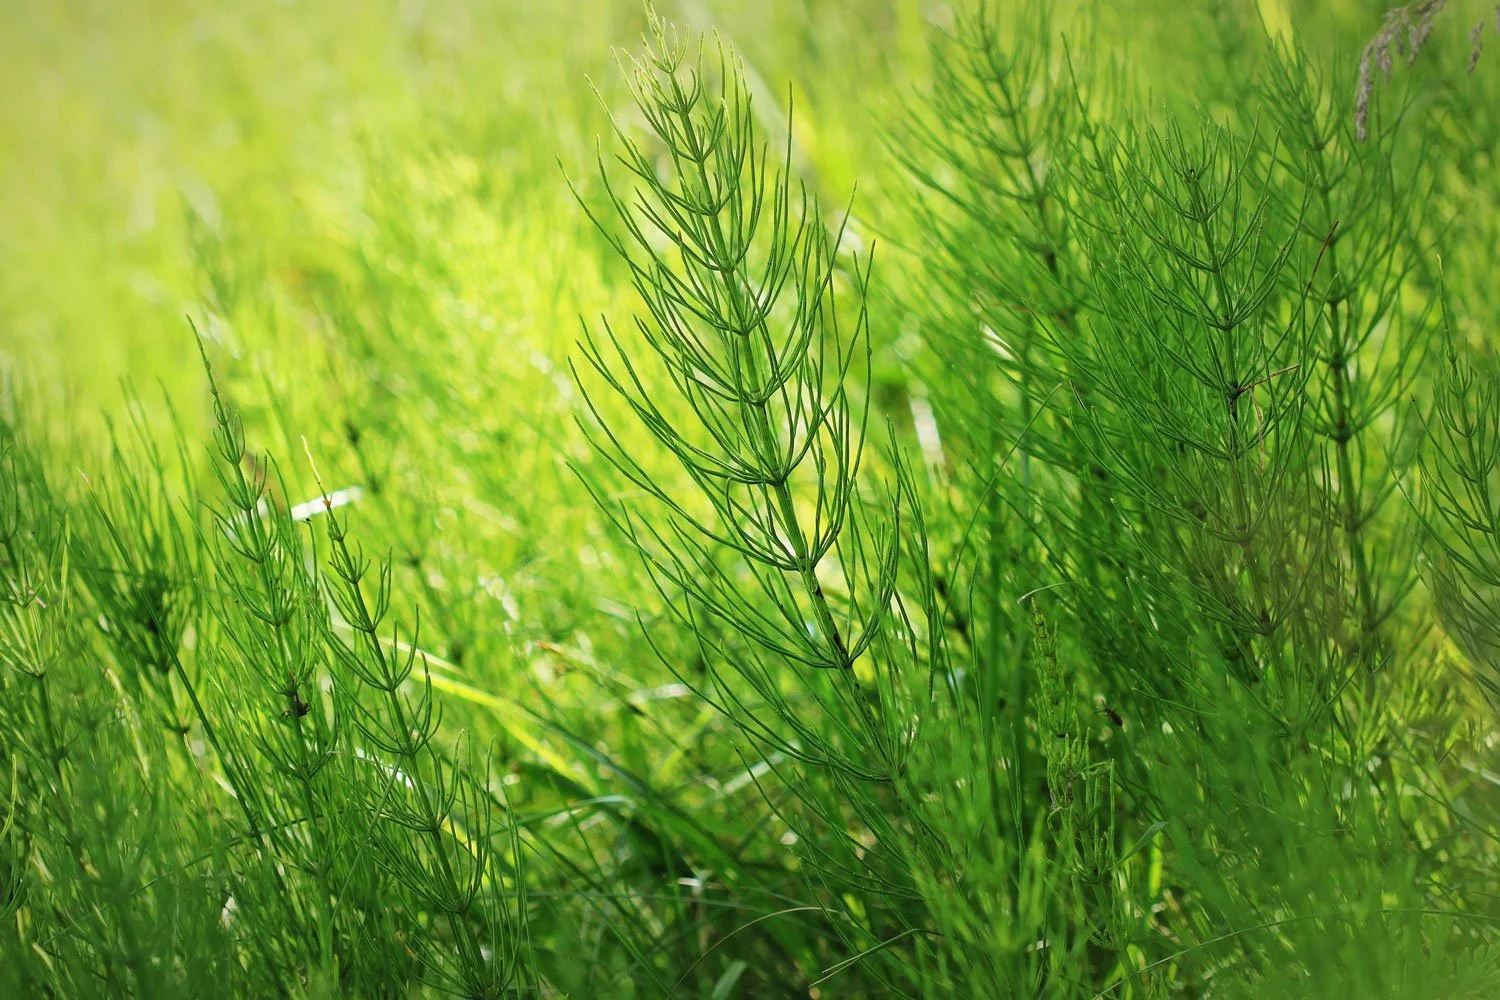
Over a decade ago, the funny-looking little 'nuts' you see pictured above made their way into my life. They are all natural cleansers that grow on trees. I'm not kidding. Soapnuts (also called soap berries or wash nuts) have a natural content of saponins.

They have numerous cleansing uses for skincare and haircare but it was learning about its history of use for textiles that got me excited. Here was an all-natural, efficient and planet-friendly solution to commercial detergents!

It took me all of a nanosecond to abandon ALL of my regular laundry products and replace them with this little bag of drupes.

For a full year, all of my laundry was done exclusively with soapnuts.

When I say everything, I mean

  • Dishrags

  • Towels

  • Sheets

  • Whites

  • Undies

  • Silks

  • Sportswear

  • Wools

  • Teddy Bears

  • Tablecloths

  • and everything else that made its way into the washing machine

'Methinks this woman is mad'. (I clearly heard you think that)

Perhaps.

But I learned a whole heck of a lot of things about using soapnuts for laundry. And because you may just find my observations and experiences useful, I'm going to share them with you.

How to Use Soapnuts for Laundry

To do a load of laundry, it takes a mere 5-6 nuts (if you have water that is relatively soft). The soapnuts are placed in a small muslin bag that is tied shut and dropped into the washing machine. The little bag was even included when I bought the soapnuts. The bags can be reused, so one bag is enough for 4-5 washes.

Not only were we going natural, we were saving money! What's not to love?

They're a bit Vinegary

OK, there is one thing that takes a bit of getting used to: the smell. Some folks don't like the vinegar-like smell, but there is a workaround for that.

Adding a few drops of lavender essential oil to the bag just before putting it into the washing machine transforms the scent of the emerging laundry to a more neutral soapy-clean scent.

Because we had extremely hard water where I lived at that time, I discovered I needed about 9-10 soapnuts per full load. I also added the lavender essential oil in the beginning, but it didn't take long to discover that the vinegar smell disappears completely as the laundry dries. (I have always air-dried my laundry - either in a drying room or in the fresh air), so I stopped using the lavender essential oil after a while.

Where Soapnuts Shine for Laundry

After my detergent-free year of using soapnuts, I learned that they work exceptionally well for washing

  • colored silks

  • colored cotton

  • colored linen

  • colored wool

  • colored delicates

I know you're seeing a pattern here, and you are indeed spot-on. Soapnuts are great for natural fabrics that have color.

As I am not a fan of synthetic fabrics, I am unable to give you terribly much input on how soapnuts are with polyesters and the likes, but can share that my own gym clothes came out clean.

Where Soapnuts Don't Shine for Laundry

As much as I hate to admit it, there are things soapnuts really suck at. Washing whites and lighter colors eventually results in 'grays' (or, to be more precise, 'browns').

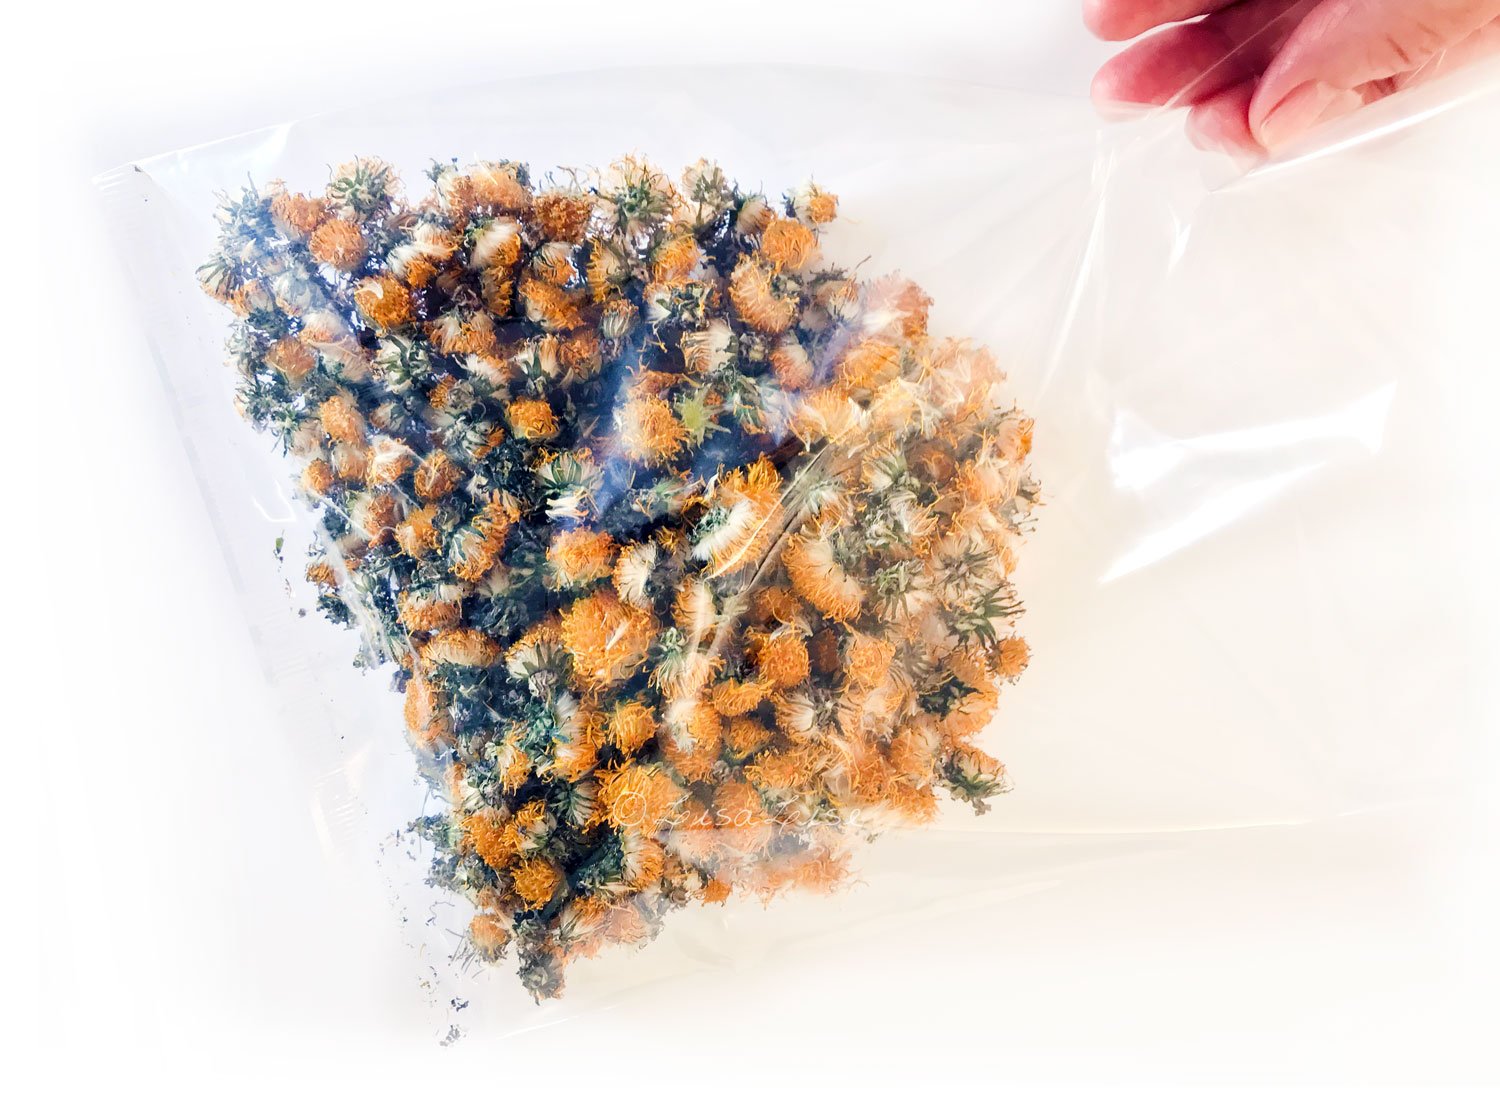
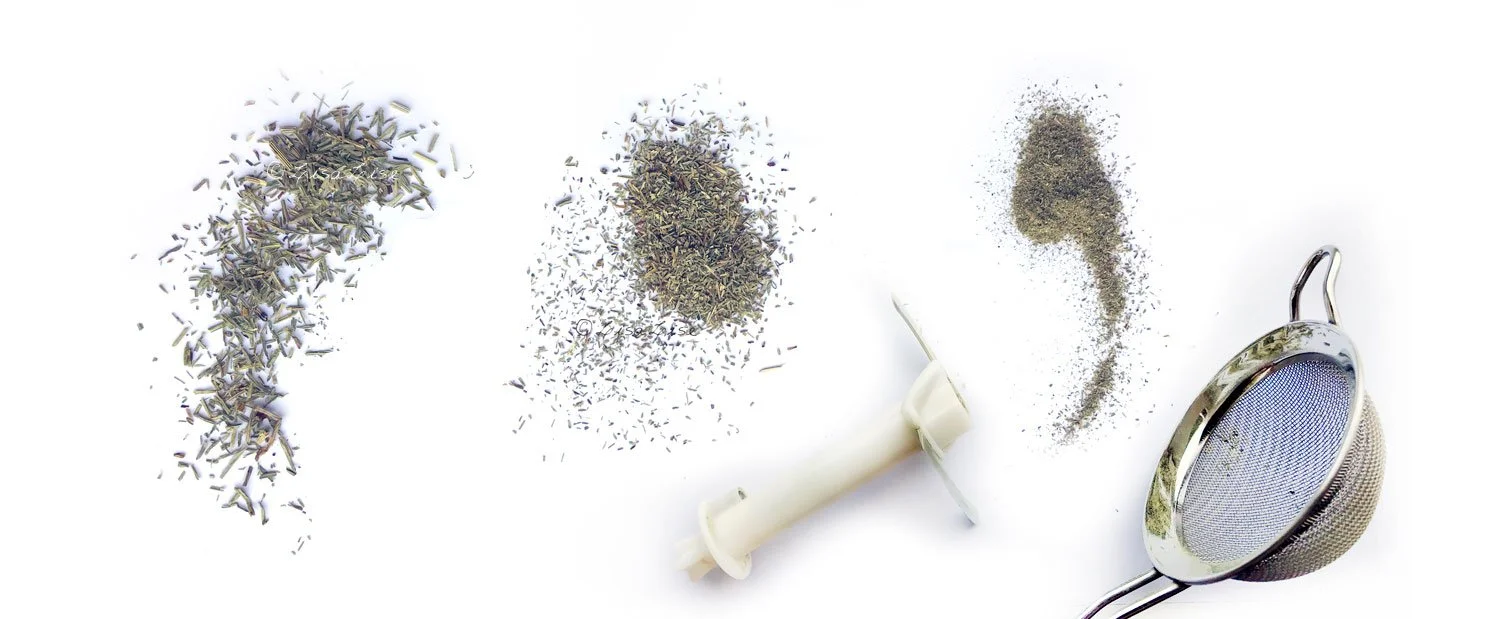
Well, judge for yourself by checking the picture above. The bag on the far left has been through 2 washes, and the bag on the right has been through about 50 washes. The darkening is a very gradual process.

It wasn't until I switched to a new bag I noticed how much the color had dulled.

There's More...

Soapnuts have an annoying habit of staining what they come into direct contact with (like the little muslin bags). The higher the washing temp, the more they stain.

This is a good reason to learn how to tie the bag shut in such a manner that the soapnuts have no chance of escape during a wash cycle.

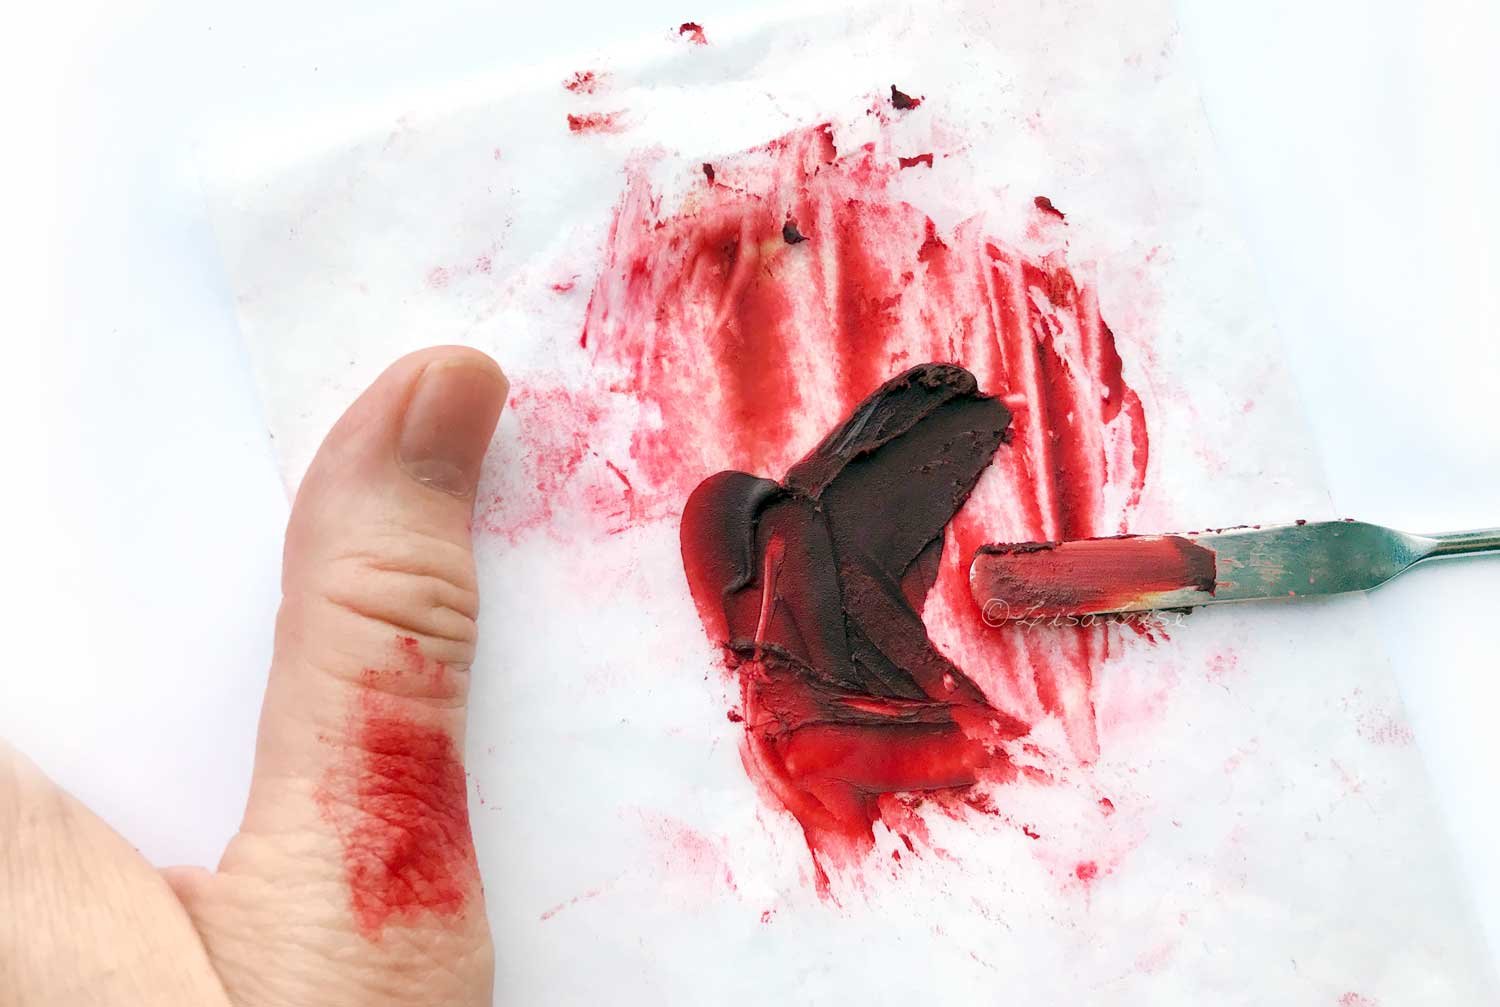
Because if they do – the sheet pictured above on the right illustrates what happens to your lovely white sheets (the brown splotches part – not the green rings part. I added those on purpose so you could see the brown splotches part more clearly).

The bad news: the stains won't even consider coming out without persistence and bleach.

Which is why I went back to my old laundry detergent for whites, but still prefer using soapnuts for colored fabrics washed at lower temps.

That said, if you are willing to wash your whites at low temperatures, the soapnuts will not discolour the fabric as quickly, but it still dulls whites over time.

Do Tell

Have you ever used soapnuts for laundry? What were your experiences with it?

Are you a thinking of becoming a member? Check the Club page to learn what kind of exclusive content you’ll have access to.

Easy Whipped Shea Butter

Lise

Over the years, I have used shea countless ways - in emulsions, melt-and-pour products, bars, bath products, hair products, and a plethora of skin care products.

Along the way, there have been lots of opportunities to experience fails, and there have been many, but I have also learned from every single one of them.

A lot of formulators have a love/hate relationship with shea butter. While that’s perfectly understandable, I find it has far too much to offer in the way of skin and hair care to be dismissed simply because it can be fiddly to work with.

Today, I'm going to show you a beautifully simple whipped shea that works for me every time so even if you are new to working with shea, this might be a great way to get acquainted with this wonderful skin-and-hair-loving ingredient.

You can use either refined or unrefined shea butter, but be sure the butter is at room temperature and has a creamy, grain-free texture before you start.

LisaLise's Easy Whipped Shea

Ingredient %
Shea Butter 80.0
Jojoba (oil) 18.0
Antioxidant of choice 1.0
Essential Oil Blend (optional) 1.0

If you don't want to add essential oils, adjust the amount of jojoba accordingly.

Method

  1. Sanitise your equipment and work area

  2. Weigh oil and warm to 40°- 45°C

  3. Weigh shea and cut into small uniform pieces and transfer to 'whipping container' (choose something tallish that has room for your mixer blades)

  4. Transfer oil to shea

  5. Whip the mixture. Start at a low speed, then increase until the mixture is homogenous and light (2-4 minutes - depending on batch size)

  6. Add antioxidant and (any) essential oils

  7. Whip the mixture again until the consistency is light and airy (1-2 minutes).

  8. Transfer the mixture to your final container.

It's ready!

Note the difference in color of the final shea - that wasn’t due to whipping, but to the essential oil blend I added.

Over the next 24 hours the butter will ‘set up’ a bit, but will still be light, yet stable. You should be able to easily dip into the balm without having to 'dig’ it out.

A Few Whipped Shea Uses

This simple product is ideal for numerous things! Try it as

  • Hand & Cuticle Cream (a little goes a long way)

  • Foot Softener (apply after a footbath and don a pair of cotton socks for at home foot spa luxury)

  • Dry Hair Tips Conditioner (rub between hands and apply to tips of hair)

  • Body Cream (apply after bath for super soft skin)

  • Deep Moisturising Night ‘Cream’ (apply after your evening cleanse and massage in gently)

Do Tell

Have you ever made a simple whipped shea? What did you use it for? Please share in a comment below.

Dandelions For Skincare: Drying the Blossoms

Lise

In case you're wondering, this is not a picture of weeds (I've added some helpful text to give you a clue).

Long ago, I would to think only one thing when seeing a meadow full of dandelions: 'pretty, but just weeds'.

No more.

Today, we're going to do a bit of preparation for some honest-to-goodness botanical magic, so grab a basket and get ready to harvest a few dandelion blossoms!

Not convinced why you should be picking 'weeds'?

Then read on to discover what this little treasure of a plant has to offer!

What Makes Dandelions Special

Dandelion (INCI: Taraxacum Officinalis) may be the bain of many gardeners and homeowners, but this widely available plant has so very much to offer.

The 'Officinalis' part of the Latin name is a giveaway that dandelions have a history of medicinal use. Apart from a plethora of different applications for soothing and helping us heal, dandelions are edible (and nourishing) from tip to root.

And there's even more.

My interest in this common plant is due to their natural content of cichoric acid.

And why is this exciting?

Because cichoric acid does a really cool thing: it inhibits the enzyme that breaks down hyaluronic acid in the body. Read: it protects collagen from damage from free radicals.

So, if cichoric acid has the ability to protect our own hyaluronic acid from breaking down, then it might be fair to view dandelions as all-natural little fountains of skincare youth.

See why I'm a little excited?

You: Sounds very interesting Lise, but is all this tested and proven by science?

I love it when you ask me serious stuff!

So far, I am seeing initial conclusions like 'warrants further study' and 'looking positive', but scientific tests are still too few and far between for any conclusive evidence. The prospects have me interested enough to keep digging for more information.

Meantime, there's no reason to put off working with what's growing so abundantly, is there?

So, are you ready to get busy with dandelions?

Dandelion Picking Tips

Although you can use the entire plant, we're going to be concentrating on collecting and drying the blossoms for this exercise.

Where to Pluck Dandelions

Find an area away from roads and other possible sources of contamination (such as pesticides, urinating pets etc). If your own garden lawn happens to fit this description and is filled with dandelions, it's a perfect place to start.

When to Pluck Dandelions

In theory, you can pluck dandelions any time of day, but I find mornings both pleasant and the best time to get the freshest blossoms. Any newly blossomed plants are easy to spot in a lawn (I picked blossoms from my lawn over a period of 3 days). Every blossom I picked for this batch had appeared overnight.

How to Pluck Dandelions

Pinch off blossoms at the top of the stem.

How to Dry Dandelions

Spread out on a clean cloth and allow to wilt in the shade in open air for a few hours. This will give any resident tiny bugs a chance to find another place to reside.

If you have a drying net, use that. A drying net allows air all around the plant.

I started out using my garden table to wilt the flowers, then moved them to a paper towel indoors and placed them face down to finish drying.

Allow the blossoms to dry throughly. Depending on the climate you are in, this could be from a few days up to a couple of weeks.

If you don't have the space to let the blossoms air dry, spread them out on a tray and leave in the oven on very LOW HEAT (about 60°C) overnight.

If you have a dehydrator, even better. Set the dehydrator to between 8-10 hours at about 60°C

When the blossoms are thoroughly dry, pop them into a bag and store dry and dark until use.

A special thanks to Vivienne at The Herbal Hub for the original inspiration to take a closer look at these gems.

Do Tell

Do you work with dandelions in your skincare? How do you use them?

Links to Nerdy Stuff about Dandelions and Cichoric Acid

https://pubs.acs.org/doi/abs/10.1021/jf0258858

https://www.ncbi.nlm.nih.gov/pubmed/24871659

https://www.sciencedirect.com/science/article/abs/pii/0031942295008659

https://www.ncbi.nlm.nih.gov/pmc/articles/PMC3982519/

https://pubs.acs.org/doi/abs/10.1021/acs.jafc.5b04533

http://pubs.rsc.org/en/content/articlelanding/2017/ra/c6ra25901d#!divAbstract

TIP: Want to get started making your own extracts but don’t know where to begin? The bundle offer below might be just the thing.

Lipstick Grows on Bushes

Lise

This red mess you are looking at is a bit of success. I suppose we could call it a successful mess. It is 100% plant-based colorants in a 100% botanical base. When I realised it actually had the color, opacity, stability, and staying power I had been trying to acheive, I was absolutely beside myself.

But I'm already a little ahead of myself.

Let's go back a bit.

"This shouldn't take too terribly long" said the Eternal Optimist

Over a decade ago, I put this 'little' project on my personal-to-do list. I thought it might be fun to develop a series of color cosmetics that uses solely plant-based colorants and doubles as skincare.

Admittedly, this sounds like mission impossible, but if you have been following me a while, you probably also know I do like a challenge.

You: Only plant colorants, Lise?

Me: Yup - all natural, all plant-based and only botanical colors.

You: But that's not possible! Plants morph and change color - they turn brown and boring.

Me: I know, and that makes the whole thing a bit of a challenge doesn't it?

The Claim: Cosmetics Will Never Be Natural

It was a meme on Instagram (posted by a formulator of the petrochemical persuasion) that helped kick me into gear and get serious about seeing if this could be done.

The meme was a graphic of a bush (or tree?) that was filled with 'blossoming' lipsticks instead of flowers.

The accompanying text was something along these lines:

"until someone invents a lipstick bush, cosmetics will never be natural."

My immediate thought: 'what an odd choice of graphic and words for someone who has obviously never heard of the Lipstick tree'.

And that was it.

I had to prove lipstick could grow on bushes, so I got to work.

As time has passed, this project has been worked on furiously, placed on the back burner and everything in between because, well, sometimes, things just get in the way.

The Value of Accumulated Fails

There have been scads of fails.

I am not exaggerating. I have over a decades worth of batch notes and research to prove it. And one of the most amazing things I have discovered about having THAT many fails is that it changes every fail from being just another learning experience to an entire education in and of itself. It creates a base from which one can begin to step in the direction of success.

And that’s what I am happy to say happens more and more often.

Plant Based Red Lippie

When this successful mess happened in 2018, it enabled me to hone in on a more targeted path to plant-color success.

I'm still working on this and haven’t cracked every plant-colorant code but from my results so far, I can attest to this: Lipstick grows on bushes.

Tip

If you’re interested in walking this plant-colorant path with me, you might consider joining LisaLise Club where I'm sharing my formulas and methods exclusively with members. Click the picture below to read more and sign up.

Tips for Making Lavender Powder

Lise

Working with different dried herbs in various cosmetic products has taught me that some herbs are far trickier to transform into a 'proper' powder than others.

Take lavender for example.

I love it to pieces, but at the same time, it can drive me absolutely batty. After several attempts at making my own powders without much luck, I started buying powdered lavender. Unfortunately, that has never brought me any joy either – regardless of supplier.

It's entirely possible that I'm overly picky, but in my book, a powdered facial cleanser should not contain ANY annoying bits that keep sticking to the skin after everything else has willingly rinsed away.

The Perfect Lavender Powder Challenge

The challenge of transforming dried lavender into a perfect powder that rinses away without leaving bits sticking to the face was hereby decreed (by me to myself). I started by investing in a rather large bag of dried whole buds so I could get serious about experimenting with different techniques.

Spoiler alert: My idea of the perfect powder doesn’t exist, but I have gotten pretty close.

I'll spare you my numerous failed attempts and concentrate on the method that has shown the most promise.

The Grind

Above: my preferred herb-pulverizing apparatus. Most of the time, this handy coffee bean grinder does a bang-up job.

But no matter how long you grind dried lavender buds, they only become something that looks like a powder.

Try sifting lavender buds that have been in a grinder and you'll see what I mean. It's as if the dried buds are too lightweight to be properly ground to a powder. And that’s exactly why they won’t willingly become a powder. The plant/buds are too fibrous.

Rethinking the Grind

Since my main goal was to use the lavender in a powdered face cleanser, and my powdered face cleansers include clay, it occurred to me that it might be possible to 'weigh down the lavender' by adding some clay to the lavender buds in the grinder.

And gosh darned if that didn't help – a whole lot.

Here are the results of a few different clays mixed with lavender buds and run through the grinder.

The winner is hopefully evident in the picture above. Rhassoul (also called ghassoul) seems to have the necessary weight to 'hold' the lavender. It's also the heaviest of all the clays, so it makes good sense.

The photo above was taken prior to passing the ground mixture through a sieve.

Sifting the ground mixture helped remove most of the remaining unwanted 'fluffy bits'.

Admittedly it’s a bit of work, but if you need lavender powder and are making a product that includes clay, try combining the 2 for some pretty decent results

Pictured at the top of this post is some of the final discarded bits – artfully arranged for your viewing pleasure.

Do Tell

Do you have a successful method of making lavender powder that you're willing to share? Please post a comment below!

PS: LisaLise Club members have access to all kinds of my best tips and useful shortcuts to ease the workload. Want to join us? Click the picture below to learn more about what the Club has to offer you.

Using Horsetail in Cosmetics

Lise

That funny looking botanical up there is commonly known under the name horsetail.

Today we're going to take a look at what this plant can do, why it is both loved and hated, and how to prepare it for use.

Why Horsetail

Horsetail is a fabulous ingredient for makers of cosmetics, but a scourge to some homeowners because the plant is quite invasive.

A neighbour (who hates horsetail with a passion) explained recently how "the roots grow to the very core of the earth and the plant will thereafter forever spread and you will never, ever, ever have a normal lawn again. Ever!"

I checked about the down to the core of the earth thing. The roots go down about 2 meters / 6.56 feet. That's definitely deeper than, say, dandelion roots.

This picture might well be a gardener's worst nightmare: an entire field of horsetail.

What's in Horsetail

Horsetail (INCI: Equisetum Arvense) has a natural content of beneficial components such as calcium, magnesium, saponins, and vitamins A, C, and E, as well as copper and zinc.

But the main component of this plant is silicon – horsetail contains about 10%. The reason for this high content (which I am told is quite unusual for herbs) is because horsetail has the ability to absorb silicon from the soil.

Do not confuse silicon with silicone.

Silicon is the second most abundant naturally occurring element in the earths crust, while silicone is a synthetic substance.

Silicon is one of the likely reasons horsetail has been popular for haircare and has been attributed with the ability to help strengthen and encourage hair growth.

Apart from hair care, horsetail also has a history of use in herbal medicine for numerous skin disorders where it was traditionally applied as a poultice or added to baths to help heal and soothe.

Modern science has been taking a look at this plant in recent years for its antioxidant activity.

I have been working with horsetail for a few years now - mostly for haircare (think shampoo bars), but I have tested it (successfully) in a few skincare products as well.

Whether you choose to pick and dry your own or purchase dried horsetail, there's still a bit of preparation before it can be used directly in a product such as a shampoo bar.

Horsetail Prep Session

Now this isn't a hugely complicated thing, but there are couple of tools and a little time involved, and if you're anything like me, you like to have all your ingredients right at hand when you start making.

The horsetail I used was bought dried from a supplier of botanicals for herbal teas and looked like what you see on the left below.

To get it to look like the (almost perfect) powdery substance you see pictured on the right, you need to grind, then pass the herb through a fine-mesh sieve a few times.

I used one of my (dedicated) electrical grinders for step one, and a hand-held metal sieve for step 2.

If you make a larger portion than you need, package the remaining dried powder in an airtight container and you're all set with a stock of ready-to-use horsetail powder.

Fun Fact

Despite it's name, horsetail is toxic to horses. (REF)

Do Tell

Do you use horsetail in any of your cosmetics? How do you use it? Please feel free to share in a comment below.

Find More About Horsetail

Britannica on Silicon: LINK

A-Vogel on horsetail: LINK

Horsetail as a natural antioxidant: LINK

Science Direct on Horsetail: LINK

Horsetail, History of use: LINK

Want to make your own shampoo bars? Horsetail is a star ingredient in the Nettle & Horsetail shampoo bar formula featured in the book below