Contact LisaLise

Please use the form on the right to contact LisaLise.

Majestic Court 5, St. Mary's Street
Mellieha
Malta

LisaLise offers online education of natural plant-based cosmetics via e-books and courses

LLBlogHEADER2020-3.gif

Shop Blog

A look inside the LisaLise natural cosmetics lab with free formulas, DIY how-to's, ingredients tips, sneak peeks, and more.

Filtering by Category: How to

How to Work With Stinky Ingredients

Lise

Working with plant-based ingredients has its occasional challenges. Some of the ingredients I work with have an inherently heavy, sharp, pungent, musky, or otherwise less than appealing scent.

Ok, that was the diplomatic description.

Some of them are so stinky there is instant nose-wrinkling and the instinctive pull-back when the seal is broken and the package is opened.

Yes, that stinky.

At the same time, some of them have all kinds of skin-loving goodness to offer, so they cannot be disregarded.

Choices must be made.

The Stinky Conundrum

So, how shall we solve this stinkiness? Shall we mask the odor?

Perhaps just replace the ingredient?

There's also 'the industry maneuver' (my term) which consists of using such a small amount of the ingredient that it won't be discernible to the nose. This is common practice in many commercially manufactured cosmetics and is also referred to as a 'tip-in'.

Using an ingredient as a tip-in is great for marketing purposes, but the downside is – of course – having to live with the fact that the ingredient won't do a dang thing because there's such a teensy tiny amount in the product (0.05%) that it might just as well not be there at all.

So, maybe we should give up and dump the stinky ingredients entirely?

Or.

Maybe we could figure out how to incorporate the smelly things in such a manner that the end product doesn’t insult the nose.

Maybe we can even make the end product a delight to the nose?

Considering the Synthetic Factor

In truth, it's relatively easy to mask even the stinkiest ingredients by using a synthetic scent. Think of detergent. Without the addition of (a synthetic) perfume, most household cleaning agents are, to put it politely, downright foul smelling.

Grabbing a bottle of fragrance would be the most obvious and easiest choice, but I have a problem with that as I am not a fan of synthetic perfumes.

Ok that was the diplomatic description.

In truth, I find (almost all) synthetic fragrances worse than the stinkiest ingredients I work with. Despite several attempts, I cannot bring myself to work with them. This might be due to a perfume allergy (I've never been tested, so I can't say for sure), but it could be because of my lifelong inherent aversion to anything synthetic.

What’s the Stinkiest?

A while back, I asked a few fellow formulators if there were any particular ingredients they would categorise as stinky and hard to work with.

There was a literal flood of replies.

Here are the stinky winners

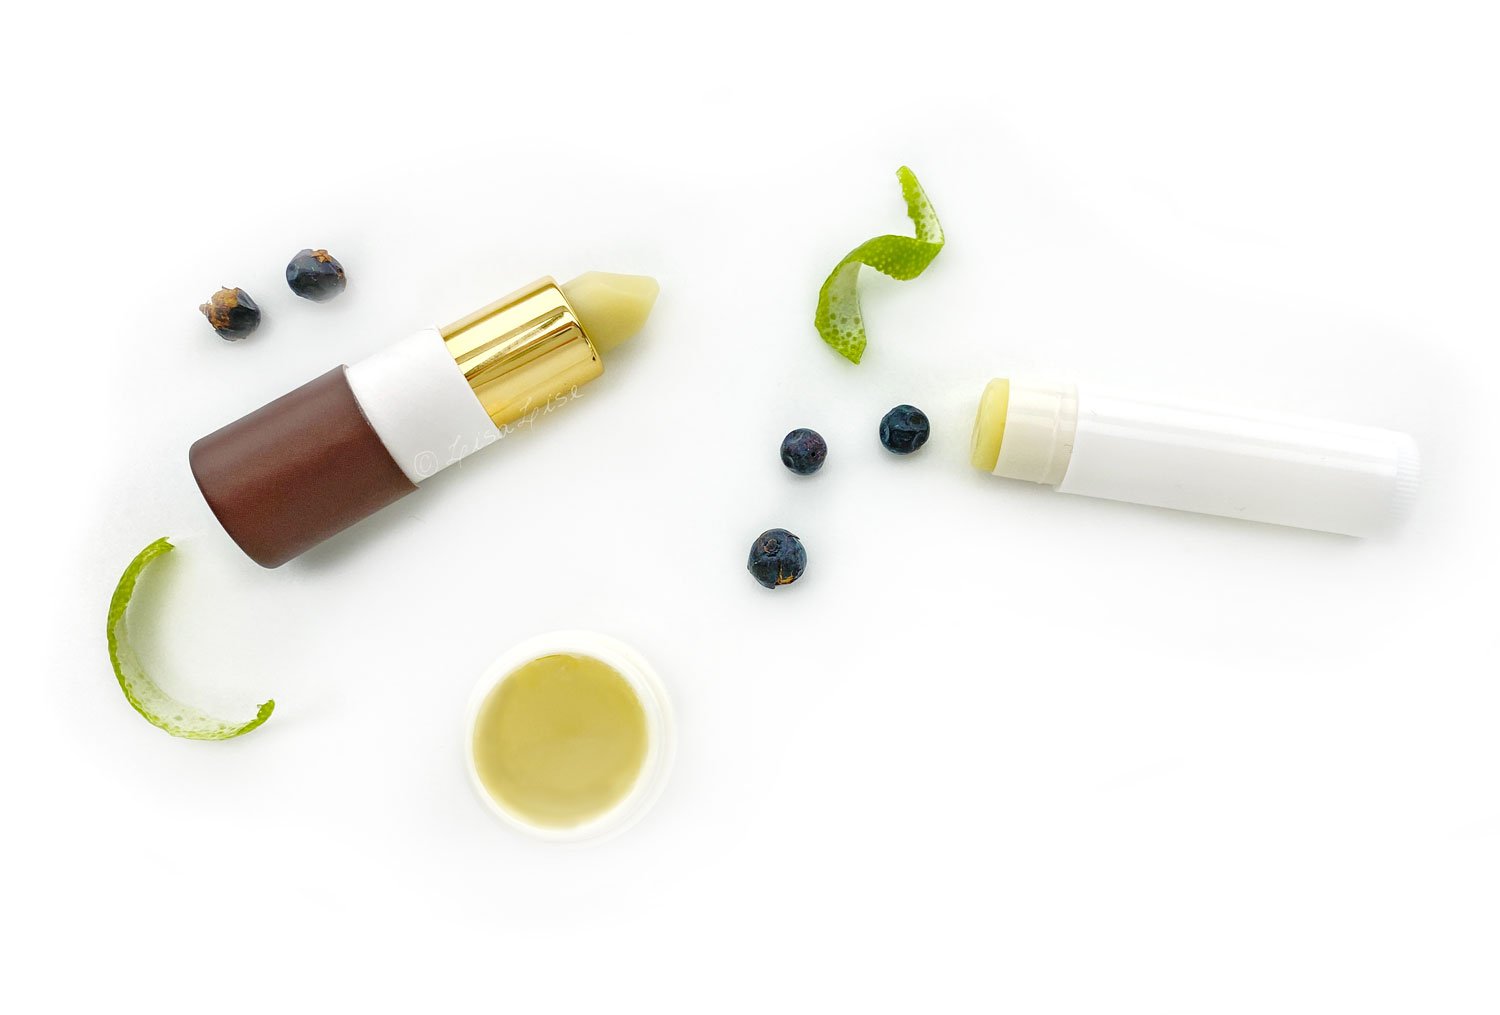
  • Neem oil (the all time winner and receiver of most votes)

  • Cocoa butter

  • Unrefined shea butter

  • Lanolin

  • Wheat germ oil

  • Argan oil

  • Carrot seed oil

  • Tamanu oil

  • Pomegranate Seed Oil

  • Evening Primrose Oil

  • Raspberry Seed Oil

  • Kelp Powder

  • Spirulina

  • Tea Tree Essential oil

  • Valerian Essential Oil

  • Soapnuts

These ingredients all have wonderful properties that are difficult to simply disregard. So, how do we deal with all this stinkiness?

We Take Stinkiness into Account

After years of trial-and-error, it has become second nature to me to take the inherent stinkiness of some ingredients into account when creating a formula.

Even though there are some limitations, it is possible to 'bend' a stinky ingredient (or 2) into something entirely pleasant with no need of masking the smell.

The secret is deceptively simple: work with, not against.

Get your perfuming nose on and get ready to include said stinky ingredient as part of the fragrance.

You doubt?

It's perfectly ok. I didn't think it was possible in the beginning either.

To get busy, we need to do a bit of nose exercise (and no, you don't need to learn how to wiggle your nose).

How To Get Your Perfuming Nose On

This is a relatively simple exercise, but does require your full attention and concentration.

Your nose may be a little offended at first, but will probably surprise you with hidden secrets sooner than you expect.

The object of this exercise is to train your nose to pick out the components of (any) fragrance.

Choose an ingredient. Don't start with the absolute stinkiest ingredient, but choose one you perhaps find a bit challenging. For example, if you have an ambivalent relationship with the scent of unrefined shea butter, start there.

Sniff the ingredient until your nose is thoroughly acquainted with it.

Alternate between sniffing the ingredient and sniffing fresh air.

Continue for a few minutes and you will start to discover the 'undertones' and 'overtones' of the scent. Is there a muskiness in the background? Is it slightly woodsy? Nutty? Fruity?

Identify the components as best you can and write down your impressions.

At one point, your nose is going to ‘sign off’ and that will be your signal that this session has ended.

Wait at least an hour before continuing.

It will probably take a few sessions, but I’m pretty sure it won't be long until you have dissected the scent and can begin to work with it. If there is a musky undertone you find unappealing, the addition of a woodsy fragrance can synergise and 'bend' the scent in an entirely different (and more pleasing) direction.

I admit this takes a bit of practice, but I also know you can totally do this. I think you will surprise yourself at how quickly your nose is able to 'dissect' what you are sniffing. Keep at it and you will discover how easy it suddenly is to dissect the components of a wine, perfume, or any dish.

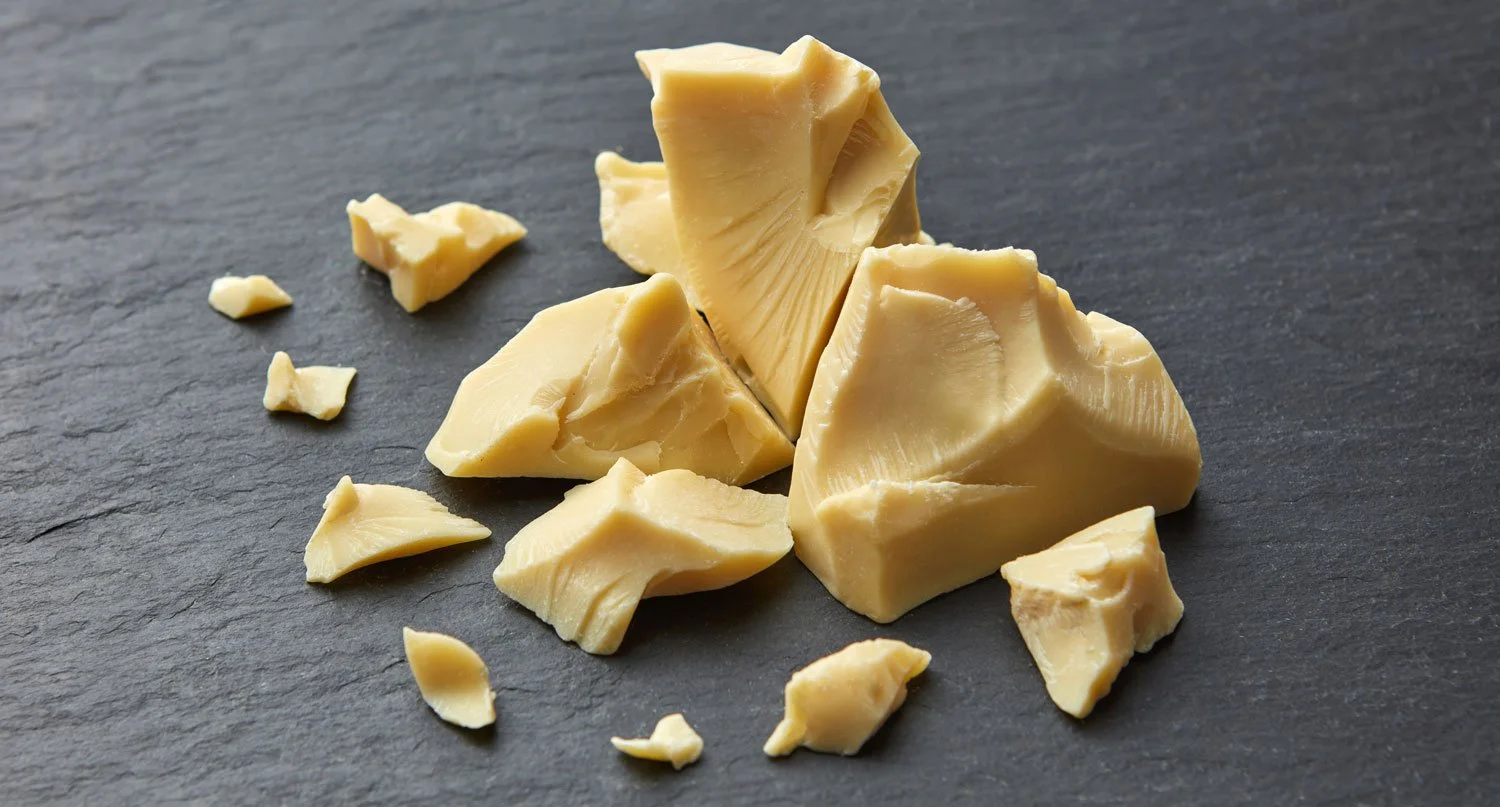
Let’s Take Cocoa Butter

When you've been exercising your nose and making all kinds of amazing discoveries at how clever your nostrils are at picking out subtle details and undertones, you can move on to this exercise.

We're going to 'bend' the scent of an ingredient that made it quite high up on the list of stinky ingredients in my impromptu poll: cocoa butter.

It almost seems unfair to call it a stinky ingredient. Most people love the smell and taste of a chocolate bar. I know I do. I actually also love the scent of cocoa butter if I am thinking of dessert. But right now, we're putting it on our skin. And not everyone wants to smell like dessert all day.

As delicious and chocolatey as unrefined cocoa butter might smell in the container, it can be downright overpowering when it is applied to the skin in a leave-on product.

In a body butter, non-chocolate-tasting lip balm, or any other water-free product, cocoa butter can have an uncanny ability to take over the entire fragrance profile and become both heavy and cloying.

How to include cocoa butter as a component of our fragrance? Here's a little exercise on how to do just that.

Cocoa Butter Base Note Exercise

For this exercise, you’ll need

  • Unrefined cocoa butter

  • Essential oils

  • Any infused oils you might want to include

Method

  1. Have your essential oils at room temperature

  2. Gently melt 5 grams (a teaspoon) of cocoa butter in a small glass container (5 grams for each scent you want to create).

  3. Sniff the cocoa butter. Note the properties: heavy, creamy, and chocolate-like. This is the base note from which you shall create your fragrance.

  4. The next step is to decide which direction you want to take this base. Here are a couple of examples to help inspire.

Woodsy : For a woodsy scent, add a component such as cedarwood, rosewood, petitgrain, or sandalwood. A combination could also be used. Round out the blend by introducing an element of citrus freshness – bergamot, mandarin, blood orange, grapefruit, or lemon could all be considered.

Oriental : To bend your cocoa butter in a more exotic direction, add myhrr or frankincense. Introduce a floral element with rose or geranium, then consider a titch of vanilla to round out the scent and make it deliciously exotic.

Floral : For a floral scent, start with a woodsy component to anchor the cocoa butter (cedarwood might be great here). Then add some rich, dense florals such as geranium or rose. Lighter florals risk being 'buried' in the fragrance profile. Chamomile – with its inherent earthy note – is another possible option. Lavender and/or an element of citrus can be added to round out the scent.

Want to try something else? Go for it! When your nose is 'tuned in', you can create any fragrance combination you think you would like.

Chill, Solidify, and Do a Nose Test

When you have finished your test bowls with essential oils and cocoa butter, pop them into the fridge and let the mixture solidify.

To test the solidified samples, warm the bowl (or solidified cocoa butter) slightly in the palms of the hand and then do a nose test to see if you are satisfied with scent profile. If you are, then you know the EO’s you blended into the sample will in all likelihood be useful for anything you make with cocoa butter

TIP : If you happen to make your own botanically infused oils, these can also be super useful in a fragrance creating setting.

Do Tell

Which scent combos have you tried adding to cocoa butter to create your fragrance? Were you happy with the results? Please share in a comment below.

Introducing Tutorials

Lise

I’m pretty excited to be able to introduce you to my very first tutorial - right here on the website!

Squee!

If you have been following me for a while, you already know I love working with botanicals of all types for all kinds of things. One increasing interest in recent years has been creating flavour oils. It began with lip balms in mind, but as I started getting more and more into combining ingredients to smell nice as well as taste nice, I kept coming up with even more things I wanted to try.

I’m not even going to mention how long my to-do list is at the moment.

This particular challenge (capturing the flavours of a classic gin and tonic) has taken much longer than I expected (that seems to be a bit of a pattern when I start out thinking I can ‘knock something out relatively quickly’). Many of the initial batches started out well, but then the fragrance faded, or flavour changed, or something else went annoyingly wrong.

Fast forward 3 years and a few more batches than I originally thought were going to be necessary, and finally I could say I was happy with the results.

The star of this tutorial is making the flavour oil (which is super for several different products), but I’ve also created a couple of lip balm formulas to use the flavour oil in: a vegan version and a version featuring beeswax.

Wouldn’t you know the balms also took a bit longer than expected to get right (I’m looking at you vegan waxes), but as it turned out, quite a bit of it was solved when I got the flavour oil right.

Does this sound complicated? Well, before I had figured out how to do it, it was, but when you know how to do it, it’s not that complicated. (Isn’t that true of so many things?)

Are you a little curious about getting busy making your own?

Click the picture below to read more.

PS: The formulas for both of these balms as well as the flavour oil are free for LisaLise Club members. If you think you might want to check out becoming a member, click the picture below.

How to Make a Strawberry Glycerite with Preservative

Lise

Today, we’re making strawberry glycerite.

You: Lise, it’s not summer, and there are no strawberries available.

Me: It’s summer in Australia right now, so somewhere on the planet, this is a timely post.

Important: Use the ripest, plumpest, freshest (organic) strawberries available to you for optimal results. If that means you have to wait for summer, then wait. Trust me when I say it will be worth it.

Because we are using fresh strawberries (which are about 92% water), there is no need to add any water.

Ingredients

  • Fresh strawberries

  • Glycerine

  • Preservative (I used benzyl alcohol)

Water to Glycerine Ratios

One of the most common ratios of water-to-glycerine for an extract with preservative is 50/50. It’s easy to work with too.

I generally start by seeing how much preservative is recommended, choose a dosage a little higher than middle, then calculate ‘backwards’ to find how much glycerine and strawberry to add. I used benzyl alcohol in this extract which has a recommended max dosage of 1%. But because glycerine is ‘aiding’ the preservative, I chose to use less than max: 0.6%. I made this pictured batch some years ago and it performed beautifully so if I were to repeat this today, I would use the same amounts.

Strawberry Glycerite with Preservative

Ingredient %
Preservative 0.6
Organic Strawberries 49.7
Glycerine 49.7

Method

  1. Sanitise the jar and equipment

  2. Place the jar on a scale and set to 0

  3. Slice or chop the strawberries

  4. Add strawberries to jar to desired weight

  5. Set scale to 0

  6. Weigh up glycerine to desired weight

  7. Weigh and add preservative

  8. Place lid on jar (TIP: If your lid isn’t in pristine condition, place a protective layer of food-safe paper or plastic between the lid and jar)

  9. Place jar out of direct sunlight at room temperature. I find putting a tea towel over the jar works well.

  10. Gently agitate the jar once a day for 7-10 days. The strawberries will start to look a little ‘spent’ and ‘tired’ when the mixture is ready for straining.

You Might be Wondering…

If we are using a preservative, can we add it after straining instead of before infusing?

Yes you can. To do so, weigh up the amount of strained liquid and then calculate how much preservative to add.

Why I don’t do it this way.

I prefer adding preservative at the beginning because the water to glycerine ratio is lower than when making a self-preserving glycerite (read: the preservative is working while the infusion is ongoing), and I just find it easier (and makes for less math) all around.

Straining

  1. Sanitise your equipment

  2. Place funnel in receptacle

  3. Place filter/ lining in funnel (1-2 layers of clean muslin, cheesecloth, or suitable paper filters)

  4. Pour mixture into funnel and allow to strain

  5. Decant into bottle

  6. Label and date the bottle

  7. Store the extract cool, and use within 6 months.

Do Tell

Are you a fan of strawberries in your skincare? Please share in a comment below.

Are you a member of LisaLise Club? If not, you may want to check out what it has to offer you by clicking the picture below.

Club Highlights

We’re welcoming the new year with all kinds of great new content! Click the picture below to check out what the club has to offer you!

Aromatherapeutic Smelling Salts (and other DIY Gift Ideas)

Lise

So there are undoubtedly some last minute things that need doing before the holiday break, some of which might be gifts. This post shows you a few things you can put together and add all kinds of your own personal touch to.

Let’s start with these lovely smelling salts (pictured above).

Classic Smelling Salts

Smelling salts have been around for ages. From days of yore, where they functioned as a go-to remedy for ladies who would tend to faint (due to their constrictive corsets). But smelling salts are still in use today. I’m sure you’ve seen them used in televised sports-related situations. Classic smelling salts pack a real punch due to the content of ammonia.

But.

What if smelling salts could have other functions?

Like, say

  • a 'Christmas Spirit' blend to jump-start the holiday cheer

  • a 'Clear The Head' blend to help battle stuffy noses

  • a 'Summer Memories' blend to bring a whiff of summer warmth

  • a 'Calm Your Spirit' blend to aid sleep and relaxation

One might even consider making a lovely personalised gift for someone.

Are you inspired?

Good, then let's get started!

Ingredients & Necessities

  • Small glass bottles that hold 10-15 ml with tight-fitting lids

  • Coarse salt (The Himalayan Crystal salt I used has a fabulous pink color, but you could use normal coarse salt or even decorative colored salts)

  • 25-30 drops essential oil blend per bottle

  • Small funnel (for dripping accuracy)

Method

Plan and combine your blend(s) before you start. Make a note of how much of each essential oil (EO) you want to use. In this example, I have created a small batch I call My Good Morning Pick Me Up blend which consists of

  • Rosemary EO: 1 g

  • Peppermint EO: 0.75 g

  • Menthol Crystals: 0.5g

  • Eucalyptus EO: 0.5 g

  • Tea tree EO: 0.5 g

When you've planned and made your blends, it's simply a matter of

  • Filling the bottle with salt

  • Adding your essential oil blend

  • Capping the bottle and giving it a bit of a shake

  • Rejoicing at your fabulous creativity

If you make different blends and are using the same salt in all of them, do find a way to mark or label your bottles. I did 2 different blends here. The mix including rosemary got a little sticker at the bottom. Optional: make a proper label for each bottle.

How To Use Aromatherapeutic Smelling Salts

  • Uncap the bottle

  • Waft the under the nose and inhale deeply

Note: keep your smelling salts out of the reach of children.

More About Classic Smelling Salts (LINK)

Inhalers

If you happen to have the necessary containers, you can also make personalised inhalers.

Click the picture to see the Clear Nose Inhalers post.

Or click the picture below to make aromatherapy inhalers

Teas

If you have a stock of dried herbs, there are a few ideas for personalised tea blends.

Click the picture below to make Calm Steam Face Tea

Clicking the picture below will take you to the Gentle Steam Botanical Face Tea post.

Finally, there is a guide to how I make my own Personalised Herbal Tea Blends if you click the picture below (for sipping)

Have fun!

Do Tell

Which essential oil combinations would you use to make your smelling salts? Which herbs you you use to make a personalised tea blend?

PS: If you happen to have this book, creating and making your own bi-phase cleansers is both easy and fun

Make Your Own Healthy Candy

Lise

Above is a peek at a few LisaLise Pure Natural Edibles. Even though this is a skin and hair care blog, the holidays are fast approaching – a traditional time of (making and) giving gifts!

These are not only easier to make than you might think, they're downright good for you.

What you see above is healthy, vegan-friendly raw food candy with no added sugar or sweeteners. The best part: they pass the 'I hate healthy food' test every time.

Even though 'healthy' and 'candy' doesn't usually go together, these tasty treats are rich, decadent and sinfully delicious. I dare you to make them and not agree with me!

There are 4 variations pictured above – each covered/dipped in organic 72% dark chocolate. Also pictured above: a peek at the packaging I made one Christmas when I was doing large-ish batches so there was enough to give as holiday gifts.

Shall we make healthy candy? Excellent!

You need only 3 base ingredients:

  1. Raw Cocoa Powder

  2. Pure Coconut (flour, grated or shredded)

  3. Medjool dates (do not substitute for other dates -- there is a world of difference!)

and one optional ingredient

  1. Dark Chocolate (if youw want to dip or cover your candies with chocolate)

The secret to success: don't skimp on the quality of the ingredients and you will have a sure-fire hit every time.

Healthy Raw Candy Instructions

  1. Pit and chop medjool dates

  2. Add raw cocoa powder and/or coconut and knead (in wax paper) until the mixture can be handled

  3. Split into however many portions you want to make flavours, then add any extras you may fancy to each portion.

  4. Knead each mixture until it is even

  5. Roll into balls

  6. Roll balls in cocoa or coconut

  7. Dip in chocolate

  8. Decorate

  9. Chill

  10. Enjoy

In the versions you see above, I soaked goji berries in rum for one of the flavor variations, added chopped almonds for another, made a roasted sesame seed with orange combo, and the fourth flavor shown above is a straight-up coconut/date combo.

I've made these many times and almost always experiment with the flavors. Try adding exciting and unexpected things such as licorice powder (this was quite a hit with my family).

If you want to go all out, photograph each flavor and make a little booklet with the ingredients and a fun description for each flavor. The recipient will not only appreciate the thought, but anyone with special dietary needs will be fully informed as to what they're tasting.

A Little Film of the Making Process

When I was a member of Vine (a social media app) many years ago, I made a series of short films to show how I make these. I do apologize for the quality of this film, but we are talking about a very old iphone, no special lighting, an amateur photographer and editor (me) and a handful of old vine shorts. Despite all the flaws, I though it still might be useful to see the making process, so I have done my best to make it as palatable to look at as I am able.

Packaging tip: if you can't find suitable boxes, package in cellophane bags and tie shut with a pretty bow.

Have fun!

After enjoying your fabulous candies, you might want to make your own tooth powders to brush your pearly whites. The book below shows you how.

How to Apply Face Oil

Lise

A lot of people have asked me what's so special about putting oil on your face.

My answer is always the same: a properly blended face oil (or serum as some prefer to call it) will nourish, soften, balance sebum (helping either very dry or very oily skin), strengthen the underlying cellular layers, fight wrinkles, help heal scars and acne, and help firm the skin.

(not all at once, but almost)

A properly applied oil will not leave your face feeling greasy or oily, but will simply melt into your skin and do its work, providing you with the perfect base for your daily moisturiser, or the perfect base for the rest of your day without the addition of any other products. In later years, I have been pretty basic in my use of skincare products and my morning routine ends with the application of my current face oil blend.

After having used face (and body) oils for years, I fully understand the ancient Egyptians appreciation of topically-applied oils for health and well being. They literally do feed your skin and leave it feeling silky smooth.

There are many ways to apply a face oil, but today I’m sharing my personal favourite method. This may sound/read like it is complicated, but it takes around a minute to do.

Start with freshly cleansed skin that is still slightly damp.

  1. Drop 6-12 drops face oil into the palm of one hand and quickly rub palms together so it is evenly dispersed. Be sure to include your fingertips

  2. Apply to your face in light, upward strokes, starting with the cheeks and moving upward and outwards towards the temples and hairline

  3. Tap gently under the eye area

  4. Place a finger on either side of the bridge of the nose and move outwards along the eyebrows

  5. Move to the forehead with gentle upward strokes

  6. Pinch along your jawline lightly, starting from the chin and working outwards towards each ear.

  7. Finish with your neck in gentle, upward strokes

  8. Check the mirror for awesome looking skin.

Do Tell

Are you a fan of face oils? What is your favourite application method?

PS: The e-books below (available in both Spanish and English) have formulas for facial oils for all types. The books are also very beginner-friendly.

Club Highlights

Members of the club get a 30% discount on all e-books, free formulas, loads of tips, and access to exclusive content not available anywhere else. Think you might want to join? Click the picture above to see what the Club has to offer you!