Contact LisaLise

Please use the form on the right to contact LisaLise.

Majestic Court 5, St. Mary's Street
Mellieha
Malta

LisaLise offers online education of natural plant-based cosmetics via e-books and courses

LLBlogHEADER2020-3.gif

Shop Blog

A look inside the LisaLise natural cosmetics lab with free formulas, DIY how-to's, ingredients tips, sneak peeks, and more.

Filtering by Category: Learn How

Make Your own Bi-Phase Cleansers - a New Publication

Lise

I’m very excited to share the latest LisaLise publication with you! We’re playing with plant colorants and making a bit of fun-loving, colorful cleansing magic in the form of bi-phase cleansers.

I had a blast putting this one together with all of the different colorful options there are to try.

And guess what? This is all about being able to customise!

It’s a Formulation Template

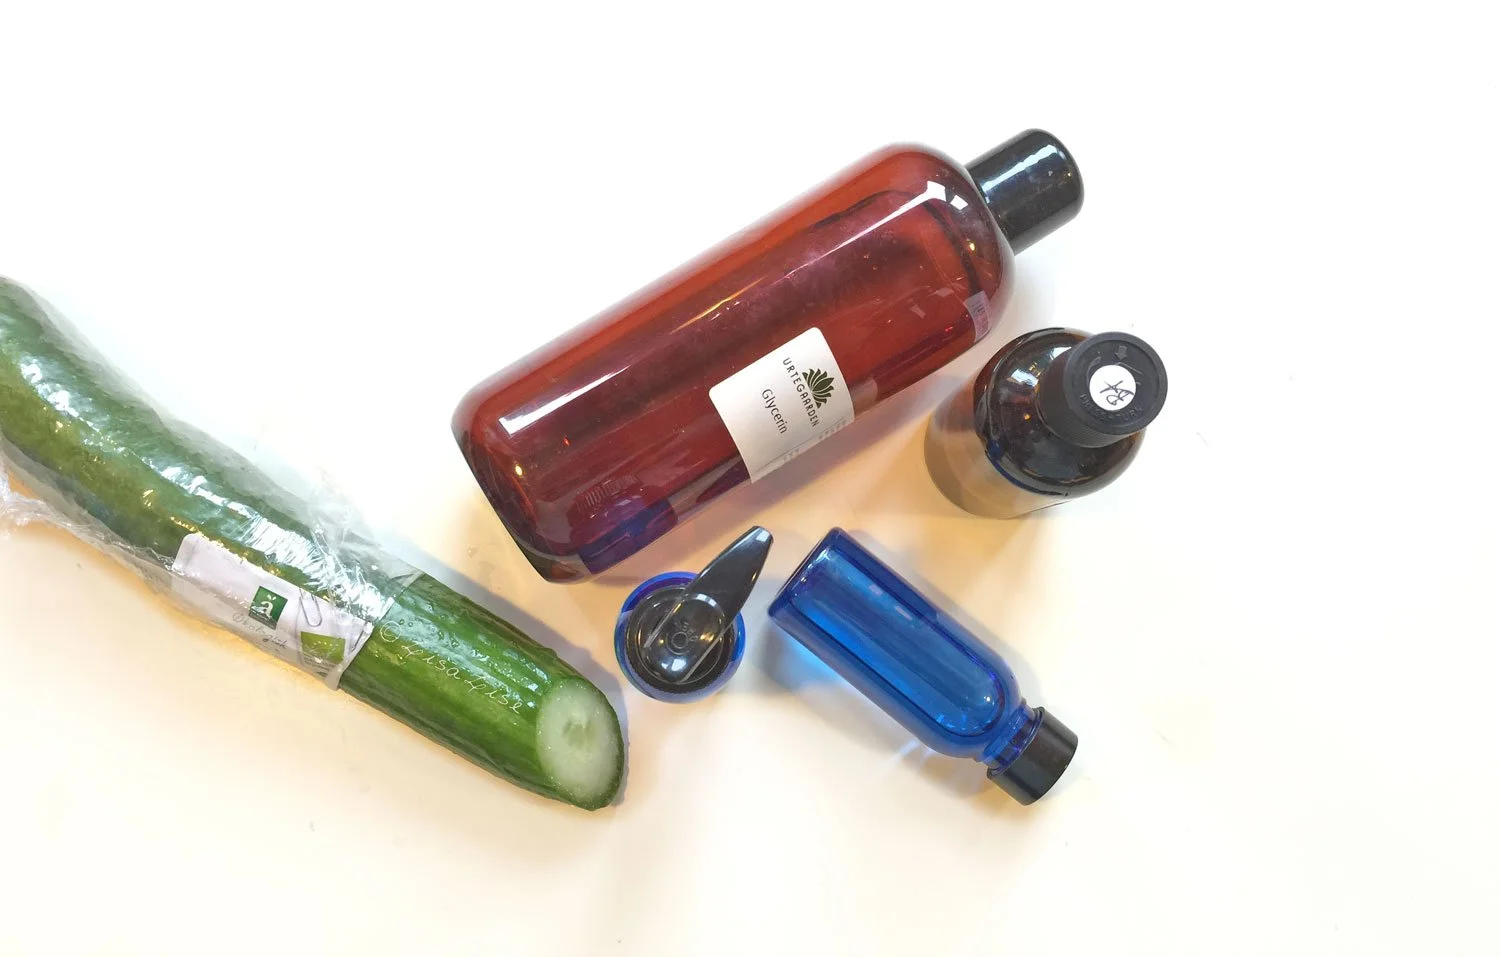
The astute observer may notice that the cover design features a band of color along the left side (which isn’t very common in my publications). That’s a visual indication that this e-book is (what I have decided to call) a Formulation Template.

This is something I have been wracking my brains about for quite a while: how to create a formula that is fully customisable yet contains enough information to ensure as successful a result as humanly possible.

This self-appointed challenge came about because of the many questions I get on ingredient substitutions. And because not everyone can get every ingredient all over the planet (well, duh), I wanted to try and accommodate that situation by creating a kind of ‘ open formula with a set of guidelines for a successful outcome’.

So it became a Formulation Template.

What does all this mean? It means you get a ‘toolkit’ of ingredient information and additional useful stuff, a formulation template with instructions on how to use it, and some example formulas to show you a few possible variations and get you comfortable with the whole process.

The first formulation template was the tooth powder e-book and I’ve gotten so much positive feedback on it that I just had to do another one. (And if you have suggestions for additional e-books you’d like to see of this type, please feel free to drop a comment below - I’m all ears!)

3 Bespoke Formulas Included

While developing an e-book of this type, I make and test a lot of formulas in several different versions. I decided to include 3 of the formulas in this book. So apart from the template (which shows you how to create your own formulas), you can also dive right in and get busy making one of my formulas if you like.

Bi-Phase Cleansers are Both Versatile and Easy to Make

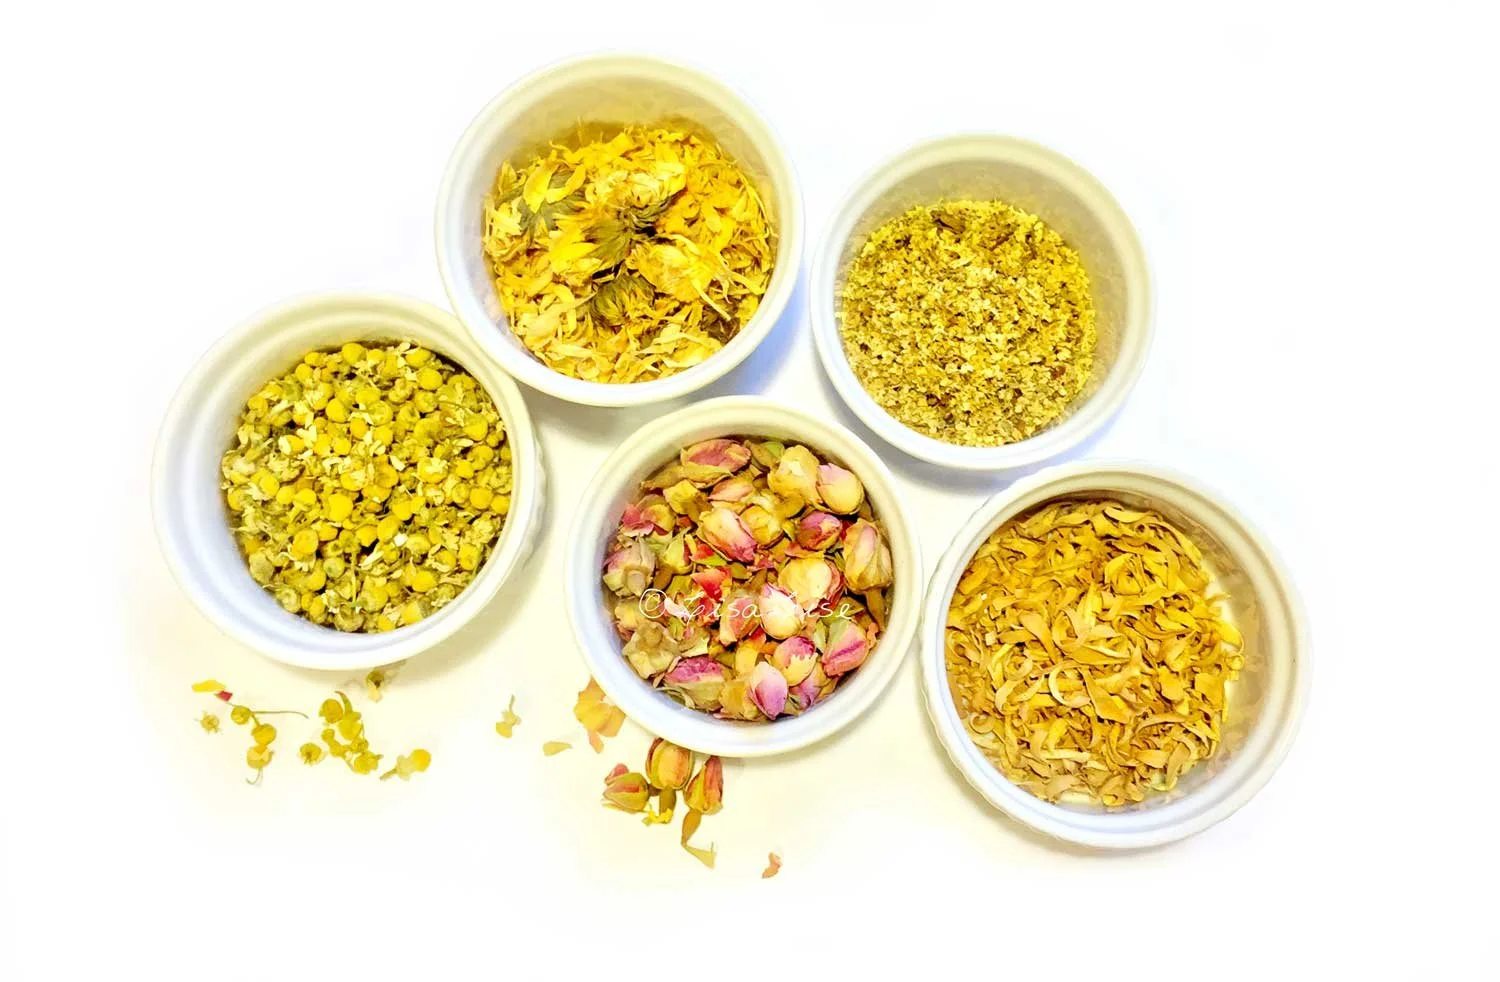
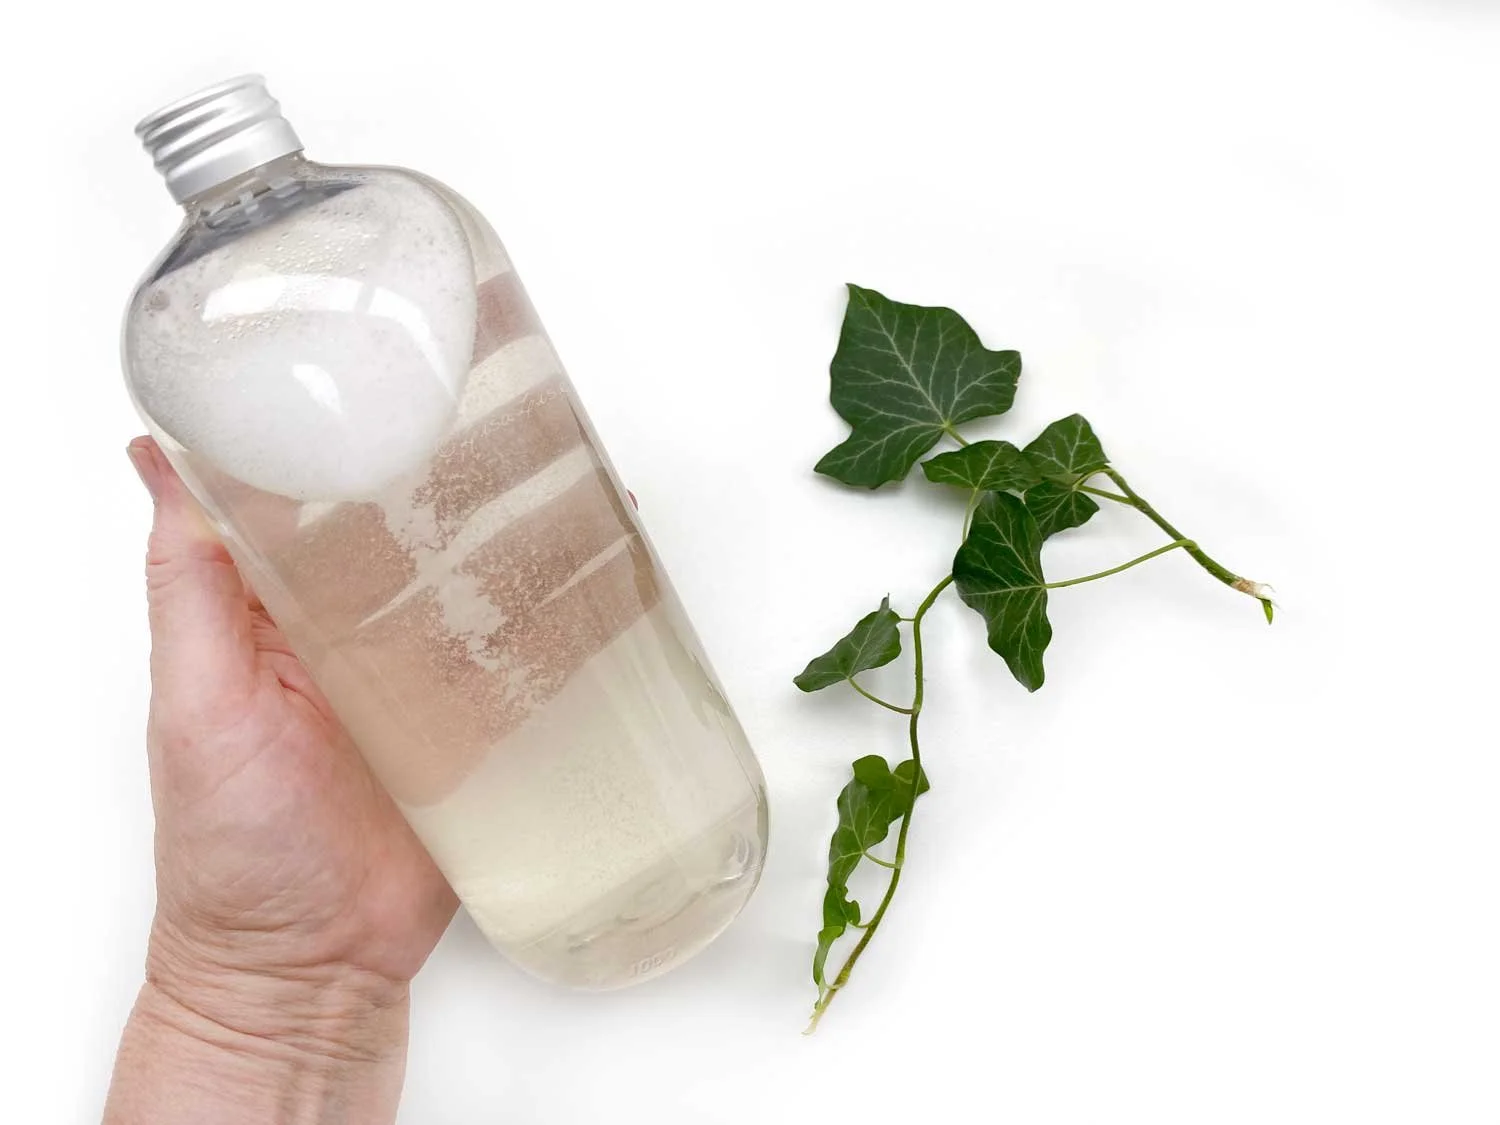
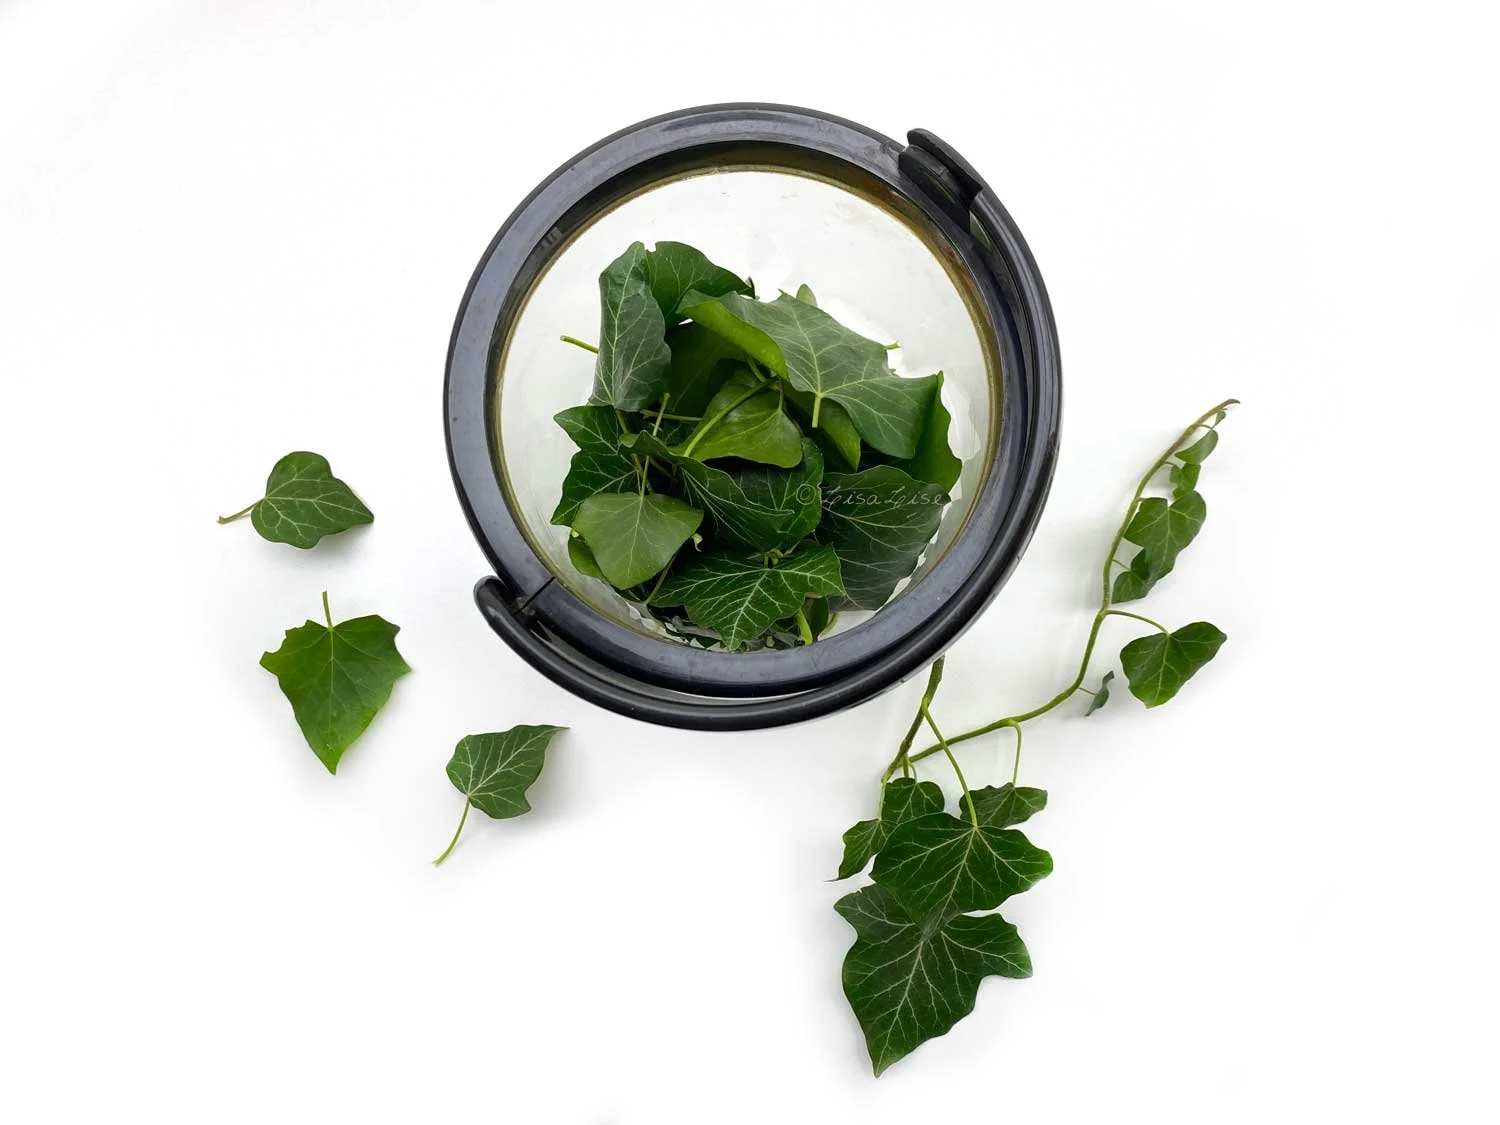
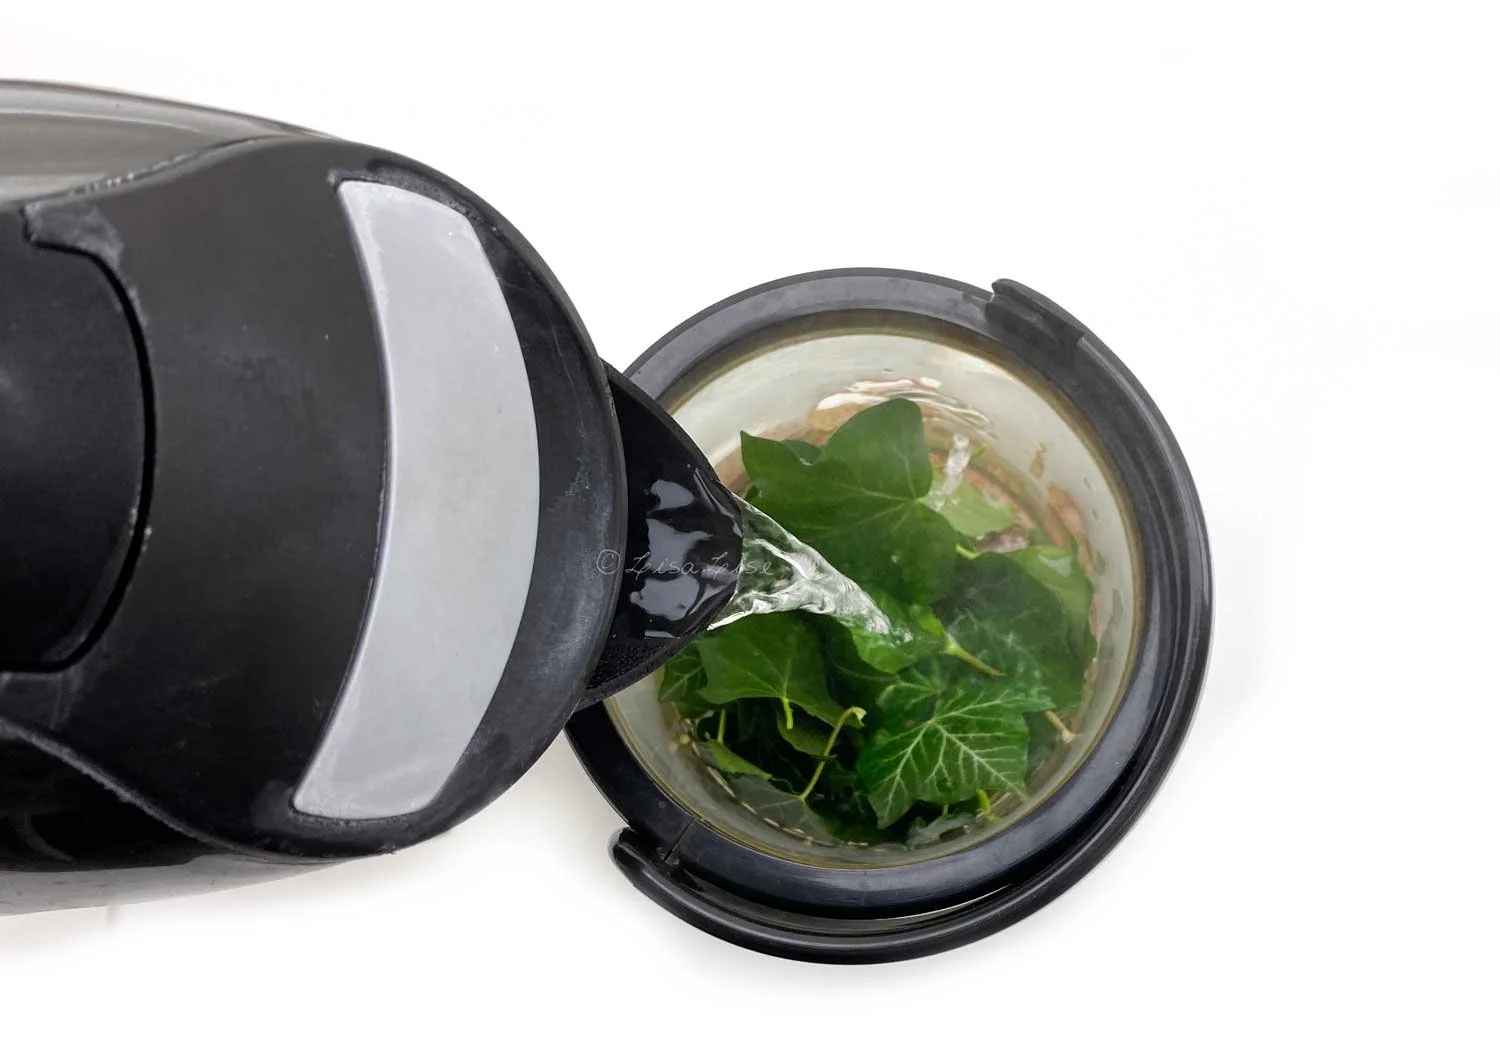
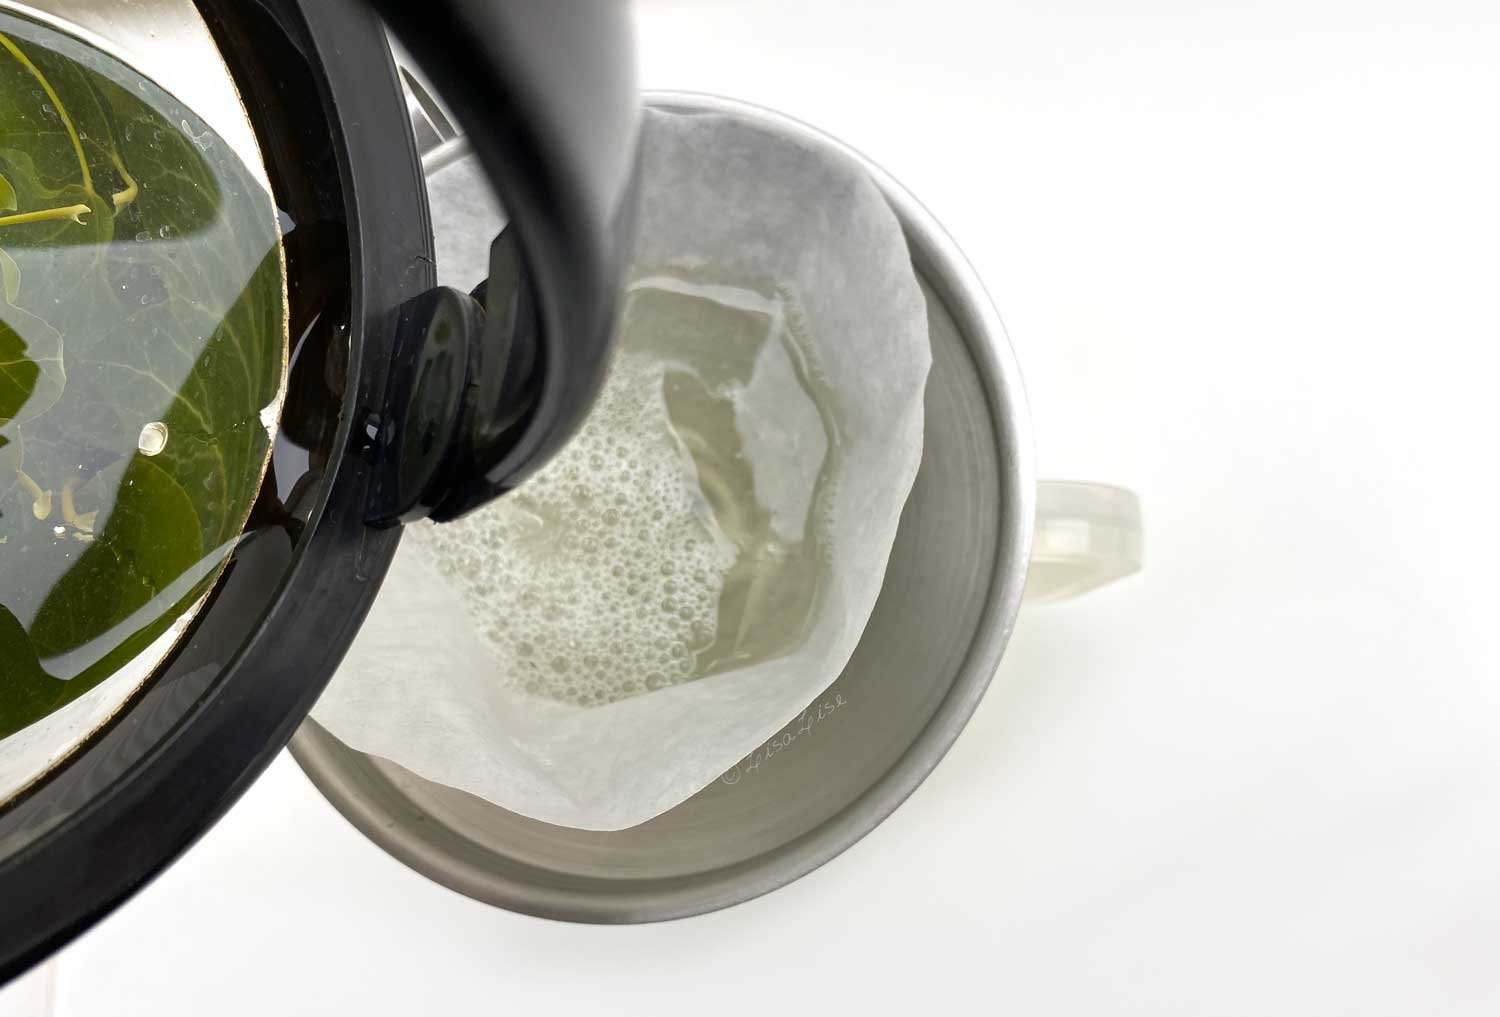
What I love most about this type of product is the absolute versatility it offers. You can use these as eye makeup removers or cleansers, dress them up with fancy ingredients or dress them down to the bare basics. You can create specifically for certain skin types or just have fun with color mixing for the sheer playfulness of it.

The book is illustrated with several of the versions I made and I better warn you right now. If you like playing around with colors, you might get little addicted to making and using these.

Click the picture below to learn more about this publication.

Do Tell

Which kinds of products would you like to see available as Formulation Templates?? Please feel free to pop in a comment below!

Below is the first Formulation Template.

How to Make Your Own Make-Up Base for Pencils

Lise

Today, I'm going to show you how to make a base mixture that can be used to make your own color cosmetics such as lip pencils, eye pencils, eyebrow pencils, and even blush sticks.

You're probably wondering how it is possible to create a texture that is equally good for all these uses. A lip pencil needs to go on smoothly yet be firm enough to where the tip doesn't break off at application. An eye pencil needs to be softer, smoother, and not even come close to feeling draggy on the skin. For cheek application, a firmer texture is ideal.

How is it possible to tick ALL these boxes?

Because I say so.

(insert wink and smile here)

I've been experimenting, testing, tweaking, and meticulously logging my results for a few years now and finally succeeded in creating an exquisitely sublime texture that is great for all of these uses. It holds pigment well, has great slip and staying power without feeling the least bit tacky or sticky - on MY skin.

So, if you have skin similar to mine, this base is perfection.

Skin type plays a major role in which texture/stiffness/glide-factor feels and performs best. But even if this base doesn't turn out to be 100% perfection for your skin, feel free to use it as a starting point and tweak to your heart's content until you have your own version of awesomeness.

Let's Make a Make-Up Pencil Base

This is enough for a 50 gram batch. Is 50g a lot or a little?

For reference:

  • Eyebrow and lipliner pencils generally contain 2-3 grams

  • Lipstick is generally between 6-10 grams (depending on the container)

So this batch is enough for about 4 lipsticks and 10 eyebrow pencils.

LisaLise's Make-up Pencil Base

Ingredient Grams
Cetearyl Alcohol 20.5
Jojoba (oil) 19.5
Beeswax 9.5
Vitamin E Antioxidant 0.5

Method

  1. Weigh ingredients

  2. Transfer wax, jojoba and cetearyl alcohol to a heatproof glass container

  3. Melt slowly over low heat until thoroughly melted

  4. Remove from heat

  5. Add E-vitamin and stir thoroughly

  6. Pour mixture into container

  7. Allow to cool completely (without lid)

  8. When set, store cool and dark until use.

TIP

Do not place the base into the refrigerator until it is fully cool or you risk condensation droplets (which are bad news for this preservative-free product).

TIP

A wine refrigerator has the perfect storage temperature (or, if you have a dedicated ingredients refrigerator, set the temp to the warmest possible temperature - that's about the same as a wine refrigerator)

Substitutions

Feel free to make all the substitutions and changes you like, but expect the texture, feel, and glide to change with EACH and ANY alteration. May I politely refer you to the bit above where I wrote about tweaking and testing for years. I've probably done as many different versions and tried as many different ingredient combinations as can be imagined.

That said, there are LOADS of different ways to do a base like this and get it right, so don't be afraid of making changes to achieve what YOU prefer.

How to Make a Make-Up Pencil with the Base

  1. Weigh out the amount you need and place in a heatproof container

  2. Melt slowly until thoroughly melted

  3. Add desired pigment mixture

  4. Test color on skin (BEFORE transferring to your container!)

  5. Add more pigment (or base) and test again until happy with the coverage and look

  6. Stir thoroughly and transfer to your final (containers)

  7. Allow to set

  8. Pat self on back for making your own awesome stuff!

Do Tell

If you decide to give this a try, I'd love hear how it turns out for you and if you made any changes. Please feel free to share in a comment below.

Interested in making your own water-based lip tint? The book below shows you how to make your own glycerine extracts and includes a formula for lip tint.


Breakfast Ingredients Face Mask

Lise

Let's do something a little roots today. I figured it's about time we revisited this face mask which consists of ingredients you probably already have in your kitchen. In fact, you may have even enjoyed some of them for breakfast.

Never ever considered making your own skincare? Well, guess what, I hereby pronounce this your day to get started.

Let's put breakfast on our faces!

(Just to set your mind at ease, no eggs or bacon are involved).

Breakfast Ingredients

This super moisture boosting face mask calls for

  1. Ripe banana

  2. Natural yoghurt

  3. Ground oats (see this post to make your own ground oats)

  4. Raw honey

I know what you're thinking:

  • Does it really boost moisture?

  • Can it make skin feel deliciously smooth?

  • Will it leave your face feeling like you've gotten an instant face lift?

I don't blame you a bit for thinking all that, because one wouldn't imagine ordinary breakfast foods could do anything of the sort.

But to answer your questions:

Yes to all of the above.

Here's why putting these particular foods on your face can be beneficial for your skin:

Yoghurt

has a natural content of lactic acid and offers gentle exfoliation (REF - this blog)

Oats

are all around fabulous for skin in more ways than you can count (seriously -- try counting them -- you'll be busy until next week)

Banana

adds both moisture and an instant glow. (Some banana fans claim there are skin lightening properties which can help hyperpigmentation, but I need to do some research on this before I can be sure if this particular claim has any substance to it)

Raw Honey

Honey has so much to offer skin that even science can't deny it. Truth: I'm a bit of a honey addict. (do a google search for 'LisaLise honey' and you'll see what I mean)

Ready to get busy putting breakfast on your face?

Excellent!

This is enough for a single portion for immediate use.

Step 1

Peel and mash about a third of the banana.

Step 2

Add a generous tablespoon of natural yoghurt and generous teaspoon of honey - stir thoroughly.

Step 3

Drizzle in ground oats while stirring to reach your desired texture. The texture should be soft and easily spreadable yet hold together enough so it doesn't drip off your face.

Step 4

Apply to face and neck (and include the backs of your hands if you have enough leftover). I used the flexible spatula you see in the pic to apply. You could also use the back of a teaspoon or a soft brush. Allow the mask to sit for 15-20 minutes.

This mask won't dry out, so in theory you could keep it on for a full hour if you like. Your skin will love you for it.

To Remove

  1. Using a spoon (or the flexible spatula), gently scrape off and discard the mask.

  2. Rinse face

  3. Finish with a spritz of hydrosol and a few drops of face oil.

  4. Rejoice in your instant glowing beauty!

Do Tell

Have you ever thought of putting breakfast on your face?

More Stuff You Might Find Interesting

Traditional and Medicinal Uses of Banana, Journal of Pharmacognosy and Phytochemistry (LINK)

Banana from peel to pulp, Ethnopharmacology, source of bioactive compounds and its relevance for human health (LINK)

PS: If you liked this mask, the book below (available in Spanish and English) is a beginner friendly guide to making your own cosmetics and includes a whole section with fresh food masks

How to Make a Glycerite with Fresh Cucumber

Lise

Today we’re revisiting one of the first glycerites I shared on the blog and a kickstarter to my passion for making and using glycerites with fresh foods in my cosmetics. I’ve pepped up the original pictures and added a few extra tips, so let’s get started!

Why Glycerites?

Glycerine extracts (or glycerites) are useful alternatives for folks who may not want to use tinctures (alcohol extracts) in their products, but glycerites also have additional advantages. Glycerine (also spelled glycerin) is an excellent humectant that doubles as an ideal solvent for many botanical constituents.

In short: a glycerite is glycerine with 'added botanical power' – the perfect addition to your lotions, creams, skin tonics and mists, serums, cleansers, and more.

Let’s make a fresh cucumber glycerite!

Water to Glycerine - How Much?

If you follow classic herbalist glycerite making instructions, you’ll find a common ratio of water to glycerine is 50/50, so for this batch, we're going to take our inspiration from there.

Fresh cucumber is about 96% water, so the percentages for this batch are

  • Glycerine 50.0 %

  • Cucumber 49.4 %

  • Preservative 0.6 %

Calculate the Batch

I am making a relatively small batch here (200 grams), so my batch amounts look like this.

  • Glycerine: 100.0 grams

  • Cucumber (organic): 98.8 grams

  • Preservative (I used benzyl alcohol): 1.2 grams

Method

  1. Sanitize your workspace, containers and equipment and pop on protective gloves

  2. Peel and slice the cucumber (I peel even organic cucumbers - but that's just me. Feel free to include the peel if you like. Remember to thoroughly wash/rinse the cucumber before slicing if you include the peel)

  3. Weigh cucumber

  4. Weigh and add glycerine

  5. Weigh and add preservative

  6. Give the mixture a stir

  7. Place lid on container

  8. Keep container away from direct light in a not too warm area

  9. Agitate daily for 5-10 days

Straining

If you used cucumber slices as I have here, you’ll notice that the slices start looking a bit shrivelled. That’s a good sign that your glycerite is ready for straining.

Before straining, be sure your equipment and containers are sanitised. (the funnel you are using is equipment too!)

  1. Place a funnel into a container and line the funnel with a filter. Coffee filters are fine but you could also use a finely woven piece of muslin/cotton. In this picture. I am using a doubled-up piece of silk jersey.

  2. Strain the mixture

  3. Bottle

  4. Label

Storage and Use

Store your glycerite cool and dark and use in your cosmetics within 6 months of making.

Glycerites can (and will) last much longer if made and stored properly, but I generally recommend using a handcrafted glycerite within 6 months of making.

Why?

Because when it is used as an ingredient in a cosmetic, that cosmetic is expected to have a certain shelf life.

Enjoy!

Want more glycerite making information? The book below might be just the thing you’re looking for.

How to Make a Botanical Face Tea

Lise

How about a nice cuppa for your face? In truth, this is simply a different name for a traditional facial steam (except with added herbs and botanicals). But since it's herbs infused into hot water, I quite like the idea of calling it face tea.

Not only is this product easy to make, but it's a real skin pampering treat.

Let's make Face Tea!

Choosing Botanicals

Combine dried herbs and plants to your hearts content, but do keep in mind that you (or whoever you gift this to) will be enjoying the steam of your blend at a close distance.

I generally like to keep my dry herb blends at around 5-6, but there are no hard or set rules on this. Concentrate on combining plants that work well together and will create a good synergy.

Method

Gather your desired dried herbs.

For this face tea, I went for a calming theme and ended up with a sunny golden combination of chamomile, elderblossom, rose, orange blossom and calendula.

I find the task of choosing botanicals to be quite therapeutic. Apart from being possessors of magical properties, botanicals are a bit of eye candy in any form. I mean, who could look at these beauties and not smile?

But I digress.

Mix the herbs together thoroughly, then package.

How to Use a Face Tea

  1. Remove make-up and wash face

  2. In a large bowl, pour boiling water over 1-2 tablespoons of tea blend

  3. Hold face over bowl for 5-10 minutes at a comfortable distance

  4. If desired, place a towel over head to keep in steam. The steam will open pores and refresh.

  5. Rinse face with lukewarm, then cool water.

  6. Finish with a spritz of hydrosol or light skin tonic and a few drops of face oil

TIP: If you are a bit creative with packaging, these facial teas make lovely personal gifts for the special people in your life.

Who Face Tea is Not Ideal For

Anyone with a tendency to rosacea or with ultra sensitive skin, may not do well with a face tea. Hot steam can exacerbate some sensitive skin conditions, so be mindful if gifting your face tea to someone with sensitive skin.

My own 'ridiculously sensitive' skin is OK with most face teas, but I don't use them more often than every other month.

Do Tell

Have you ever made a face tea? Which herbs did you use?

The book below includes a section on herbs and their uses and there’s a bundle offer in the shop too!

How to Make an Ivy Leaf Hair Cleanser

Lise

Pictured above: an all natural sudsy liquid that will cleanse your hair and scalp beautifully.

You've probably seen this plant many times and in many places: parks, gardens, fields, forests, and urban areas.

I seem to remember hearing it referred to as 'the architects comfort' somewhere. Perhaps this is because it seems to grow just about anywhere (like, up brick walls) and adds a touch of green and a cozy atmosphere wherever it grows.

While it is both decorative and hardy, Hedera helix - otherwise known as Common ivy – is also a very useful plant for cleansing due to its natural content of saponins. (The word saponin comes from Latin: sapo means soap).

Ivy leaves can be transformed into an all natural cleanser for numerous things: dishes, laundry, and even your scalp and hair.

There is a slight difference in the method for making laundry and dishwashing liquid (which is more concentrated) as compared to a scalp and hair cleanser.

Today, I'm going to show you how to make your own hair and scalp cleanser with nothing more than a few freshly picked ivy leaves and some water.

Did someone say sustainable, planet-friendly effective hair and scalp magic?

Ivy Leaf Picking Tips

  • Select leaves that are growing up (and not along the ground)

  • Select healthy looking leaves

  • If you are picking leaves from someone’s garden, remember to ask first

  • Bring a small scissors to cut the leaves instead of tearing them off

Batch Size

I usually make a liter at a time (to last about a week), but feel free to make a smaller batch (which will also allow you to leave out the preservative and use regular tap water instead of distilled water)

For a 1 liter batch, you'll need:

  1. Handful of fresh-picked ivy leaves (enough to fill about a third of a container that holds 1 liter)

  2. Demineralised water

  3. Broad spectrum preservative

For a use-the-same-day batch, you'll need

  1. Small handful of ivy leaves (enough to fill about half of a container that holds 200 ml / 16,7 fl oz)

  2. Tap water

Method

  1. Inspect leaves and discard any unhealthy looking specimens.

  2. Place leaves in container (do not pack them tightly, just drop the whole leaves into the container)

  3. Boil water

  4. Pour freshly boiled water over leaves

  5. Cover container and allow to steep until the liquid reaches room temperature

  6. Strain (and use same day if you made a single use portion). Otherwise continue with the next 6 steps below.

If you are making 1 liter:

  1. Weigh the strained liquid

  2. Weigh out appropriate amount of preservative and add to liquid.

  3. Stir to thoroughly incorporate

  4. Check pH (this infusion measured pH 6.0)

  5. Adjust pH if necessary (I generally add a splash of herb-infused vinegar to function both as pH adjuster and hair-shine booster)

  6. Bottle

I used phenonip as the preservative for this 1 liter batch.

How To Use the Ivy Leaf Hair Cleanser

  1. Enter shower

  2. Wet hair

  3. Apply about 100 ml of liquid (for short fine hair -- you may need more if your hair is longer/thicker)

  4. Massage scalp and hair lightly (as you would if you were using a shampoo).

  5. Allow the liquid to sit in hair for about 4-5 minutes (while you finish showering)

  6. Rinse hair

  7. Do a 'squeak test' on your hair. If it doesn't feel clean enough, repeat steps 2 and 3.

  8. Dry and set as usual

No Lather I Gather?

We’ve been taught for generations to equate lather with cleansing, but it is possible to cleanse thoroughly and completely without any lather or sudsing action.

This cleanser may foam up beautifully when you shake the bottle, but it goes on like water and rinses off like water.

Doing a squeak test will reveal that it really cleanses your hair. I’ve experimented a bit with how much it can handle, and can attest that this latherless cleanser even removes my pre-poo hair oil treatment with a mere 2 applications. The secret to optimal cleansing action is letting the liquid sit on the scalp for about 4-5 minutes after massaging and before rinsing off.

Enjoy!

Do Tell

If you decide to give this cleanser a try, I’d love to hear your feedback!

Find More Information

About Saponin Synthesis and Function (LINK)

Saponins and flavonoids in Ivy Leaf extracts (LINK)

Saponin content of ivy leaves (LINK)

Triterpenoid biosynthesis and engineering in plants (LINK)


If you prefer lather in your hair cleanser, then maybe the book below is for you.