Contact LisaLise

Please use the form on the right to contact LisaLise.

Majestic Court 5, St. Mary's Street
Mellieha
Malta

LisaLise offers online education of natural plant-based cosmetics via e-books and courses

LLBlogHEADER2020-3.gif

Shop Blog

A look inside the LisaLise natural cosmetics lab with free formulas, DIY how-to's, ingredients tips, sneak peeks, and more.

Live Workshop: Botanical Extracts and Skincare

Lise

This is something I’ve never done before. For the first time ever, I am doing a live workshop.

It's happening in May of 2024 in the beautiful Beiras region of Portugal. Pictured above are a few snapshots of the venue where this will all be taking place.

I've teamed up with Vivienne Campbell of the Herbal Hub so we could offer an in-depth look at identifying, picking, processing, and using botanicals for skincare and haircare. In short, we're going to be immersed in hands-on botanical magic from May 10th to May 16th.

What We'll be Doing

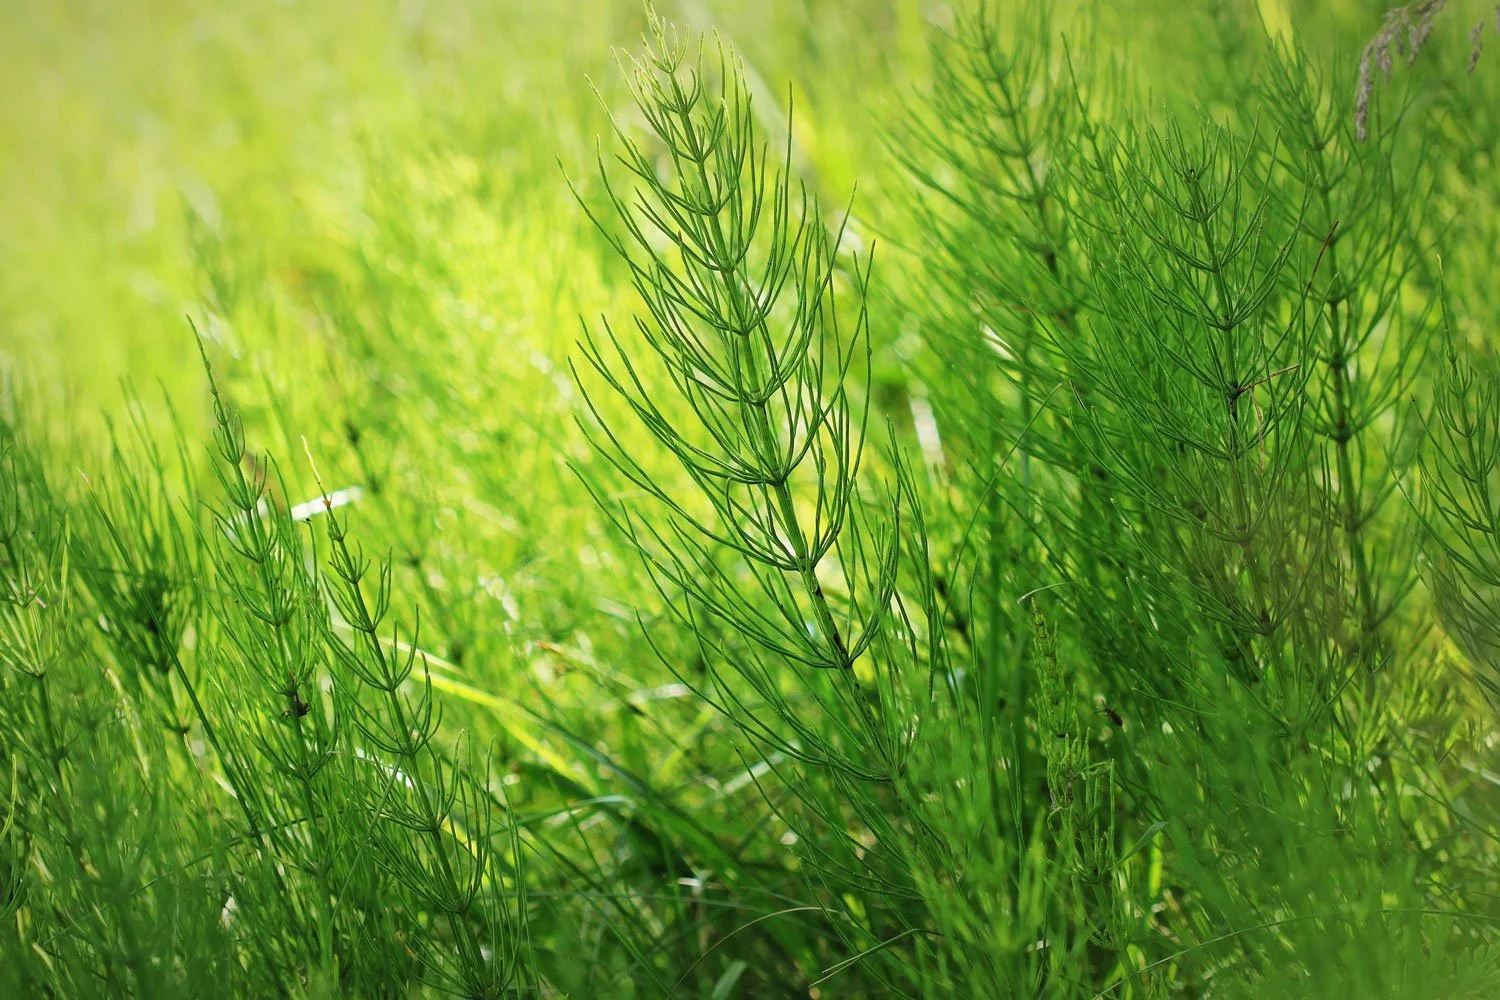
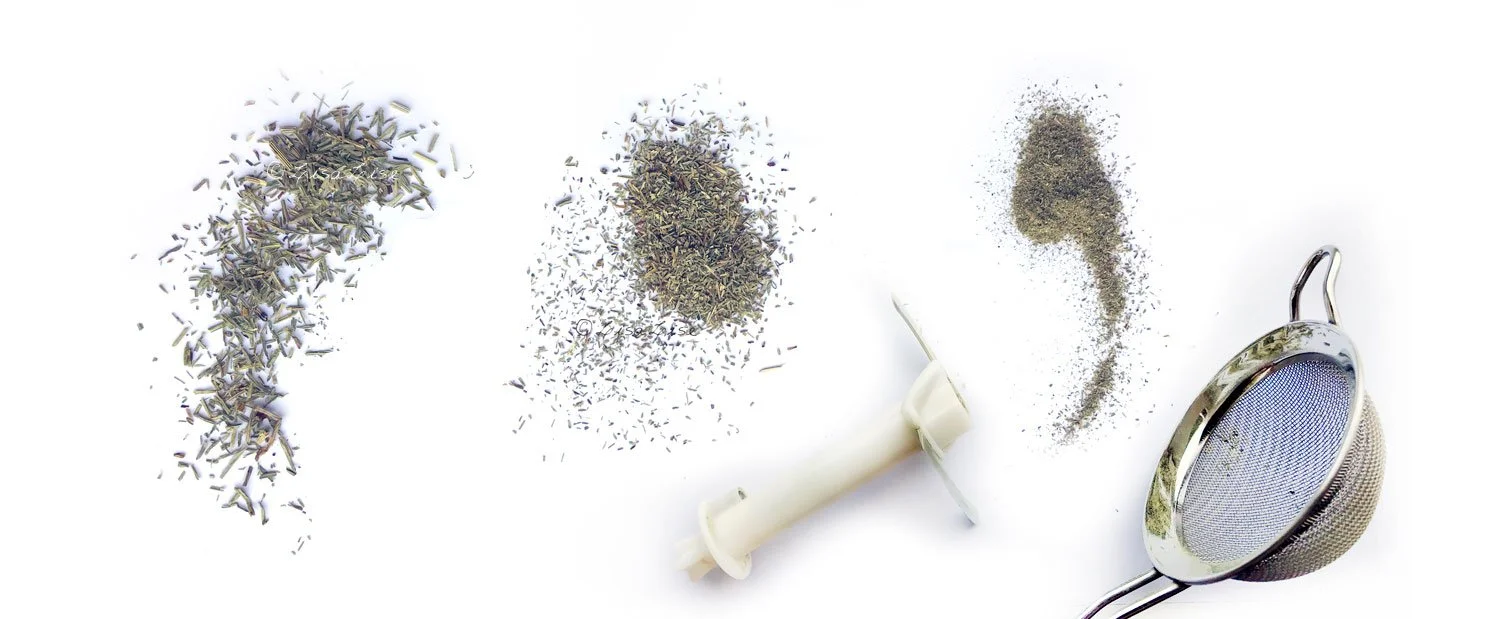
Attendees will observe or help with the following processes and extract-making techniques:

  • Collecting herbs

  • Drying herbs (different methods)

  • Herbal Infused vinegars

  • Glycerites

  • Alcohol tinctures

  • Herbal footbaths

  • Hydrosols (in an Air Still)

  • Freshly made cold-pressed oil (nut or seed oil)

Not only will we be making extracts, we'll be incorporating them into the following products which attendees will take home.

  • Botanical Shampoo Bar

  • Self Preserving Facial Cleanser

  • Masks

  • Deodorant

  • and more

Schedule Overview

Here’s a very brief description of the program:

Arrive: Friday 10th May 2024 (join us for dinner together this evening)

Enjoy Learning with Us: Participate in 5 days of classes Sat. 11th – Wed. 15th May

Leave: After breakfast on Thursday 16th May

All Skill Levels

Both Vivienne and I are accustomed to teaching all skill levels and agreed this workshop should span everything from newbies to professionals. So you don't have to be an expert to join, and neither will you find this workshop 'too easy' if you're a practiced formulator.

Only 20 Spots Available

We also decided while planning that we wanted to keep the group an intimate size so it would be a truly immersive experience for every attendee.

Vivienne and I are equally passionate about working with botanicals and look forward to sharing our experience, knowledge, and love of botanicals & their multiple properties with you in May.

Want to Know More?

Click the button below to read more about what's included, check accommodation options, see more of the venue and get an idea of what to expect from this workshop and to sign up.

Don't wait too long as spots are going fast.

I hope you'll be joining us!

We look forward to seeing you

Click the button to learn more about the workshop

Do Tell

Have you ever been to a botanical skincare workshop? Please share your experience in a comment below.

How to Work With Stinky Ingredients

Lise

Working with plant-based ingredients has its occasional challenges. Some of the ingredients I work with have an inherently heavy, sharp, pungent, musky, or otherwise less than appealing scent.

Ok, that was the diplomatic description.

Some of them are so stinky there is instant nose-wrinkling and the instinctive pull-back when the seal is broken and the package is opened.

Yes, that stinky.

At the same time, some of them have all kinds of skin-loving goodness to offer, so they cannot be disregarded.

Choices must be made.

The Stinky Conundrum

So, how shall we solve this stinkiness? Shall we mask the odor?

Perhaps just replace the ingredient?

There's also 'the industry maneuver' (my term) which consists of using such a small amount of the ingredient that it won't be discernible to the nose. This is common practice in many commercially manufactured cosmetics and is also referred to as a 'tip-in'.

Using an ingredient as a tip-in is great for marketing purposes, but the downside is – of course – having to live with the fact that the ingredient won't do a dang thing because there's such a teensy tiny amount in the product (0.05%) that it might just as well not be there at all.

So, maybe we should give up and dump the stinky ingredients entirely?

Or.

Maybe we could figure out how to incorporate the smelly things in such a manner that the end product doesn’t insult the nose.

Maybe we can even make the end product a delight to the nose?

Considering the Synthetic Factor

In truth, it's relatively easy to mask even the stinkiest ingredients by using a synthetic scent. Think of detergent. Without the addition of (a synthetic) perfume, most household cleaning agents are, to put it politely, downright foul smelling.

Grabbing a bottle of fragrance would be the most obvious and easiest choice, but I have a problem with that as I am not a fan of synthetic perfumes.

Ok that was the diplomatic description.

In truth, I find (almost all) synthetic fragrances worse than the stinkiest ingredients I work with. Despite several attempts, I cannot bring myself to work with them. This might be due to a perfume allergy (I've never been tested, so I can't say for sure), but it could be because of my lifelong inherent aversion to anything synthetic.

What’s the Stinkiest?

A while back, I asked a few fellow formulators if there were any particular ingredients they would categorise as stinky and hard to work with.

There was a literal flood of replies.

Here are the stinky winners

  • Neem oil (the all time winner and receiver of most votes)

  • Cocoa butter

  • Unrefined shea butter

  • Lanolin

  • Wheat germ oil

  • Argan oil

  • Carrot seed oil

  • Tamanu oil

  • Pomegranate Seed Oil

  • Evening Primrose Oil

  • Raspberry Seed Oil

  • Kelp Powder

  • Spirulina

  • Tea Tree Essential oil

  • Valerian Essential Oil

  • Soapnuts

These ingredients all have wonderful properties that are difficult to simply disregard. So, how do we deal with all this stinkiness?

We Take Stinkiness into Account

After years of trial-and-error, it has become second nature to me to take the inherent stinkiness of some ingredients into account when creating a formula.

Even though there are some limitations, it is possible to 'bend' a stinky ingredient (or 2) into something entirely pleasant with no need of masking the smell.

The secret is deceptively simple: work with, not against.

Get your perfuming nose on and get ready to include said stinky ingredient as part of the fragrance.

You doubt?

It's perfectly ok. I didn't think it was possible in the beginning either.

To get busy, we need to do a bit of nose exercise (and no, you don't need to learn how to wiggle your nose).

How To Get Your Perfuming Nose On

This is a relatively simple exercise, but does require your full attention and concentration.

Your nose may be a little offended at first, but will probably surprise you with hidden secrets sooner than you expect.

The object of this exercise is to train your nose to pick out the components of (any) fragrance.

Choose an ingredient. Don't start with the absolute stinkiest ingredient, but choose one you perhaps find a bit challenging. For example, if you have an ambivalent relationship with the scent of unrefined shea butter, start there.

Sniff the ingredient until your nose is thoroughly acquainted with it.

Alternate between sniffing the ingredient and sniffing fresh air.

Continue for a few minutes and you will start to discover the 'undertones' and 'overtones' of the scent. Is there a muskiness in the background? Is it slightly woodsy? Nutty? Fruity?

Identify the components as best you can and write down your impressions.

At one point, your nose is going to ‘sign off’ and that will be your signal that this session has ended.

Wait at least an hour before continuing.

It will probably take a few sessions, but I’m pretty sure it won't be long until you have dissected the scent and can begin to work with it. If there is a musky undertone you find unappealing, the addition of a woodsy fragrance can synergise and 'bend' the scent in an entirely different (and more pleasing) direction.

I admit this takes a bit of practice, but I also know you can totally do this. I think you will surprise yourself at how quickly your nose is able to 'dissect' what you are sniffing. Keep at it and you will discover how easy it suddenly is to dissect the components of a wine, perfume, or any dish.

Let’s Take Cocoa Butter

When you've been exercising your nose and making all kinds of amazing discoveries at how clever your nostrils are at picking out subtle details and undertones, you can move on to this exercise.

We're going to 'bend' the scent of an ingredient that made it quite high up on the list of stinky ingredients in my impromptu poll: cocoa butter.

It almost seems unfair to call it a stinky ingredient. Most people love the smell and taste of a chocolate bar. I know I do. I actually also love the scent of cocoa butter if I am thinking of dessert. But right now, we're putting it on our skin. And not everyone wants to smell like dessert all day.

As delicious and chocolatey as unrefined cocoa butter might smell in the container, it can be downright overpowering when it is applied to the skin in a leave-on product.

In a body butter, non-chocolate-tasting lip balm, or any other water-free product, cocoa butter can have an uncanny ability to take over the entire fragrance profile and become both heavy and cloying.

How to include cocoa butter as a component of our fragrance? Here's a little exercise on how to do just that.

Cocoa Butter Base Note Exercise

For this exercise, you’ll need

  • Unrefined cocoa butter

  • Essential oils

  • Any infused oils you might want to include

Method

  1. Have your essential oils at room temperature

  2. Gently melt 5 grams (a teaspoon) of cocoa butter in a small glass container (5 grams for each scent you want to create).

  3. Sniff the cocoa butter. Note the properties: heavy, creamy, and chocolate-like. This is the base note from which you shall create your fragrance.

  4. The next step is to decide which direction you want to take this base. Here are a couple of examples to help inspire.

Woodsy : For a woodsy scent, add a component such as cedarwood, rosewood, petitgrain, or sandalwood. A combination could also be used. Round out the blend by introducing an element of citrus freshness – bergamot, mandarin, blood orange, grapefruit, or lemon could all be considered.

Oriental : To bend your cocoa butter in a more exotic direction, add myhrr or frankincense. Introduce a floral element with rose or geranium, then consider a titch of vanilla to round out the scent and make it deliciously exotic.

Floral : For a floral scent, start with a woodsy component to anchor the cocoa butter (cedarwood might be great here). Then add some rich, dense florals such as geranium or rose. Lighter florals risk being 'buried' in the fragrance profile. Chamomile – with its inherent earthy note – is another possible option. Lavender and/or an element of citrus can be added to round out the scent.

Want to try something else? Go for it! When your nose is 'tuned in', you can create any fragrance combination you think you would like.

Chill, Solidify, and Do a Nose Test

When you have finished your test bowls with essential oils and cocoa butter, pop them into the fridge and let the mixture solidify.

To test the solidified samples, warm the bowl (or solidified cocoa butter) slightly in the palms of the hand and then do a nose test to see if you are satisfied with scent profile. If you are, then you know the EO’s you blended into the sample will in all likelihood be useful for anything you make with cocoa butter

TIP : If you happen to make your own botanically infused oils, these can also be super useful in a fragrance creating setting.

Do Tell

Which scent combos have you tried adding to cocoa butter to create your fragrance? Were you happy with the results? Please share in a comment below.

Rosehips For Skincare

Lise

Here's an ingredient that has been a staple in my stockroom for years.

Rich in vitamins, these brightly-colored fruits are not only super healthy to eat (and make a delicious jam), but also have loads to offer with topical use.

Where They Grow

Rose-hips are native to Europe and parts of Asia. In Scandinavia, they grow wild along beaches, forests, and fields, dotting the landscape with their brightly colored flowers in summer and even more brightly colored hips throughout the Fall and Winter months.

The fruits are able to withstand the harsh Nordic elements and will not only remain on the branches long after the leaves have fallen, they will also retain their vitamin content and most of their beneficial properties.

Species

There are 2 equally popular (and useful) species of rose-hips - each with numerous synonyms:

Rosa rubiginosa is also known as Sweetbriar, Briar Rose, Rosa Mosqueta, or Apple Rose

Rosa canina is also known as Dog Rose or Dogwood Rose.

Both contain similar amounts of vitamins but rosa canina has a slightly higher fatty acid content.

Oils From the Seeds

Apart from 2 species (and therefore 2 seed oils), there are also 2 kinds of rose-hips oil used for skincare. They differ somewhat in their properties which can create some confusion.

The golden-orange seed oil is produced by pressing the seeds from inside the hips. Both Rosa rubiginosa and Rosa canina are used to produce seed oils. The Rosa rubignosa oil is especially favoured for its content of trans-retinoid acid (a natural vitamin A derivative).

It is not an inexpensive oil.

The cold-pressed (Rosa rubiginosa) seed oil has been a favourite of mine for years and has found its way into numerous products: from face oil blends to emulsions (added at the cool down phase as this is a heat sensitive oil).

With about 40-45% linoleic acid (omega-6) and a healthy portion (about 10-15%) of oleic acid (omega 3), it also contains natural content of vitamin E as well as squalene.

Rose-hips oil is categorized as a dry oil, melting into the skin quickly with no greasy feel. The scent is quite unobtrusive and works well in any facial oil blend - my personal favourite use of it.

The only real downside is the oxidation potential: it has a pretty short shelf life. This can be optimized (but not extended) if the oil is handled properly (not added to heated phase of emulsions) and stored cool and dark.

You will find rose-hips oil widely available from health food stores to cosmetic ingredient suppliers and I have used both food grade as well as cosmetic grade in my formulations.

Below: rose-hips seed oil from a cosmetic ingredient supplier.

The Oil That is Not from the Seeds

The other kind of rose-hips oil is an infused oil. Many folks looking to find a less pricey solution to the seed oil have taken to making their own infused rose-hips oil by placing the dried fruits into a carrier oil to infuse for a period of time and then straining out the fruits.

While this makes a lovely oil that can be used for cosmetics, an infused oil does not contain the same properties as oil pressed from the seeds. Check Vivienne Campbell of the Herbal Hub’s 5 minute film explaining the main difference between these oils right here

Powdered Rose Hips

Apart from oils, there is also rose-hips in powdered form. This ingredient has made its way into several of my fave go-to products: cleansing powders, masks, and exfoliating scrubs. The scent of the powder is subtle and faintly fruity which I find quite pleasant.

In my experience, powdered rose-hips has a slight graininess to it, making it ideal for gentle exfoliation. I have yet to source this powder where I am living now in Portugal, so I am looking forward to seeing if I have the same 'graininess' experience when I find a new supplier.

If you're wondering how it is even possible to make a powdered version of rose-hips while retaining the C vitamin content, you are not entirely off track. The production process destroys a lot of the vitamin in the fruits which makes it impossible to label the powder accurately for vitamin content.

When I bought rose-hips powder in Denmark, the packet would always have a detailed explanation of why they were unable to state even an estimated amount of vitamin C content and comply with labelling laws at the same time. In short, the vitamin C content of the powder appears to be anybody’s guess.

Happily, I use the because I like the gentle exfoliating graininess (and any vitamin C it may contain is just an added bonus)

Do Tell

Do you use rose hips in your skincare? Please share how and in which products in a comment below.

More About Rose-hips

PubMed: Study Indicating rose-hips helps reduce pain LINK

Another PubMed study on rose-hips powder for pain management LINK

Bioactive ingredients of rosa canina LINK

Chemical components of rosa rubiginosa (Chrome extension pdf document) LINK

Therapeutic aspects of rose-hips from different rosa species LINK

Rosa rubiginosa (Plants for a Future) LINK

Rosa Canina (Plants for a Future) LINK

Tips for Making Lavender Powder

Lise

Working with different dried herbs in various cosmetic products has taught me that some herbs are far trickier to transform into a 'proper' powder than others.

Take lavender for example.

I love it to pieces, but at the same time, it can drive me absolutely batty. After several attempts at making my own powders without much luck, I started buying powdered lavender. Unfortunately, that has never brought me any joy either – regardless of supplier.

It's entirely possible that I'm overly picky, but in my book, a powdered facial cleanser should not contain ANY annoying bits that keep sticking to the skin after everything else has willingly rinsed away.

The Perfect Lavender Powder Challenge

The challenge of transforming dried lavender into a perfect powder that rinses away without leaving bits sticking to the face was hereby decreed (by me to myself). I started by investing in a rather large bag of dried whole buds so I could get serious about experimenting with different techniques.

Spoiler alert: My idea of the perfect powder doesn’t exist, but I have gotten pretty close.

I'll spare you my numerous failed attempts and concentrate on the method that has shown the most promise.

The Grind

Above: my preferred herb-pulverizing apparatus. Most of the time, this handy coffee bean grinder does a bang-up job.

But no matter how long you grind dried lavender buds, they only become something that looks like a powder.

Try sifting lavender buds that have been in a grinder and you'll see what I mean. It's as if the dried buds are too lightweight to be properly ground to a powder. And that’s exactly why they won’t willingly become a powder. The plant/buds are too fibrous.

Rethinking the Grind

Since my main goal was to use the lavender in a powdered face cleanser, and my powdered face cleansers include clay, it occurred to me that it might be possible to 'weigh down the lavender' by adding some clay to the lavender buds in the grinder.

And gosh darned if that didn't help – a whole lot.

Here are the results of a few different clays mixed with lavender buds and run through the grinder.

The winner is hopefully evident in the picture above. Rhassoul (also called ghassoul) seems to have the necessary weight to 'hold' the lavender. It's also the heaviest of all the clays, so it makes good sense.

The photo above was taken prior to passing the ground mixture through a sieve.

Sifting the ground mixture helped remove most of the remaining unwanted 'fluffy bits'.

Admittedly it’s a bit of work, but if you need lavender powder and are making a product that includes clay, try combining the 2 for some pretty decent results

Pictured at the top of this post is some of the final discarded bits – artfully arranged for your viewing pleasure.

Do Tell

Do you have a successful method of making lavender powder that you're willing to share? Please post a comment below!

PS: LisaLise Club members have access to all kinds of my best tips and useful shortcuts to ease the workload. Want to join us? Click the picture below to learn more about what the Club has to offer you.

Using Horsetail in Cosmetics

Lise

That funny looking botanical up there is commonly known under the name horsetail.

Today we're going to take a look at what this plant can do, why it is both loved and hated, and how to prepare it for use.

Why Horsetail

Horsetail is a fabulous ingredient for makers of cosmetics, but a scourge to some homeowners because the plant is quite invasive.

A neighbour (who hates horsetail with a passion) explained recently how "the roots grow to the very core of the earth and the plant will thereafter forever spread and you will never, ever, ever have a normal lawn again. Ever!"

I checked about the down to the core of the earth thing. The roots go down about 2 meters / 6.56 feet. That's definitely deeper than, say, dandelion roots.

This picture might well be a gardener's worst nightmare: an entire field of horsetail.

What's in Horsetail

Horsetail (INCI: Equisetum Arvense) has a natural content of beneficial components such as calcium, magnesium, saponins, and vitamins A, C, and E, as well as copper and zinc.

But the main component of this plant is silicon – horsetail contains about 10%. The reason for this high content (which I am told is quite unusual for herbs) is because horsetail has the ability to absorb silicon from the soil.

Do not confuse silicon with silicone.

Silicon is the second most abundant naturally occurring element in the earths crust, while silicone is a synthetic substance.

Silicon is one of the likely reasons horsetail has been popular for haircare and has been attributed with the ability to help strengthen and encourage hair growth.

Apart from hair care, horsetail also has a history of use in herbal medicine for numerous skin disorders where it was traditionally applied as a poultice or added to baths to help heal and soothe.

Modern science has been taking a look at this plant in recent years for its antioxidant activity.

I have been working with horsetail for a few years now - mostly for haircare (think shampoo bars), but I have tested it (successfully) in a few skincare products as well.

Whether you choose to pick and dry your own or purchase dried horsetail, there's still a bit of preparation before it can be used directly in a product such as a shampoo bar.

Horsetail Prep Session

Now this isn't a hugely complicated thing, but there are couple of tools and a little time involved, and if you're anything like me, you like to have all your ingredients right at hand when you start making.

The horsetail I used was bought dried from a supplier of botanicals for herbal teas and looked like what you see on the left below.

To get it to look like the (almost perfect) powdery substance you see pictured on the right, you need to grind, then pass the herb through a fine-mesh sieve a few times.

I used one of my (dedicated) electrical grinders for step one, and a hand-held metal sieve for step 2.

If you make a larger portion than you need, package the remaining dried powder in an airtight container and you're all set with a stock of ready-to-use horsetail powder.

Fun Fact

Despite it's name, horsetail is toxic to horses. (REF)

Do Tell

Do you use horsetail in any of your cosmetics? How do you use it? Please feel free to share in a comment below.

Find More About Horsetail

Britannica on Silicon: LINK

A-Vogel on horsetail: LINK

Horsetail as a natural antioxidant: LINK

Science Direct on Horsetail: LINK

Horsetail, History of use: LINK

Want to make your own shampoo bars? Horsetail is a star ingredient in the Nettle & Horsetail shampoo bar formula featured in the book below

Activated Charcoal as a Skincare Ingredient

Lise

Cleansing with Charcoal?

It does sound like a bit of an oxymoron, doesn't it? How can applying a black substance cleanse anything at all?

Let's take a closer look at the ins and outs of activated charcoal.

One of the more recent buzzwords making the rounds in the beauty (and health) industry is 'detoxify'. It's understandable actually. We are all exposed to more than our fair share of unwanted chemicals via both air and water in most modern environments. And as a natural extension, our first line of defence - our skin - is going to take a bit of a beating.

That is where detoxifying comes in.

Imagine finding something we could use that just cleared away all of the toxins and unwanted chemicals.

The Good News

The good news: that something exists.

Activated charcoal has the (documented) ability to draw out and adsorb unwanted chemicals when taken internally.

And before I continue, let's just clarify the difference between absorb and adsorb.

ABsorb vs ADsorb

An item that absorbs integrates a substance into itself (kind of like a sponge takes up water).

An item that adsorbs attracts and keeps the substance exclusively on its surface area.

Activated charcoal is great at adsorbing because it is extremely porous (read: loads of surface area). (LINK)

The Less Good News

Now for the less good news: (some) science says activated charcoal may not be all that with topical use.

Instead of being able to give you a long list of links to dozens of studies proving activated charcoal clears up acne, brightens skin, helps heal wounds, and erases 20 years of wrinkles, it appears the jury is still out on how well activated charcoal works when applied topically. (some links below).

While researching this, I read many of the cons as well as the pros on activated charcoal's abilities with topical use and decided to share my conclusion with you.

Seeing as activated charcoal has been used for water purification, preservation and wound treatments (!) since ancient Egyptian times (link) , I am of the opinion that (some) modern science really needs to catch up with what history has already shown.

You: Lise, you're questioning science again

Me: Of course I am. Proper science welcomes questions.

In truth, it is up to every individual to decide whether or not activated charcoal works for them.

Now let's examine what this black substance comes from and what we can use it for in a cosmetics/personal care setting.

Activated Charcoal Production

Activated Charcoal is also called activated carbon. The raw material can come from various types of sources - from petroleum pitch to wood, coconut husk or even bamboo.

The activated charcoal you can purchase from many cosmetic ingredient suppliers is often from coconut.

To transform charcoal to activated charcoal, it is heated using a special process that results in increased porosity and adsorption capabilities. (read more about the process here)

It may come as a surprise to some that there are different processes to producing activated charcoal and it is available in different shapes, with different pore structures, and even with different purities (LINK)

A gram of activated charcoal can have a specific surface area (SSA) ranging from 500 m2 to 3,000 m2. The higher the number, the better the adsorption. (LINK)

What is Activated Charcoal Used in?

I'm sure you remember a wave of activated charcoal toothpastes that swept the beauty and personal care scene a few short years ago. It seemed everyone was introducing a fashionably black toothpaste for whitening, brightening and supporting overall oral health.

I have yet to try this in one of my tooth powders, but writing about it has prompted me to add this to my to-do list.

Apart from oral care, you might find activated charcoal a useful ingredient in your

  • Face Masks

  • Face Cleansers

  • Soaps

  • Exfoliating sponges

  • Hair masks

  • Shampoo Bars

  • Deodorants

Do Tell

Have you worked with activated charcoal? What did you use it in and what were the results?

Please share in a comment below.

More Links:

This is a short list of some of the places I visited while researching this— the ‘titles’ are not written out. Each link is instead paired with a short description of the article’s conclusion.

Internal adsorption (LINK)

Ability to Bind salicylic acid (aspirin) (internal use) (LINK)

Activated charcoal may be functional in battling bacterial toxins and aid wound healing (LINK)

Activated charcoal dressing for diabetic foot ulcers (LINK to Chrome Extension PDF file)

For oral use (inconclusive evidence of detoxification used as tooth cleanser) (LINK)

For oral use: no increased erosion of tooth enamel (LINK)

For topical use on skin: inconclusive (LINK to Chrome Extension PDF file)

Inconclusive, not FDA approved, anecdotal (LINK)

Possible benefits for skin (Medical News Today) (LINK)

Short History of activated charcoal (from a supplier of activated charcoal) (LINK)

Below is my book formulation template on how to make your own tooth powders.