Contact LisaLise

Please use the form on the right to contact LisaLise.

Majestic Court 5, St. Mary's Street
Mellieha
Malta

LisaLise offers online education of natural plant-based cosmetics via e-books and courses

LLBlogHEADER2020-3.gif

Shop Blog

A look inside the LisaLise natural cosmetics lab with free formulas, DIY how-to's, ingredients tips, sneak peeks, and more.

Filtering by Category: Extracts

Understanding Cloudiness in Vinegar Tinctures

Lise

Even though tincture making has been around for ages, it is perhaps more known as something created specifically for consumption. And while I love using herbal tinctures in the kitchen (and for health and well being), I’ve been just as busy making and using them as cosmetic ingredients. And apparently, so are more and more cosmetic makers.

It has been a thrill for me to see a widespread increase in interest for vinegar tinctures. And with growing interest comes an increase in questions - like what cloudiness means. Today, we’re going to take a look at what it can mean if a vinegar tincture is cloudy.

Defining Cloudiness

Cloudiness is used to describe any vinegar (or alcohol-based) tincture where the liquid is semi-opaque or opaque. If you can't see through the liquid in the bottle, then you've got cloudiness.

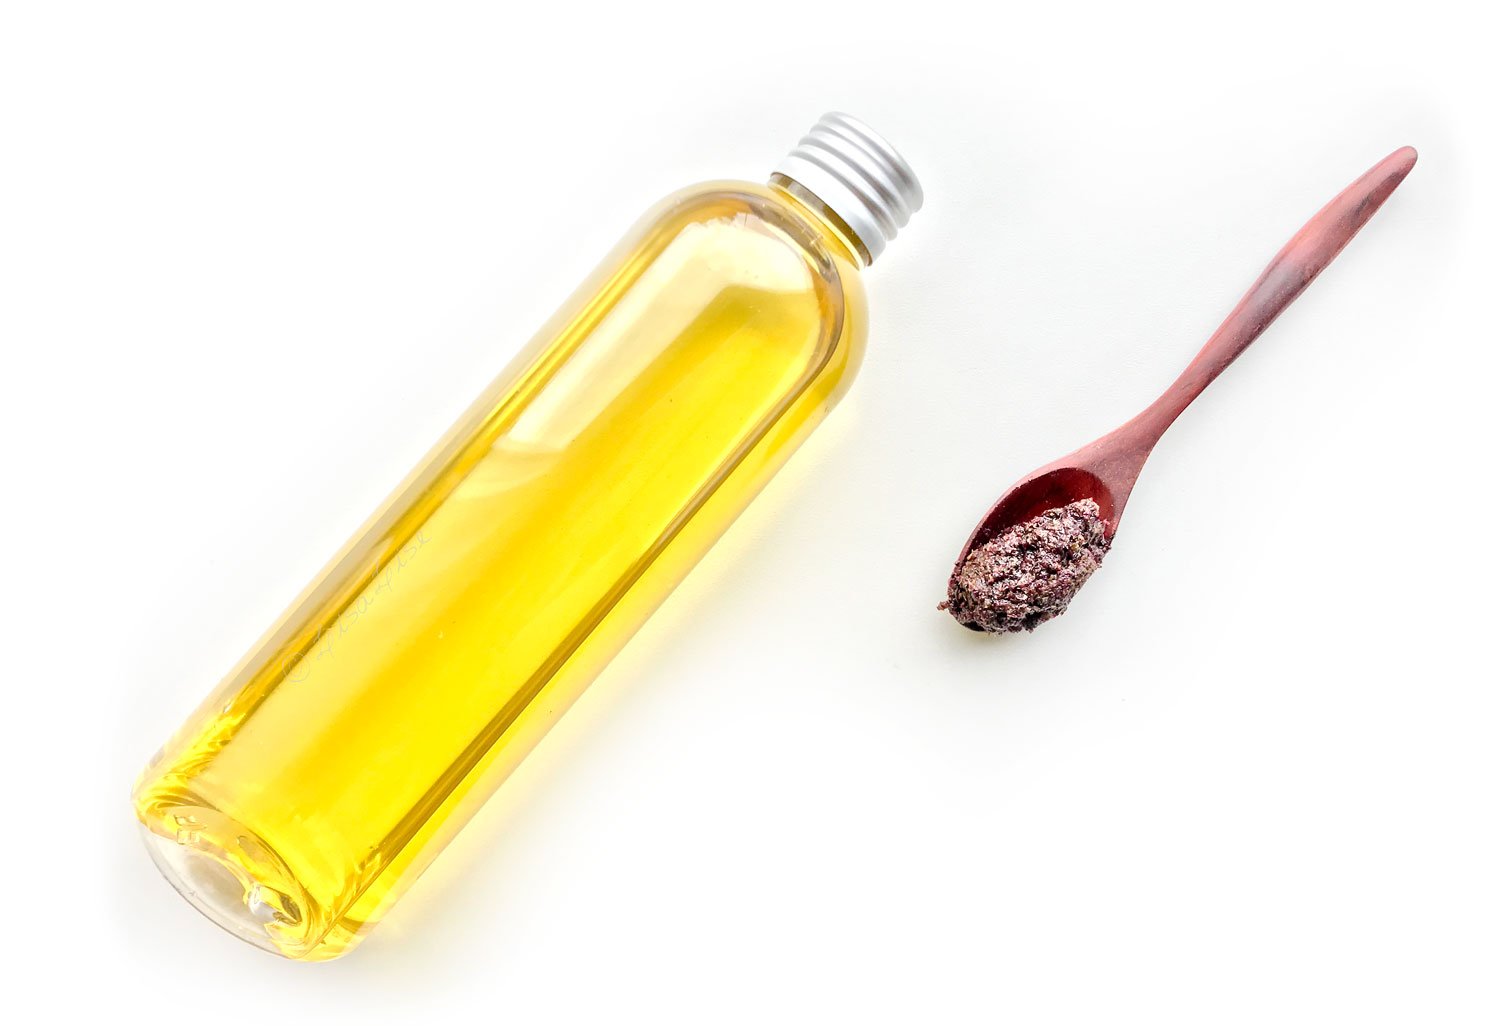
To illustrate, the top of this post shows a cloudy tincture.

The picture was taken shortly after straining and bottling. This tincture was made with distilled white vinegar and crushed juniper berries.

A Cloudy Tincture Isn't Necessarily Bad

An opaque tincture doesn't necessarily mean it is wonky. As you can see from the picture above, even a freshly made tincture can be quite cloudy.

Here are a couple of the most common reasons for cloudiness.

1. Type of Vinegar Used

One reason for cloudiness could be the vinegar. Not all vinegars are the same.

Check the post that uses coconut vinegar. My description of the vinegar is 'frosted white'. It kind of goes without saying if the vinegar isn't crystal clear to begin with, the end product won't be either. (but I said it anyway)

2. Material Used

Another possible reason for cloudiness is the infused material. Some herbs and plant materials disintegrate into particles that are so fine they become difficult to remove – even after straining.

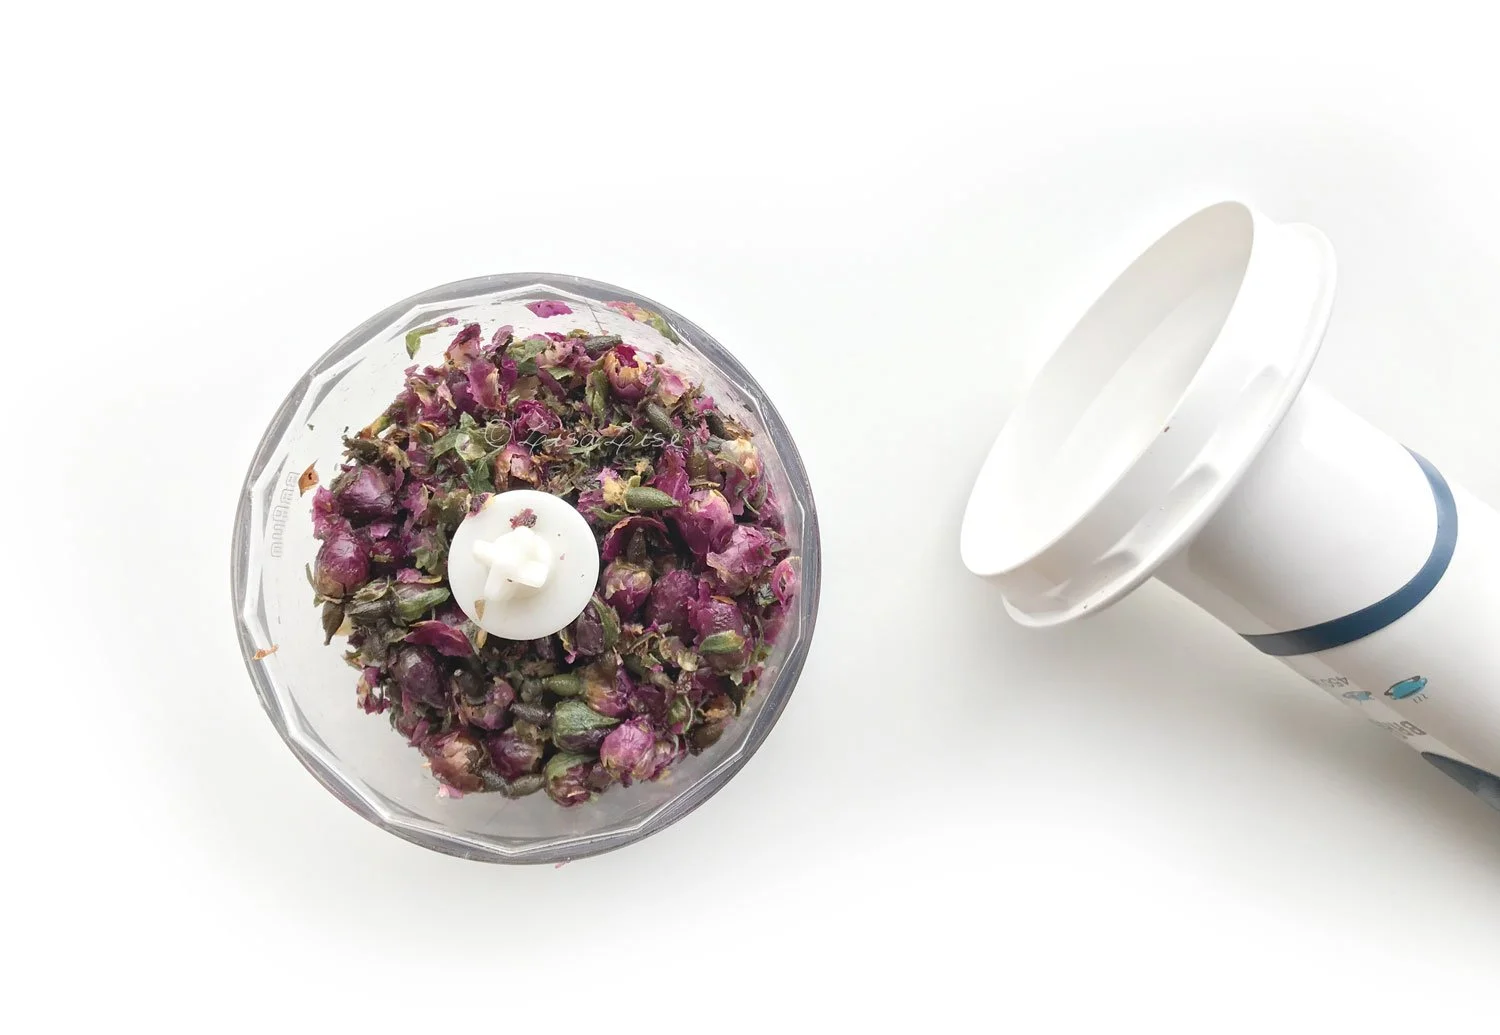
Juniper is one example. To extract the most from juniper berries, it is recommended to crush or grind them before infusing.

And that's what I did. These were whacked to smithereens with a rolling pin prior to infusing.

Note how opaque the liquid is in the picture at the top. Despite being strained through several layers of muslin and followed by 2 passes through paper filters, the liquid is still cloudy.

If the material is the cause of the cloudiness, to all you need to do is let the tincture stand undisturbed for a while (read: it could be anything from a few days to 2-3 weeks)

Below is one of the juniper tincture bottles (after some use) and a couple of undisturbed weeks in my ingredients fridge.

Seeing residue settled at the bottom of a bottle might look worrying, but in this instance, it's a bit of good news.

The clear liquid (that took 14 days to achieve by letting nature take its course) might have been achievable with advanced filtering equipment, but that's not even necessarily the case.

Even some commercially produced tinctures will have residue. I've experienced this on more than one occasion.

Tip For Using Tinctures With Residue

If your requirement is a crystal clear tincture and you have a very steady hand, it is possible to carefully decant the clear liquid into a new bottle. Use the remainder of the tincture in a product that doesn't require a clear liquid.

(This post is an updated version of a post from 2018)

Do Tell

Have you ever experienced cloudiness in one of your vinegar tinctures? Did you discover the cause? Please feel free to share in a comment below.

PS. LisaLise Club members have access to this as well as a section of posts and tutorials about making and using vinegar tinctures for cosmetics. Think you want to start this year as a Club member? Click the picture below to read more about what the Club has to offer you.

Vinegar as Medicine and For Cosmetics

Lise

You might be shaking your head at this title, and I really don't blame you. Not too terribly many years ago, I would probably have scoffed a little at the idea of using vinegar in anything cosmetics related.

I mean, seriously?

It's vinegar!

Think salad, think cooking, but cosmetics?

But before you dismiss this pungent liquid from your cosmetics ingredients list, let's take a closer look at some of vinegar's uses and capabilities.

Historic Vinegar

Vinegar has been used for centuries for health and well being. You might have heard of the historically famous 4 Thieves Vinegar: a vinegar brew with a selection of carefully chosen herbs.

As the story goes, this herbal-infused vinegar functioned as an antibacterial guard for 4 plundering thieves during the plague. They doused themselves in the mixture (and perhaps drank some too) to stave off bacteria as they ruthlessly (and successfully) robbed plague victims without becoming ill.

When they were finally caught after a lengthy spree of robbing the sick and dying, the authorities were amazed they had been able to survive without catching the plague themselves and demanded to know their secret. They promised to share if they were granted some leniency.

And after revealing their recipe, they were subsequently executed for their crimes.

Is this story true? No one knows.

I imagine you're curious, so here's what is claimed as the most historically accepted version of this magical concoction.

Classic Four Thieves Vinegar

Ingredient Amount
White wine vinegar 3 pints
Wild Marjoram handful
Juniper Berries handful
Meadowsweet handful
Wormwood handful
Sage handful
Elecampane Root 2 ounces
Angelica 2 ounces
Rosemary 2 ounces
Horehound 2 ounces
Cloves 50
Camphor 3 grams

The method for making it was described in few words.

  1. Add ingredients to liquid

  2. Allow to brew for 7 days, then strain

I couldn't help but smile at the lack of continuity of these measurements. Ounces, grams and 'handfuls'.

Nonetheless, the combination of herbs with this common liquid has been the basis for several beneficial uses throughout history.

Among other things, it has been tested and studied as an antibacterial agent that helps aid wound healing. (links below).

Vinegar for Hair

It has been common knowledge for ages that a vinegar rinse helps remove any last remains of shampoo and provide a healthy shine to the hair.

Does it work?

Yes, indeedy.

And if you check this link to the Korean Institute of Science and Technology, you'll find vinegar has shown promise as a hair-growth-boosting ingredient in a study (using rodents).

It's quite fun to see science catching up with grandma's old haircare tips, wouldn't you say?

What About Now

In this day and age, vinegar is just as useful and multifunctional as it has always been. There are numerous bonuses to working with vinegar. Not only is it widely available, but it can be made from a plethora of sources and is so pocketbook friendly, you can allow yourself to splash out a bit in the experimenting department.

Vinegar can be a very useful component of cosmetics. Transformed into a tincture, it can function as a colorant, fragrance (yes, you read correctly), pH adjuster, and even more.

Which brings me to the picture at the top of this post. That, my friends, is an example of vinegar transformed. What you are looking at is the aftermath of a hibiscus-vinegar squeezing pH performance of multicolored magnificence that demanded to be photographed and shared with you.

Do Tell

Have you ever used a vinegar hair rinse? Did it make your hair shiny?

More About Vinegar

Medicinal Uses and Antiglycemic effect, ncbi, Medscape General Medicine (LINK)

Assessment of antifungal potential of apple cider vinegar, Iraqi Scientific Academic Journals (LINK)

Evaluation of Stability in Purified Wood Vinegar for Hair Growth, Korea Institute of Science and Technology Information (LINK)

Effect of Apple Cider Vinegar on the Healing of Experimentally Induced Wounds... Reasearchgate (LINK)

Wound Healing Through the Ages, Indian Journal of Plastic Surgery (LINK)

The History of Vinegar and of its Acetification Systems, (article) Archives Des Sciences, 2009, 62: 147-160

Four Thieves Historic Anti-plague remedy, Kitchen Doctor (LINK)

Four Thieves Vinegar by Kami McBride (LINK)

PS: in the LisaLisa Club members area there is a section on making (and using) vinegar tinctures. If you think you’d like to join us, click the picture below to read what’s in it for you.

Witch Hazel: One Name, Different Things

Lise

I get all sorts of interesting comments on my blog posts, and some of them lead to new acquaintances as well as learning new things.

Today's post is one such example.

Penny posted comment on an previous post about witch hazel hydrosol that prompted me to get in touch with her and ask for more information. As it turned out, she had loads to offer because she and her husband happened to be artisan distillers of pulp free, botanically certified witch hazel.

After our communications, Penny graciously allowed me to share what I learned from her.

Witch Hazel isn't Just Witch Hazel

Depending on where you live on the planet, witch hazel is different things.

To North Americans, witch hazel is a bottled liquid sold in drug stores as an over-the-counter medicine for skin irritation.

In my (European) experience, I have never come across a product called 'witch hazel' in a drug store – bottled or otherwise. One might find dried twigs and leaves of the plant available in some specialist shops, or find a hydrosol (steam distillation) available from some herbalists or cosmetic ingredient suppliers.

There's a reason for this, and today, we're going to take a closer look at why.

One Plant – Many Applications

The botanical name for witch hazel is Hamamelis Virginiana. It is one of the most widely used plants in the world. You will find it in products for internal as well as external use, in pharmaceuticals as well as cosmetics.

There are three primary types of processes and witch hazel products, each using a different part of the plant and different processing method:

  • Tinctures (made with alcohol and distilled)

  • Witch Hazel USP (where it is allowed to make medical claims)

  • Witch Hazel INCI (for cosmetics use)

Witch Hazel Tincture

A tincture is made by adding witch hazel bark, twigs or leaves to pure, fine grain alcohol where it is allowed to infuse over a period of time. The resulting product is a concentration of actives in an alcohol base. A witch hazel tincture can be used both externally and internally. Taken internally, it helps control diarrhoea, reduce inflammation and promotes a healthy digestive tract. Applied externally, it encourages healing of bruises, sprains, and even bleeding haemorrhoids. Tinctures are most commonly found in specialty stores in the USA and Canada.

Witch Hazel - USP (United States Pharmacopeia)

Witch hazel for use in American pharmaceutical products is referred to as USP. There are numerous production processes which will each give varying properties to the end product. The American Pharmacopeia calls for use of 'dormant twigs' for the production of USP witch hazel. (see the complete description of requirements here) http://www.pharmacopeia.cn/v29240/usp29nf24s0_m89070.html

Witch Hazel - INCI (International Nomenclature of Cosmetics Ingredients)

This is witch hazel for cosmetics use and is commonly a steam distillation using the leaves (or in Europe, and/or the flowers). Sometimes, alcohol is added to the end product.

Penny, who is in the USA, explains:

In the USA, the FDA does not include leaf distillation in its cosmetic manufacturing standards.

In 1994, the FDA declared they were "changing the name of the ingredient 'Hamamelis water' to 'witch hazel' in the final monograph for OTC (over-the-counter) astringent skin protectant drug products.' Read the entire document here.

This places witch hazel for cosmetics use in a sort of limbo-land, making it impossible for American consumers to know whether the witch hazel they are buying is a distillate from leaves or a diluted version of a USP distillate with alcohol.

Witch Hazel Production Methods

The world's leading producer of witch hazel is American Distilling, Inc. Located in Connecticut USA, they produce witch hazel that is exported around the world and used in everything from salves and creams to toothpastes and shampoos.

It is reported that industrial witch hazel is made using the entire tree rather than the dormant twigs (which is called for in the prescribed formulas - link). Although it might sound like a good idea to use the whole tree, this actually dilutes the end product considerably as the actives are concentrated in the leaves and dormant twigs.

Traditional Witch Hazel Production

Traditionally, the witch hazel wood is cut in such a manner that the plant can grow back. As one might imagine, re-harvesting the same trees over a period of time is not just environmentally friendly, but Penny explains it is also practical.

Modern Witch Hazel Production

American Distilling's website (LINK) states that the tree is 'cut to the stump, then chipped whole and delivered to the factory'. (Edit: this information was on their website at the time of the original post in 2013 but has since been removed)

Penny offered these thoughts on this production process:

"In reality, only about 12 % of the tree is bark, which – while not the legally required twigs – still contains some active ingredients. What puzzles me most is that pulp wood is not a legally accepted ingredient for any witch hazel formula in any country, yet the witch hazel factory in Connecticut gets deliveries of at least 300 tons of pulp wood every year.

Since the annual production of witch hazel USP runs in the neighbourhood of 3 million gallons, a whopping 20 million tons of witch hazel twigs would be required. I have to wonder if commercial witch hazel contains any active ingredients other than alcohol."

Penny told me she even contacted the FDA about this and was both surprised and disappointed with what she learned:

"They reported that there was no audit of raw-materials-to-final-product to insure the formula was being followed. In other words, the witch hazel may or may not be consistent from product to product. The FDA will test for solvents and alcohol – but not the active ingredients or phyto (plant) chemicals".

The European Pharmacopeia Standard(s)

In Europe, there are variations on the standards – each depending on the individual country's pharmacopeia. For a detailed report, read the European Assessment Report of the different witch hazel uses and production methods here.

As For Me

The witch hazel I know best and have used throughout the years is a hydrosol (steam distilled plant material using the flowers). My primary source of the distillate has been the French company Aroma Zone who write this about their product which is produced in France.

Concentration

To make 1 liter of hydrosol, 0.2 kilo of aerial parts are necessary, we speak of a ratio of 1/5. This extraction ratio, lower than that required for most other hydrosols (1/1), is necessary because this hydrosol is obtained from dried flowers that are much richer aromatically. So in this case this ratio makes it possible to obtain a pleasant olfactory result and to ensure good conservation of the hydrosol.

Visit the page here.

More

Visit Penny's website right here

Find organic Witch Hazel hydrosol at Aroma Zone here.

Do Tell

Do you work with witch hazel under any form? Please share which in a comment below.

Easy Rose Exfoliating Paste

Lise

This simple exfoliant ticks all of my favourite boxes:

  • All natural (read: plant-based and organic)

  • Vegan-friendly

  • Beginner-friendly

  • Gentle

  • Effective

  • Planet friendly

  • Reasonably priced

The best part? It contains a mere 3 ingredients – one of which I know you have already guessed.

Are you ready to make your own rose exfoliant?

It Starts With Rose-Infused Oil

This product begins with your own rose-infused oil, so if you don't happen to have one brewing, you can learn how to make one right here.

If you have followed me for a while, you will probably know I have been making rose-infused oils for many years.

With that in mind, I'm almost embarrassed to tell you this next part.

Up until 2018, I discarded the spent plant material after straining my rose infusions.

(insert shock-faced emoji here)

But when my batches (finally) started resulting in the most heavenly fragranced oil, it became physically impossible for me to toss the spent material.

Then it hit me: Repurpose!

Instead of tossing the roses, I turned them into a luxuriously fragrant exfoliant. Here’s how easy it is to make your own.

Making Rose Exfoliating Paste

After straining your rose infusion, you are left with a straining cloth full of roses with some residual oil.

  1. Place the oily roses into a chopper/grinder

  2. Pulse until you have a paste

  3. Test the texture for the skin feel you like and if necessary, keep pulsing/grinding until you are happy with the texture

  4. Transfer the paste to a jar

  5. Label and date the jar

  6. Keep the contents free of moisture and use within 3 months (alternatively, add a preservative if you want to be able to dip wet fingers into the jar and use with abandon)

Here's what it looks like straight out of the jar. This paste makes a lovely hand exfoliant without the addition of anything else, but you could also add some fine himalayan pink salt to extend the amount and turn it into a luxurious rose body exfoliant.

Enjoy!

Do Tell

What do you do with the spent plant material from your oil infusions?

Want to incorporate your essential oil blends safely into a series of fabulous bath products? The e-book below might be just the thing!

Almost Accidental Jasmine Enfleurage

Lise

Look what happened to be growing over the fence from my neighbour around the end of August. These beautifully fragrant jasmine flowers were picked the same day they flowered. I know because I had been eyeing (what I could see of the plant) with great interest.

This ‘haul’ of 10 blossoms was carefully spread out to dry in my lab. The next day, a new bunch showed up and was promptly plucked. This went on for a little more than a week (I stopped counting). I picked every blossom I could with a clear conscience as only a very small area of the plant had decided to grow near enough for me to reach.

The entire batch was a relatively modest amount (about 100 flowers in total), but the fragrance was quite powerful.

And as I brought them into the lab to dry, there were other lab things going on… like little swatches of freshly made balms undergoing a bit of scrutiny.

The Enfleurage Urge

It has long been one of my desires to learn proper enfleurage. I’ve read a bit about it and listen with great interest to those who practice it and are willing to share their wisdom and experience with me.

Enfleurage originated in France in the 1700’s and is a perfuming technique used to capture the scents of plants that are otherwise hard to capture by distillation or maceration. There are several different enfleurage methods that can be employed. One method calls for freshly picked blossoms being placed ‘face down’ on – or very near – a thin layer of neutral smelling fats in a special container/tray. They then ‘breathe’ their fragrance molecules onto the fat layer. Blossoms are replaced regularly until the fat is satisfactorily fragrant.

With this method in mind, a couple of balm swatches became impromptu fat layers for some jasmine flowers.

Guess what?

Even without the correct equipment, the scent transferred beautifully.

To be sure my own nose wasn’t playing tricks on me, I brought one of the balm swatches (sans flowers) to my husband and asked him what he thought it smelled like. He immediately said jasmine (wrinkling his nose a bit as he doesn’t much like jasmine).

Doing proper enfleurage just got bumped up my to-do list.

Do Tell

Have you ever tried enfleurage? Which flowers and method did you use?

More Enfleurage Stuff

The inspirational Jade Forest on Enfleurage (LINK)

My interview with Jade (Jade Grows her Own Perfume) on this blog

A previous enfleurage attempt using lilacs in coconut oil (LINK)

Want to make your own balms? Below is my ebook about natural balms. Click the picture to learn more about what’s included.

Rose-Infused Oil With the Cold Infusion Method

Lise

Today, I'm going to show you how I make cold-infused rose oil. And if you decide to make your own, I'll show you how to use the leftovers to make another product in an upcoming post.

Are you a little excited?

Excellent!

Let's get busy!

The Rose Quest

Apart from being a major fan of rose hydrosol, essential oil, powder, wax, and every other imaginable kind of rose I can get my hands on, I have also experimented with infusing rose into different fixed/carrier oils for quite some time.

Powder, dried petals, and dried buds of different types from a variety of different suppliers around the globe have made their way into my infusion jars.

The reason is simple.

I've been on a quest to

  • find which precise combination of oil and rose type produce the most fragrance

  • find optimal infusion time

This is admittedly a self-appointed 'against-all-odds' kind of a challenge. A cold oil infusion with rose doesn't generally produce much in the way of scent.

But, on occasion I have produced a very discernible and pleasant fragrance. And every good result has inspired me to continue and try to optimise even further.

So here are a few of my best cold infusion tips.

Infusing Oil with Dried Rose: Optimising the Fragrance

The solution is deceptively simple: use quality raw materials from start to finish. There is, of course, a hard part or this wouldn't have been an ongoing quest.

The hard part is finding the roses.

Now, I know there are a lot of suppliers who deliver top quality, but there's an additional factor.

Even though we are infusing dried material, we are looking for the freshest (read: most freshly-harvested) and most recently dried material. And that's the hard part, because the really fragrant rose types have a short season.

Therefore, if you are not growing, processing, and drying your own roses, your best bet is to source from producers of the raw material.

In my experience, many producers of dried roses also happen to be distillers of hydrosols and essential oils. Look for a company that specialises in rose products. Not only are they the folks who will be able to deliver the goods, but they are also passionate about what they do and therefore knowledgeable about the material.

Which roses are the most fragrant?

  • Rosa damascena (damask roses)

  • Rosa Centifolia (cabbage roses)

You could in principle use any roses you choose, but if fragrance is your goal, look to these first.

That said, I've also had some pretty good results with dogwood roses/wild roses (rosa canina) when I have had occasion to forage and dry them myself.

Which Oil to Use

As for oils, there are numerous possibilities that will provide a good result, but as a general guideline choose an oil that has

  • Long shelf life

  • Neutral scent

  • Function you like, want, and need

  • Skin feel you like, want, and need

There are several oils that fit this category. My personal faves are

  • Sweet Almond oil

  • Apricot Kernel Oil

  • Jojoba

  • Fractionated Coconut Oil*

  • Castor Oil

*this oil has no nutrients to offer in the way of skincare, but does have a very long shelf life and is quite forgiving to work with

Feel free to use any oil you prefer, but if you are on a fragrance-capturing quest, start with something from the list above.

So, now that you have sourced your dried roses and chosen your oil, you're ready to get busy infusing!

Here is the formula:

LisaLise's Rose Infused Oil

Ingredient Percent
Oil of Choice 84.5
Dried Rose 15.0
Vitamin E Antioxidant 0.5

Method

Choose a container size that fits with your batch to avoid too much 'air headroom' in the jar.

  1. Weigh ingredients

  2. Place ingredients in a sanitised container

  3. Place lid on container and label with date and contents

  4. Allow to infuse for 4-8 weeks at room temperature. Place the container where the temperature does not fluctuate very much. Some prefer placing a cloth of some type over the container.

  5. Agitate the container daily (and tell it how pretty it is to make it feel good)

  6. Strain through tightly woven cloth (muslin or layers of cheesecloth)

Pictured above: organic sweet almond oil infused with rose. That golden color came about after 6 weeks of careful pampering (read: daily agitation and whispering sweet nothings at the infusion in progress).

Coming Up

Next time we get busy with rose, we'll use the leftovers from the infusion to make a brand new product.

Do Tell

Have you been successful capturing the scent of roses in an oil infusion? Please feel free to drop a comment below!

Want more oil infusion fun? The book below shows you how to make oil infusions with the heated method (as well as how to make your own stunning balms). Click the picture to read more.