Contact LisaLise

Please use the form on the right to contact LisaLise.

Majestic Court 5, St. Mary's Street
Mellieha
Malta

LisaLise offers online education of natural plant-based cosmetics via e-books and courses

LLBlogHEADER2020-3.gif

Shop Blog

A look inside the LisaLise natural cosmetics lab with free formulas, DIY how-to's, ingredients tips, sneak peeks, and more.

Filtering by Category: Butters

Easy Whipped Shea Butter

Lise

Over the years, I have used shea countless ways - in emulsions, melt-and-pour products, bars, bath products, hair products, and a plethora of skin care products.

Along the way, there have been lots of opportunities to experience fails, and there have been many, but I have also learned from every single one of them.

A lot of formulators have a love/hate relationship with shea butter. While that’s perfectly understandable, I find it has far too much to offer in the way of skin and hair care to be dismissed simply because it can be fiddly to work with.

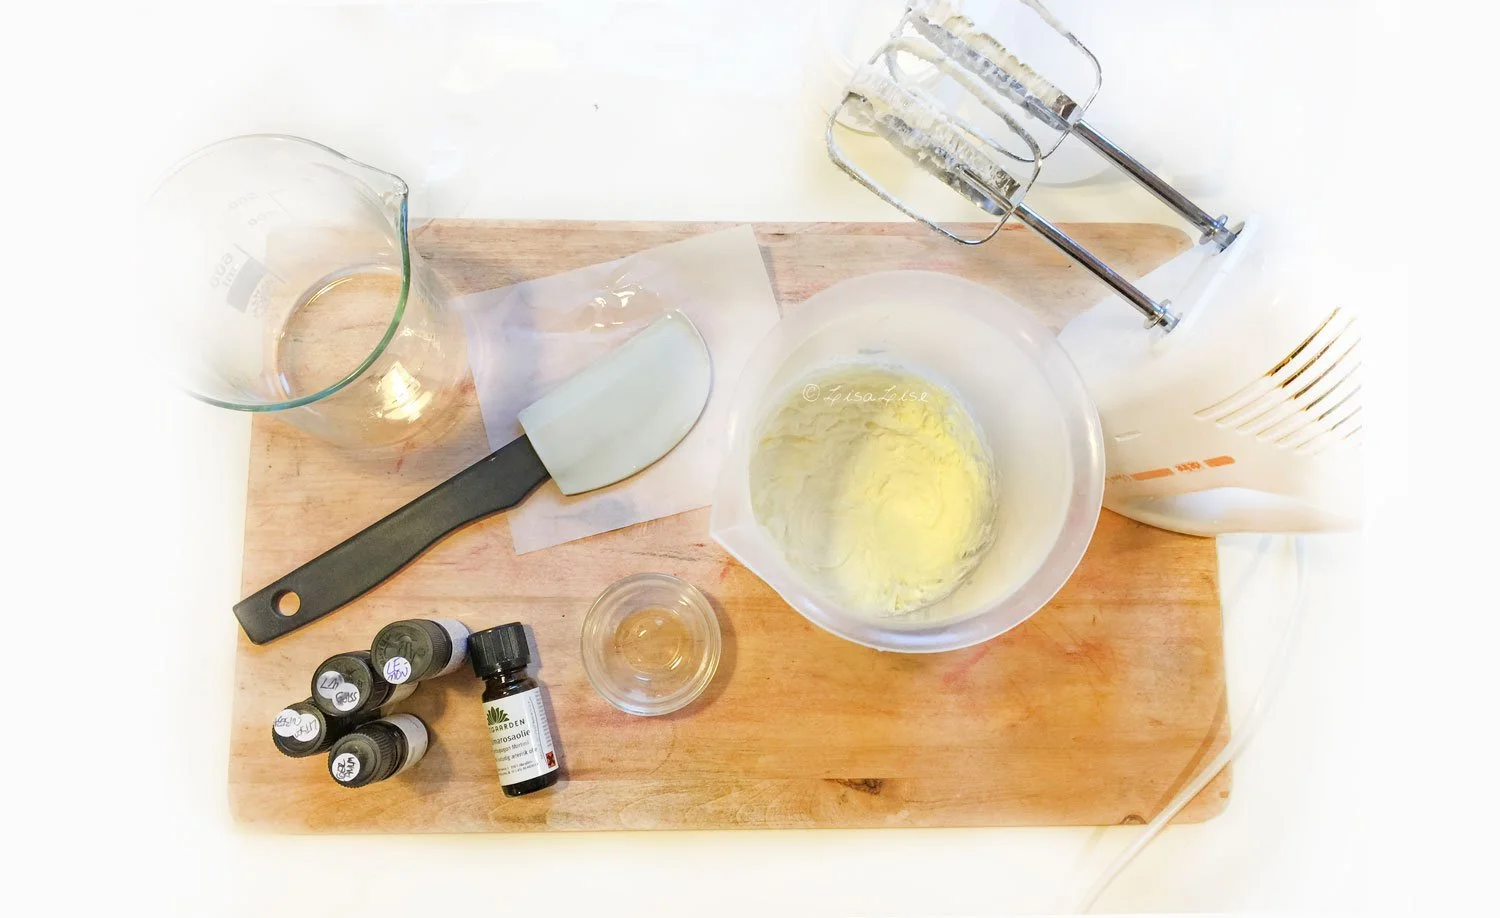
Today, I'm going to show you a beautifully simple whipped shea that works for me every time so even if you are new to working with shea, this might be a great way to get acquainted with this wonderful skin-and-hair-loving ingredient.

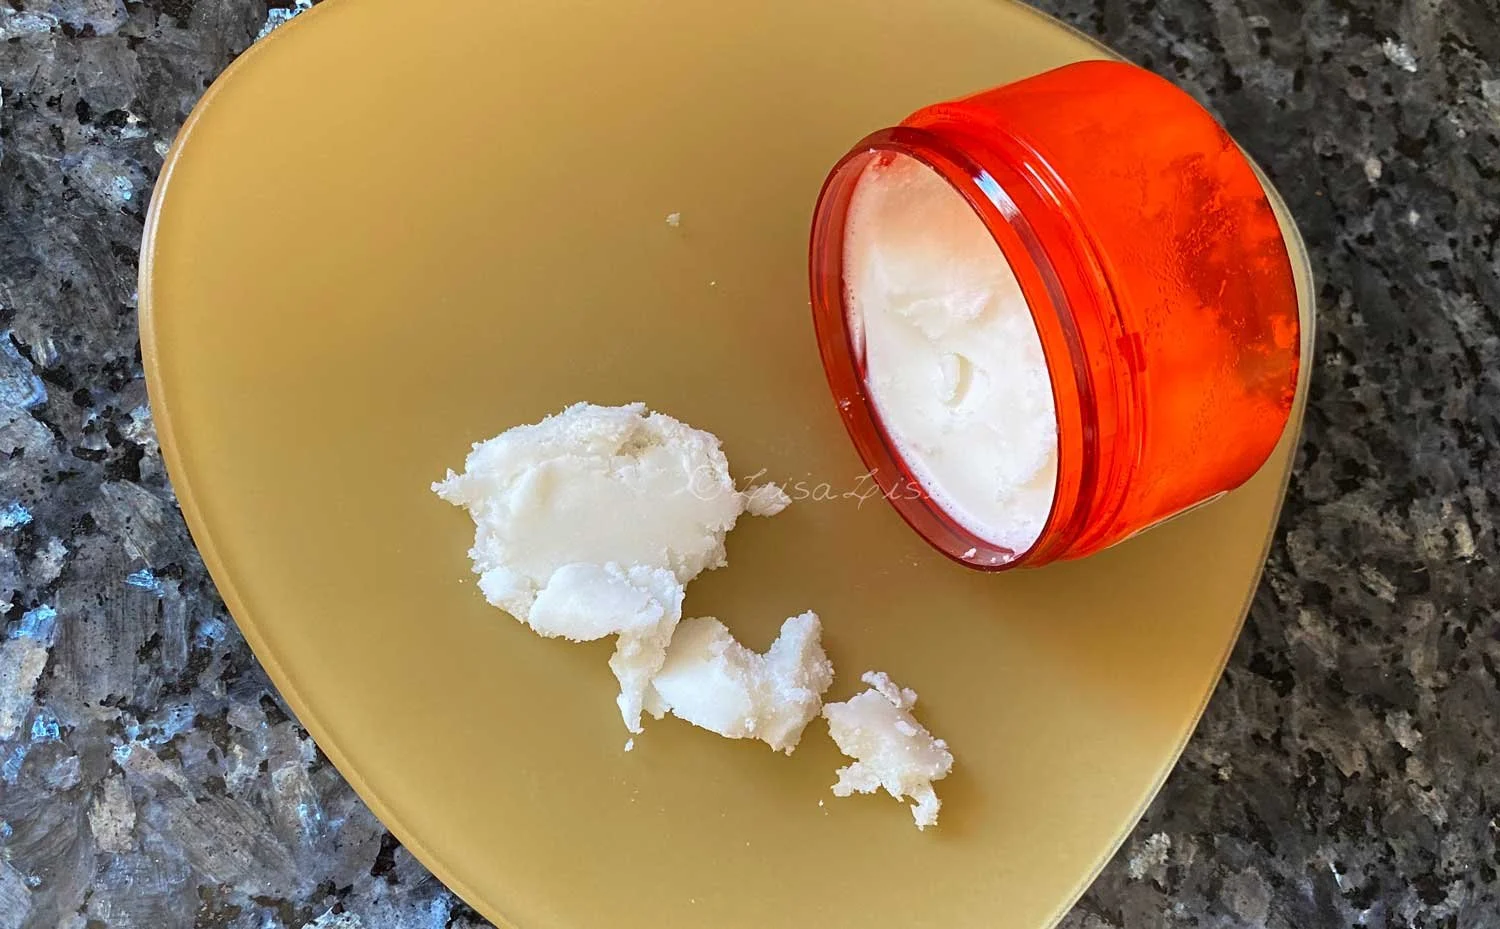
You can use either refined or unrefined shea butter, but be sure the butter is at room temperature and has a creamy, grain-free texture before you start.

LisaLise's Easy Whipped Shea

Ingredient %
Shea Butter 80.0
Jojoba (oil) 18.0
Antioxidant of choice 1.0
Essential Oil Blend (optional) 1.0

If you don't want to add essential oils, adjust the amount of jojoba accordingly.

Method

  1. Sanitise your equipment and work area

  2. Weigh oil and warm to 40°- 45°C

  3. Weigh shea and cut into small uniform pieces and transfer to 'whipping container' (choose something tallish that has room for your mixer blades)

  4. Transfer oil to shea

  5. Whip the mixture. Start at a low speed, then increase until the mixture is homogenous and light (2-4 minutes - depending on batch size)

  6. Add antioxidant and (any) essential oils

  7. Whip the mixture again until the consistency is light and airy (1-2 minutes).

  8. Transfer the mixture to your final container.

It's ready!

Note the difference in color of the final shea - that wasn’t due to whipping, but to the essential oil blend I added.

Over the next 24 hours the butter will ‘set up’ a bit, but will still be light, yet stable. You should be able to easily dip into the balm without having to 'dig’ it out.

A Few Whipped Shea Uses

This simple product is ideal for numerous things! Try it as

  • Hand & Cuticle Cream (a little goes a long way)

  • Foot Softener (apply after a footbath and don a pair of cotton socks for at home foot spa luxury)

  • Dry Hair Tips Conditioner (rub between hands and apply to tips of hair)

  • Body Cream (apply after bath for super soft skin)

  • Deep Moisturising Night ‘Cream’ (apply after your evening cleanse and massage in gently)

Do Tell

Have you ever made a simple whipped shea? What did you use it for? Please share in a comment below.

Lab Tips: Cleaning Away Fats

Lise

Any anhydrous mixture with a large percentage of butters and/or waxes is inevitably going to leave a layer of product on your equipment that can be a major chore to remove.

Fats and waxes don't just magically melt away with a bit of detergent and water - especially if they have had time to set up and cool. And your water pipes will thank you for not pouring melted fats and waxes into them because they WILL harden into a clogged mass and cause all kinds of plumbing hell that costs a fortune to repair (can you tell I speak from experience?).

So today, I’m going to share a simple and effective way to clean your containers and tools after making a batch of balms, solid lotion bars, or other fat-rich products without causing plumber anxiety.

Work Fast and Work Warm

While containers and tools are still warm, wipe away excess product with a paper towel (or 2).

To work warm, you have to act immediately after pouring. While this is easiest from a cleaning perspective, it’s not always possible, so if your equipment has cooled and the product has stiffened up and set, gently reheat just enough to where you can easily wipe away the fats.

If you have been using a water bath, it’s just a question of placing the container back over the warm water briefly. If your heat source has cooled in the meantime and you happen to have a microwave available, place any (microwave safe) containers in the oven and do a few short bursts of heat to soften and remelt the product so it can be wiped away.

Don’t Skimp on the Paper Towel

With beakers or glass containers, wipe the inside with paper towel to remove as much excess as possible.

Do your best to remove everything (read: change the paper as often as needed). I generally use between 3-5 sheets of paper towel for each beaker.

When your beaker (or glass container) looks like this (slightly frosted), it is relatively easy to clean away any remainder with ordinary detergent and hot water.

Some folks have suggested saving the fatty paper towels to use as fire starters. I think this sounds like a useful idea but am not a fire starting expert, so if you have tried this or have any additional tips, please feel free to share!

Every Last Bit

Finish the cleanup process with a pass of boiling water (or dip into a basin of boiled water) before drying and storing your equipment. This will remove every last bit of residue.

Alternative Cleanup Methods

You can also use a (70% solution) of isopropyl alcohol to break down fats. Simply spray the solution onto/into the container, let sit momentarily and then wipe the fats away. This may need to be repeated a few times depending on how much there is to remove.

A 70% solution means it is a mixture of 70% isopropyl alcohol with 30% distilled water. If you have access to both ingredients, you can easily make your own .

Baking soda is said to be useful for removing fats but as I haven't tried this on my cosmetic making equipment, I am unsure of how best to use it. Perhaps making a paste with it and applying? If you have tried this please feel free to share your experiences.

Do Tell

If you have any tips for cleaning fats off of equipment, please feel free to share in a comment below.

Plant Butters: Melting Points and Hardness

Lise

There's a world of fabulous plant-based butters available to cosmetic formulators these days, so there's no need to limit yourself when it comes to plant butters. Each butter has its own benefits so depending on the properties you are looking for, you can find the perfect match for your project.

The chart I've made below gives you an overview of a few useful plant butter characteristics.

Butter vs Oil

All butters and oils are made up of fatty acids, so if you want to get real persnickety, butters could be referred to as solid oils. What makes butters solid and oils liquid is the different proportions of the fatty acids they are made up of.

Butters have a higher content of saturated fatty acids such as

  • Stearic acid

  • Palmitic acid

  • Myristic acid

  • Lauric acid

(there are many more saturated fatty acids - check the link below for a complete list)

What Melting Point Means

Melt point temperature doesn't mean the butter will be completely liquid the moment it reaches the listed temperature. Melt point is exactly as it states: the point where the butter begins to melt. You may find when you are melting butters for your project that the temperature will be somewhat higher by the time everything is fully melted. That's worth taking into consideration if you are including heat sensitive oils in your formula.

Butter Melting TIP

  • If you are making lotion bars, balms, or other solid cosmetics, ensure your butter is in small, even-sized pieces before turning on the heat. This can help avoid the mixture reaching a higher temperature than desired.

Butter Chart

Below is an overview of skin-loving plant butters and their approximate melting points (MP) in both Celsius (MP-C˚) and Fahrenheit (MP-F˚)

LisaLise's Plant Butter Melting Point and Hardness Chart

Butter INCI Name MP-C° MP-F° Hardness
Bacuri Platonia Insignis Seed Butter 35° 95° Semi Soft
Cocoa Theobroma Cacao Seed Butter 35° 95° Hard
Cupuaçu Theobroma Grandiflorum Seed Butter 32-36° 90-97° Hard
Illipe Shorea Stenoptera Seed Butter 36° 97° Hard
Kokum Garcinia Indica Seed Butter 38-41° 100-106° Very Hard
Kombo Pynanthus Angolensis Nut Oil Butter 43° 109° Soft
Kpangnan Pentadesma Butyracea Seed Butter 35° 95° Semi-Soft
Mango Mangifera Indica Seed Butter 35° 95° Semi-Soft
Murumuru Astrocaryum Murumuru Seed Butter 33° 91° Semi-Soft
Sal Shorea Robusta Seed Butter 35° 95° Semi-Hard
Shea Butyrospermum Parkii Seed Butter 32° 90° Soft
Shea Nilotica Butyrospermum Parkii Seed Butter (sp. V. nilotica) 25-30° 77-86° Soft
Tucuma Astrocaryum Tucuma Seed Butter 31° 88° Semi-Soft
Ucuuba Virola Surinamensis Seed Butter 53° 127° Very Hard

What About Composed Butters

Although you may have seen some of the butters listed below, checking the INCI and ingredient list will reveal that none of these are true plant butters, but products that are created with shea butter and/or hydrogenated vegetable oil with the addition of the 'star ingredient' oil.

It's perfectly fine to use composed butters as an ingredient in cosmetics. Just be mindful that the characteristics (and ingredients) may differ from supplier to supplier.

A Few Composed Butters

  • Matcha

  • Coffee

  • Macadamia

  • Lime

  • Grapeseed

  • Avocado

  • Apricot

  • Almond

Super Soft 'Butters'

The following are oils that are (generally) solid at room temperature which can (for some products) be handled and processed as if they were butters.

  • Palm Kernel Oil (unrefined): approximate melting point: 28˚C / 82˚F

  • Coconut Oil: approximate melting point: 24˚C / 75˚F

This post has been updated from the original post of February 2, 2015

More about Butters

Visit the Lipid Web

Learn more about fatty acids and oils at the Lipid Academy

The Power of the Seed by Susan M Parker

Fairly Traded Butters from the Amazon (LINK to Rainforest Chica)

List of Saturated Fatty Acids (LINK)

If you’re a butter lover, you might just love the e-book pictured below. It contains several formulas featuring butters.

How to : Shower Shaker Body Scrub

Lise

This came about during a spell of making loads of bath products – partly for Module 1 of the Formulation Course at Tisserand Institute and partly for this book.

Today, I'm going to show you how to make a Salt & Pepper Shower Shaker.

A Shower Shaker is a Dry Scrub for the Shower

We all know exfoliating scrubs, emulsified scrubs and other scrubby things, but have you ever made and used a dry scrub in the shower?

I hadn't either until this idea popped up. In many ways, it sounds a little bonkers to bring a dry scrub into a shower. But I experimented with a few ways to make it work, and this version turned out quite well so I had to share it.

Spoiler alert: despite what it looks like, there's no pepper in this product.

Packaging is an Integral Part of the Formula

Part of getting this product to work is finding/making appropriate packaging. There are loads of possiblities. For this batch, I used a small take-away cardboard coffee cup with a plastic lid that I punched holes in to create the 'shaker' bit. It works like a charm.

These cups hold 100 dl / 3.38 fl oz and are the perfect size for a single use. Even though they are sold as single use, I reuse them a few times. The plastic lid can be reused over and over again.

Shower Shaker Ingredients

There are only 4 ingredients to these shakers and you can pretty much put them together any way you like.

Choose salts or sugars that function well as exfoliants (no flaked salt or anything with sharp edges that might scratch the skin). In the pictured batch I am using fine Himalayan Pink Salt.

The 'pepper' in this shaker is actually coarsely ground hempseed flour bought at a local supermarket. You could also use ground hempseeds, or you could replace it with another herb that gives the mixture a peppery look.

Milk powder is added for a little luxurious extra. I use powdered skimmed milk (from a local supermarket). You can omit this ingredient if you like, or replace it with coconut milk powder for a vegan version.

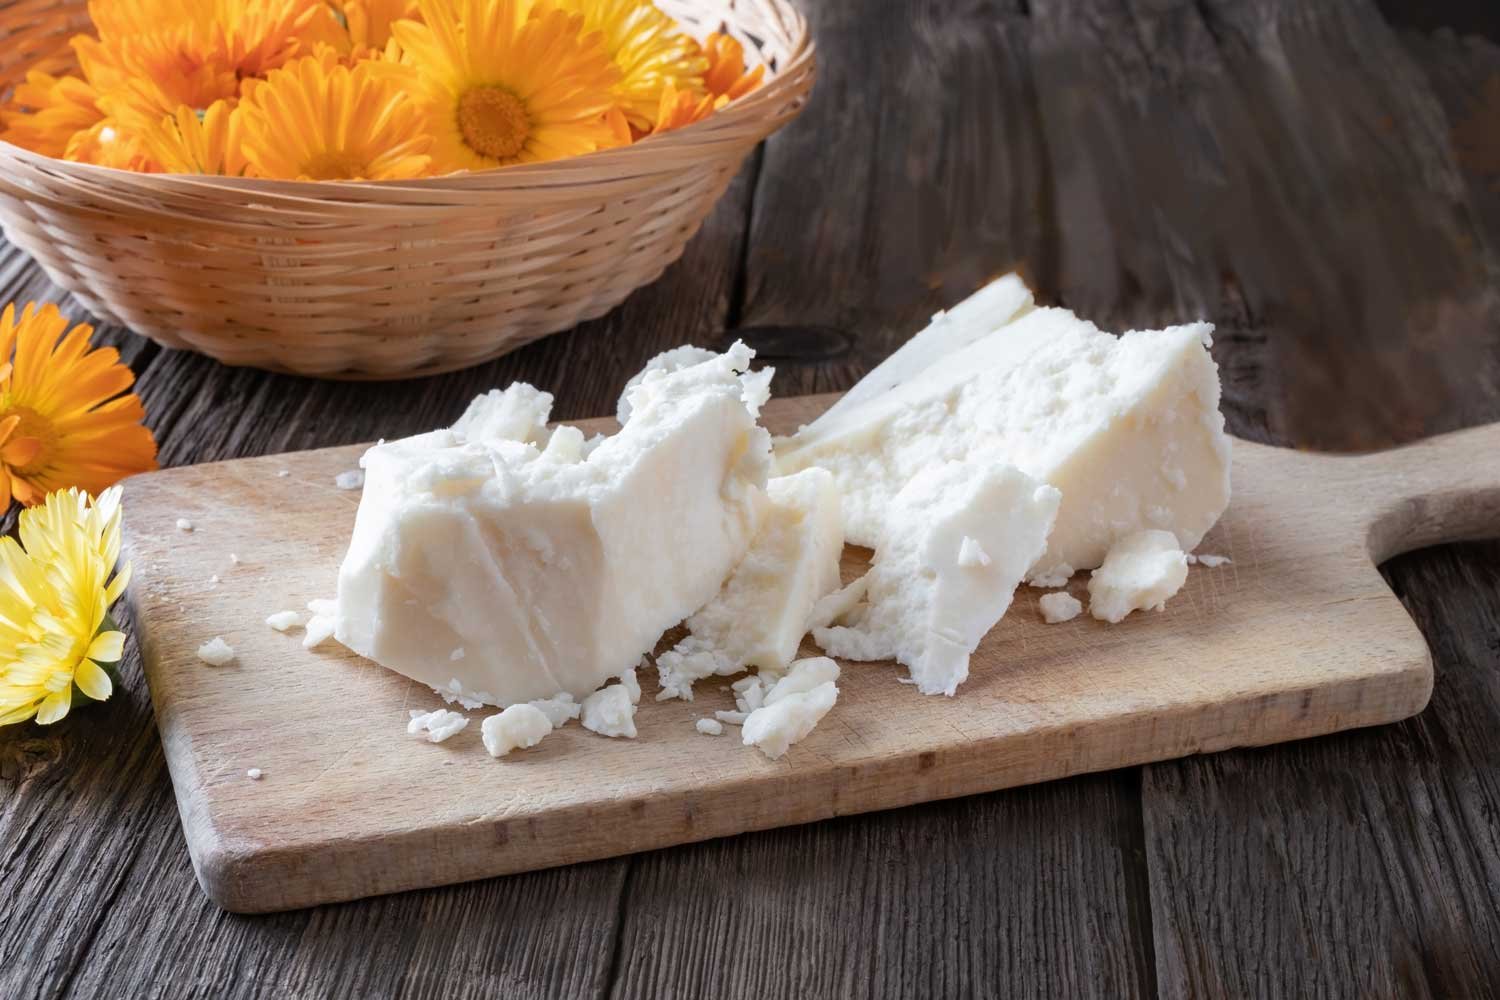
Grated cocoa butter is a little bit of skin-loving magic that gives this mix a fabulous moisturising boost and leaves skin glowing. There's just enough added to moisturise the skin yet not enough to create cocoa butter build-up in your pipes (you're welcome, plumbers).

I've made numerous shaker mixes (both with and without cocoa butter), and every time I've left out the cocoa butter, it exfoliates just fine but just doesn't have that 'fabulous factor'. If you try it yourself, I'm guessing you'll agree.

The cocoa butter should be grated quite finely and distributed as evenly as possible throughout the mixture for optimal results. I know it's a bit fiddly to make grated cocoa butter, but it's worth the trouble.

TIP: Chill the cocoa butter before grating it and immediately store your grated cocoa butter chilled if you want it to remain finely grated and not turn into a lump that needs to be re-grated.

So, are you ready to give this a try? The following is enough for about 5-6 scrubs.

LisaLise’s Salt and Pepper Exfoliating Shower Shaker

Ingredient Grams Ounces
Salts of Choice 255 9
Coarse Hempseed Flour 15 0.53
Powdered Skimmed Milk 15 0.53
Grated Cocoa Butter 15 0.53

Method

  1. Weigh out all ingredients

  2. Place in bowl and stir to incorporate thoroughly

  3. Transfer to air-tight container for storage

Now all you need to do is find/make your ideal shaker container to use when it's time to exfoliate. If you use cups like the one pictured above, it's easy to measure out a few portions by filling a few cups and storing them dry until use. I’ve played around with numerous different types of containers and found most of the work. I’ll be posting more ideas in upcoming posts.

How to use a Shower Shaker

  1. Start by running the water and stepping under the shower to get thoroughly wet.

  2. Now, turn off the water and grab your shaker. Sprinkle enough mixture into a hand for one limb and scrub to your hearts desire.

  3. Repeat until you have exfoliated everywhere and the shaker is empty.

  4. Run the water again to rinse off.

  5. Dry off as usual.

Not only are you exfoliating and moisturising in one go, you are also saving water and sharing a bit of sustainable love for the planet (as well as your utilities bill).

How can that be anything but win-win?

Do Tell

Are you curious enough to give this a try? Please drop a comment and share your thoughts.

PS. The book below is what I was working on when the shower shaker idea came to me.

Kpangnan Butter for Skin and Hair

Lise

That bit of butter up there may not look like much, but it's a treasure trove of hair and skin-loving goodness.

While on a quest for the ideal butter for lotion bars a few years ago, kpangnan literally showed up unannounced on my doorstep (as a small sample packet from a supplier). The timing was perfect – it was immediately incorporated into a small test batch that performed so well that I fell quite in love with it and have been using it ever since. Let’s see, that makes it about 10 years now.

Let's have a look at how what this butter has to offer and find out why it made my lotion bar ingredients list of winners.

Say it With Me

Even though kpangnan butter doesn't have much going for it in the memorable name department, it's actually much easier to pronounce than it than it is to spell.

It's pronounced 'Pan-ya'.

Kpangnan (Botanical name: Pentadesma butyracea) is also known as Kanga, Kanya, Painya, and Akpoto. The tree is native to Central and Western Africa, and the butter is made from the seeds of the (edible) berries that grow on it. Unsurprisingly, kpangnan is also known as the 'African Butter Tree'.

Production of the butter is not unlike the production of shea butter (which is entirely by hand). Kpangnan butter does not require as many steps as shea, but is still entirely hand-produced in local communities.

Depending on where (and how) it is made, kpangnan butter can vary in color - from a creamy white to a rich yellow. It is available both as refined and unrefined. I have only ever worked with raw, unrefined so am unable to offer any input on how the refined butter is. I have however noticed some suppliers offer a 'carefully refined' butter (which may or may not be market speak). The butter pictured above is unrefined and from Aroma Zone.

The Treasure Inside

Kpangnan butter has a content of healing and anti-inflammatory components that makes it ideal for application (but also consumption).

It is also anti-oxidant and is so soothing for skin that it is recommended for sufferers of eczema.

Here are some of the goodies you'll find in kpangnan butter:

  • Vitamin f

  • Omega 6

  • Oleic acid (44%)

  • Stearic acid (45%)

  • Tocopherol (vitamin e)

  • Stigmasterol

That last one may not be as known as the others. Let’s take a closer look.

Stigmasterol is Pure Plant Power

A precursor to vitamin d, Stigmasterol belongs to a group of plant sterols. It has been showing some impressive health-inducing properties in scientific studies (a few links below). Mind you, all of the studies are based on consumption of stigmasterol - not from applying it topically.

Good For Hair and Good Everywhere

Kpangnan is widely recommended for hair care - particularly coils, kinks and curls. Some years ago, while developing a series of products specifically for textured hair, I repeatedly discovered that ingredients recommended for kinks and curls all seemed to work beautifully on my skin. Kpangnan was definitely one.

Kpangnan butter is lovely to work with and a great addition to solid skin care (think lotion bars). It has a relatively neutral scent too (a plus). Because it is not very greasy to the touch, kpangnan butter could even be described as powdery feeling.

Texture-wise, I would place it somewhere in between cocoa butter, mango butter and shea butter.

Kpangnan can be used straight up - right out of the packaging - as a smoothing, non-greasy skincare product. Although it may not work for everyone, I’ve found a small application of kpangnan butter has the ability to put an immediate stop to itchiness on my (ridiculously sensitive) skin.

INCI name: Pentadesma Butyracea Seed Butter

Do Tell

Have you ever worked with this butter? Which product did you use it in, and how did you like working with it?

More Info on Stigmasterol and Kpangnan

Stigmasterol: a phytoesterol with potential osteoarthritic properties (LINK)

PubChem's breakdown of stigmasterol (LINK)

Chemical analysis of kpangnan (LINK)

How to: Green Beauty Soap-Free Facial Cleanser

Lise

We're going to be making a soap-free facial cleanser today. Even if you've never tried making your own skincare products before, this cleanser might be the perfect project to start with. And if you are a practiced artisan, you may still want to give it a whirl because it's such an effective and skin-pampering cleanser.

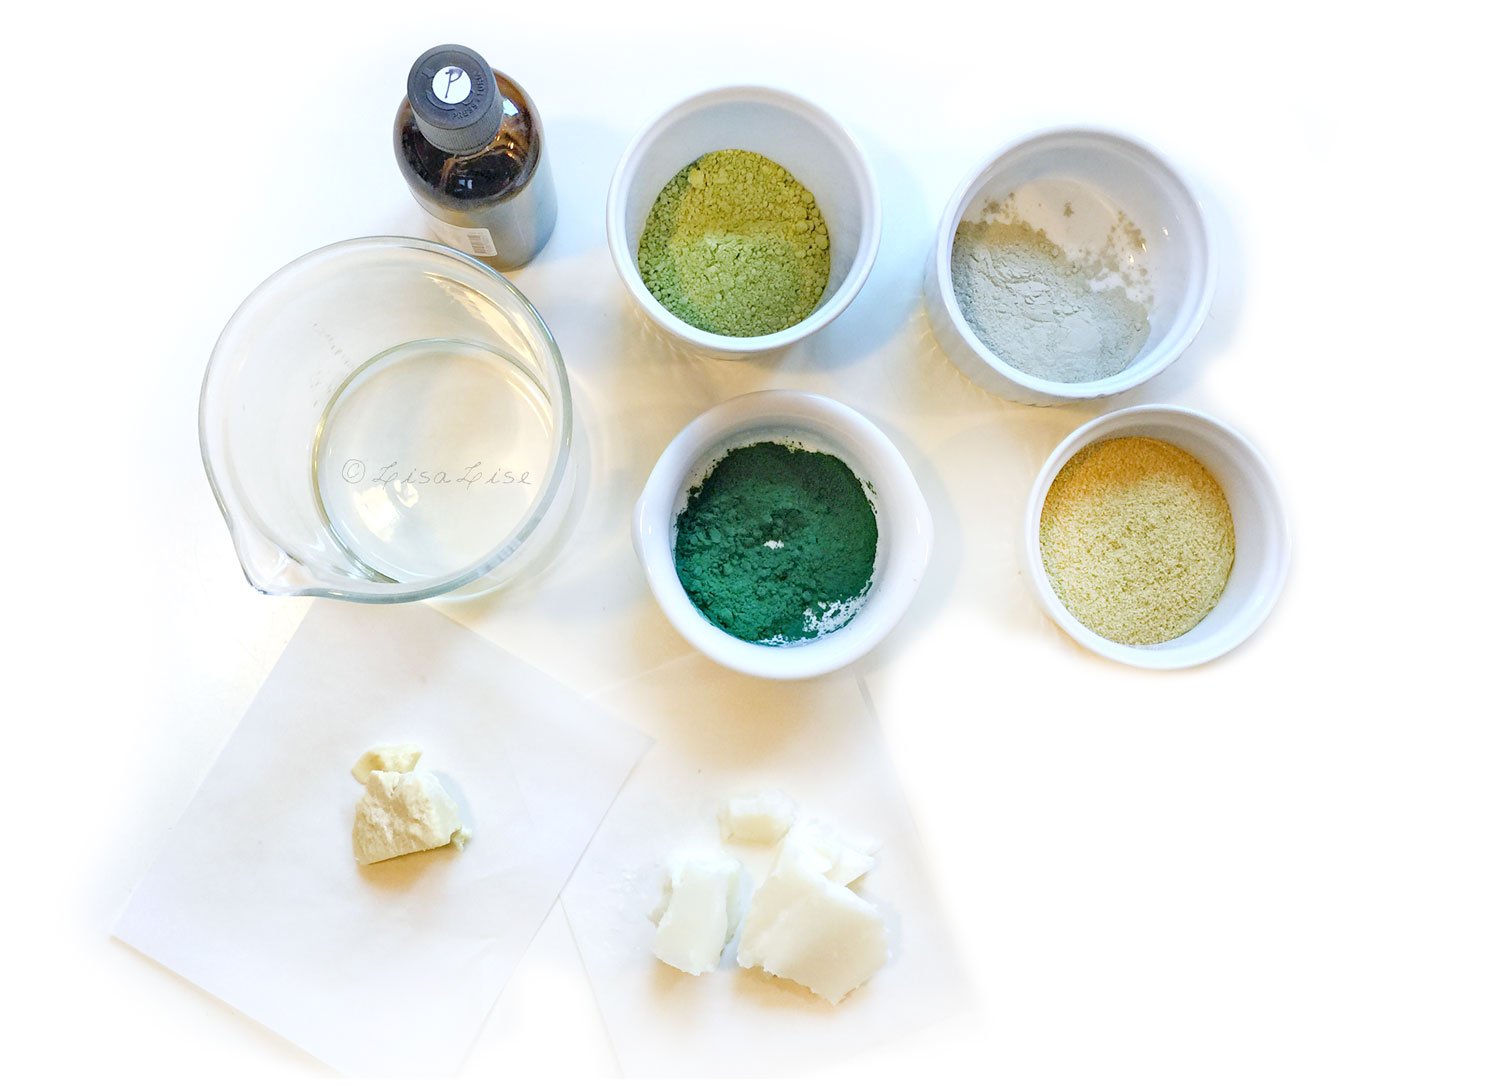
The green beauty cleanser features green clay, spirulina, green tea, and chamomile and is great for normal to dry skin types. I'm betting it also may perform well with combination skin.

Here's how to make 100g.

LisaLise's Green Beauty Soap Free Cleanser

Phase Ingredient % / Grams
A Cocoa Butter 8.0
A Refined Palm Oil 24.0
A Castor Oil 31.0
B Green Clay 12.0
B Chamomile Powder 8.0
B Green Tea Powder 8.2
B Spirulina 8.0
C Broad Spectrum Preservative* 0.8

*I used phenonip, but preservative can be optional - read more below

Method

  1. Slowly melt phase A ingredients over a water bath until they are thoroughly melted

  2. Remove from heat

  3. Add Phase B (dry ingredients), stir to combine thoroughly

  4. Add phase C (this can be optional - read more below)

  5. Pour into container

  6. Chill for 15-30 minutes until set

  7. Add a label (remember the date)

  8. Store at room temperature

  9. Use with unabandoned joy

About the Ingredients

This combo of fats and oils works beautifully on my (mature) skin, and also usually makes the perfect texture (not too runny and not too stiff), but you can replace these with your preferred combination of fats and butters. If you do make substitutions, expect to do a bit of tweaking to get the texture and spreadability to what you like.

The same goes for any clays and dry ingredients you want to replace. In cleansers of this nature, the dry ingredients are going to behave differently depending on what you are using, and the texture of the final product can change dramatically.

You'll have to experiment with what works best for you, but if you're brand new to making this kind of cleanser, I recommend trying the original formula first and then making any desired adjustments or changes in the second batch.

If you have no other options but to substitute one ingredient with another, replace with ingredients that have similar density and/or weight. Example: the refined palm oil might be substituted with illipe, sal or shea butter.

TIP: Be prepared that almost ANY replacement can affect the final texture.

Here’s the cleanser right after pouring up.

Preservative in a Water-Free Product?

Even though this is an anhydrous formula, I chose to add a preservative because of the intended use of this product: moisture does have a chance of being introduced to the mixture during use - most especially if you dip wet fingers into the jar.

If you are willing to be meticulous about using and storing the face cleanser so that no moisture gets in the jar, feel free to leave out the preservative.

I wrote a post about how to know when to use a preservative right here if you want to read more about this.

Using the Cleanser

For a single application, use approximately 1 teaspoon of cleanser

  1. Apply to moistened skin

  2. Massage gently using circular motions

  3. Wipe away with a moistened cloth or cotton rounds

Because there is no emulsifier in this formula, trying to rinse the cleanser away with nothing but water is going to be a bit of a chore (and won't do your water pipes any favours either). For best results, gently wipe off, then finish with a spritz of skin mist.

In my experience, using non-emulsified cleansers allows for a few extra (precious) moments of self pampering, and that just makes the whole cleansing process an enjoyable ritual.

Do Tell

Have you ever made and used a soap free cleanser? What did you think of it? PLease feel free to share in a comment below.
If you’re interested in making self-preserving cleansers and your own self-preserving glycerine extracts, you might be interested in the bundle offer below.

Course Enrolment for Emulsions Essentials at Tisserand Institute now open!

Classes start August 30th, so be quick as a bunny and click the button below to sign up and join me for this 4-week course on hand-stirred emulsions!