Contact LisaLise

Please use the form on the right to contact LisaLise.

Majestic Court 5, St. Mary's Street
Mellieha
Malta

LisaLise offers online education of natural plant-based cosmetics via e-books and courses

LLBlogHEADER2020-3.gif

Shop Blog

A look inside the LisaLise natural cosmetics lab with free formulas, DIY how-to's, ingredients tips, sneak peeks, and more.

Filtering by Category: Formulations

How to Make an Ivy Leaf Hair Cleanser

Lise

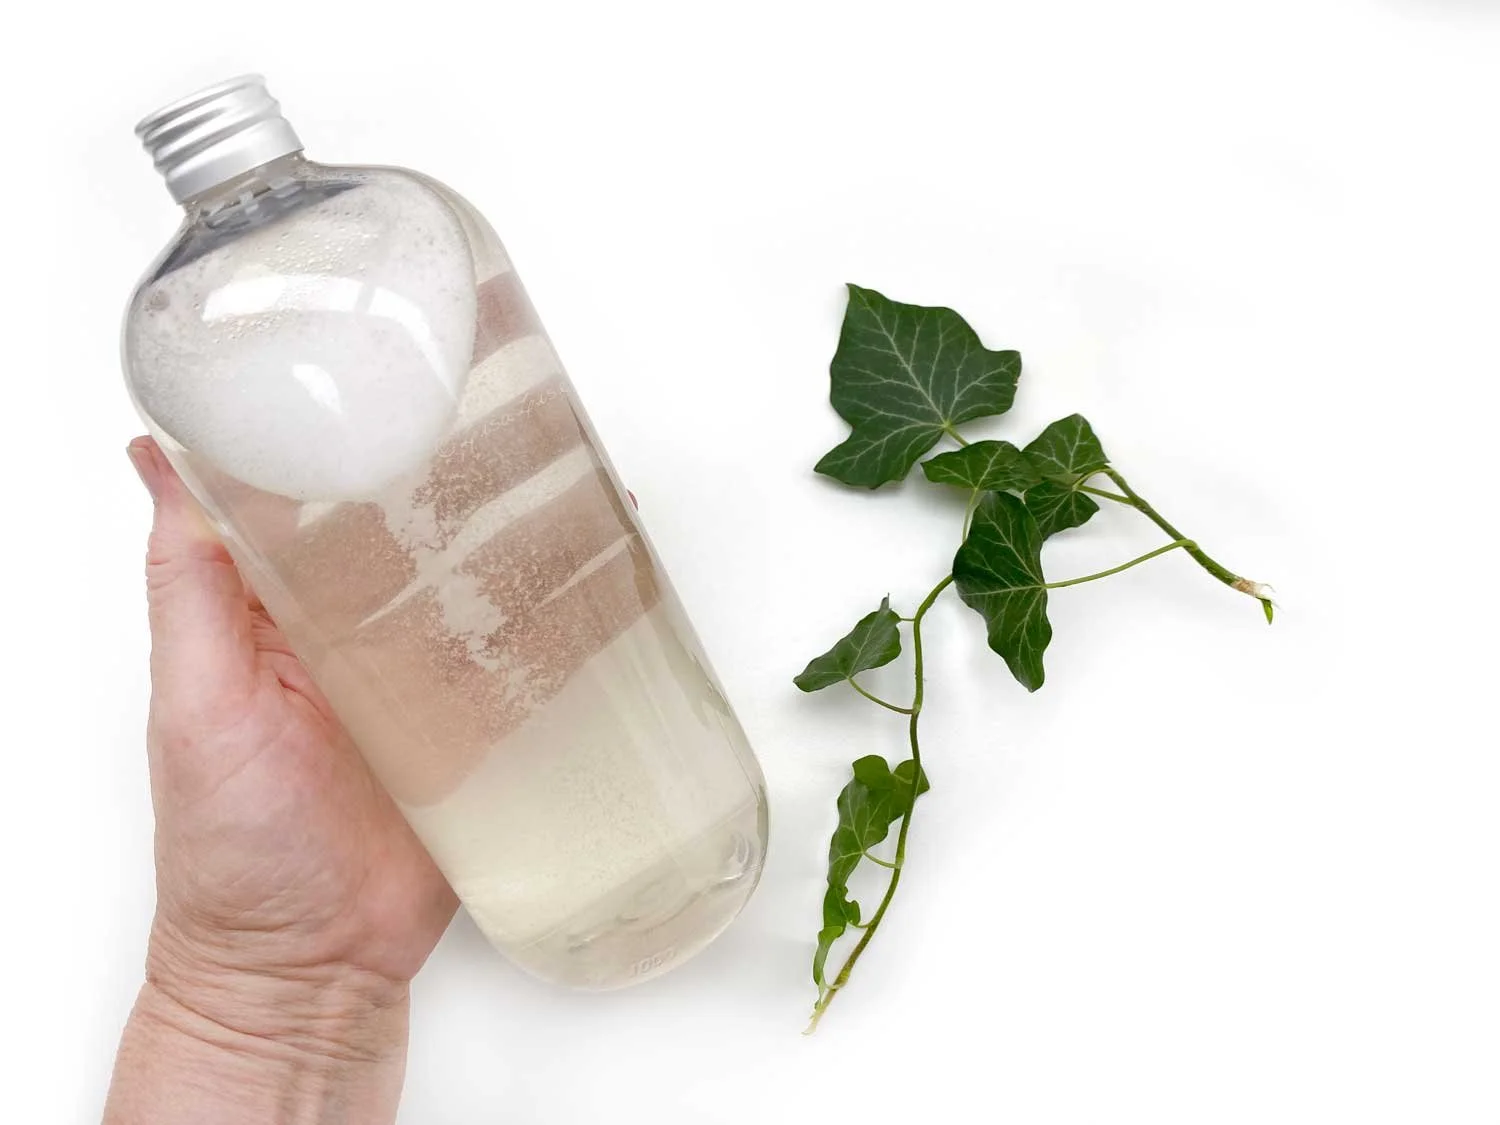
Pictured above: an all natural sudsy liquid that will cleanse your hair and scalp beautifully.

You've probably seen this plant many times and in many places: parks, gardens, fields, forests, and urban areas.

I seem to remember hearing it referred to as 'the architects comfort' somewhere. Perhaps this is because it seems to grow just about anywhere (like, up brick walls) and adds a touch of green and a cozy atmosphere wherever it grows.

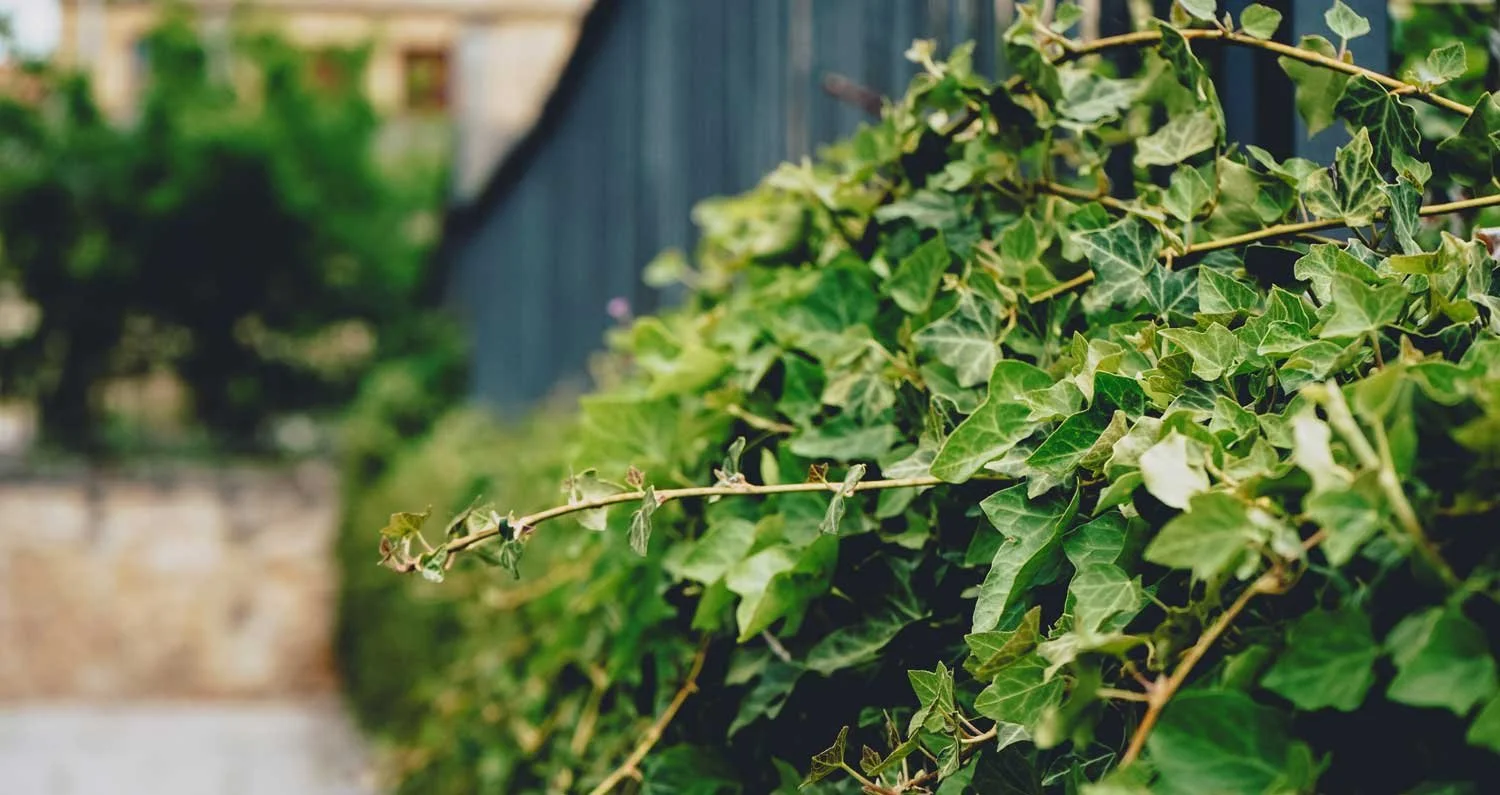
While it is both decorative and hardy, Hedera helix - otherwise known as Common ivy – is also a very useful plant for cleansing due to its natural content of saponins. (The word saponin comes from Latin: sapo means soap).

Ivy leaves can be transformed into an all natural cleanser for numerous things: dishes, laundry, and even your scalp and hair.

There is a slight difference in the method for making laundry and dishwashing liquid (which is more concentrated) as compared to a scalp and hair cleanser.

Today, I'm going to show you how to make your own hair and scalp cleanser with nothing more than a few freshly picked ivy leaves and some water.

Did someone say sustainable, planet-friendly effective hair and scalp magic?

Ivy Leaf Picking Tips

  • Select leaves that are growing up (and not along the ground)

  • Select healthy looking leaves

  • If you are picking leaves from someone’s garden, remember to ask first

  • Bring a small scissors to cut the leaves instead of tearing them off

Batch Size

I usually make a liter at a time (to last about a week), but feel free to make a smaller batch (which will also allow you to leave out the preservative and use regular tap water instead of distilled water)

For a 1 liter batch, you'll need:

  1. Handful of fresh-picked ivy leaves (enough to fill about a third of a container that holds 1 liter)

  2. Demineralised water

  3. Broad spectrum preservative

For a use-the-same-day batch, you'll need

  1. Small handful of ivy leaves (enough to fill about half of a container that holds 200 ml / 16,7 fl oz)

  2. Tap water

Method

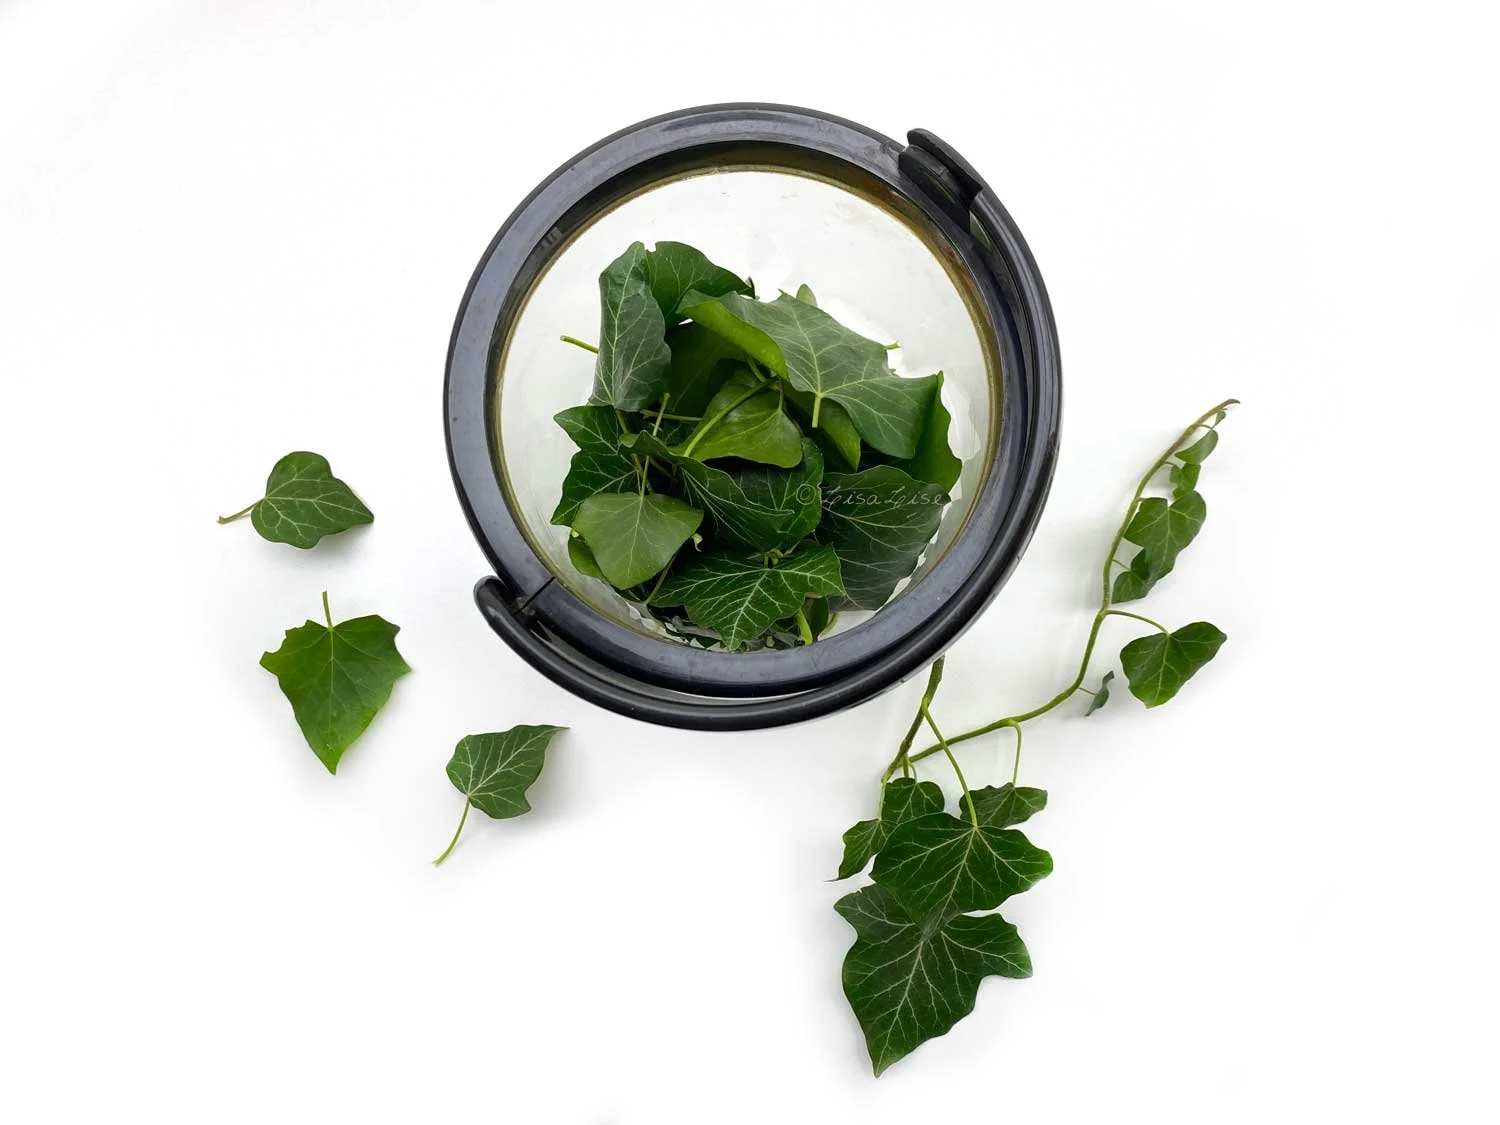
  1. Inspect leaves and discard any unhealthy looking specimens.

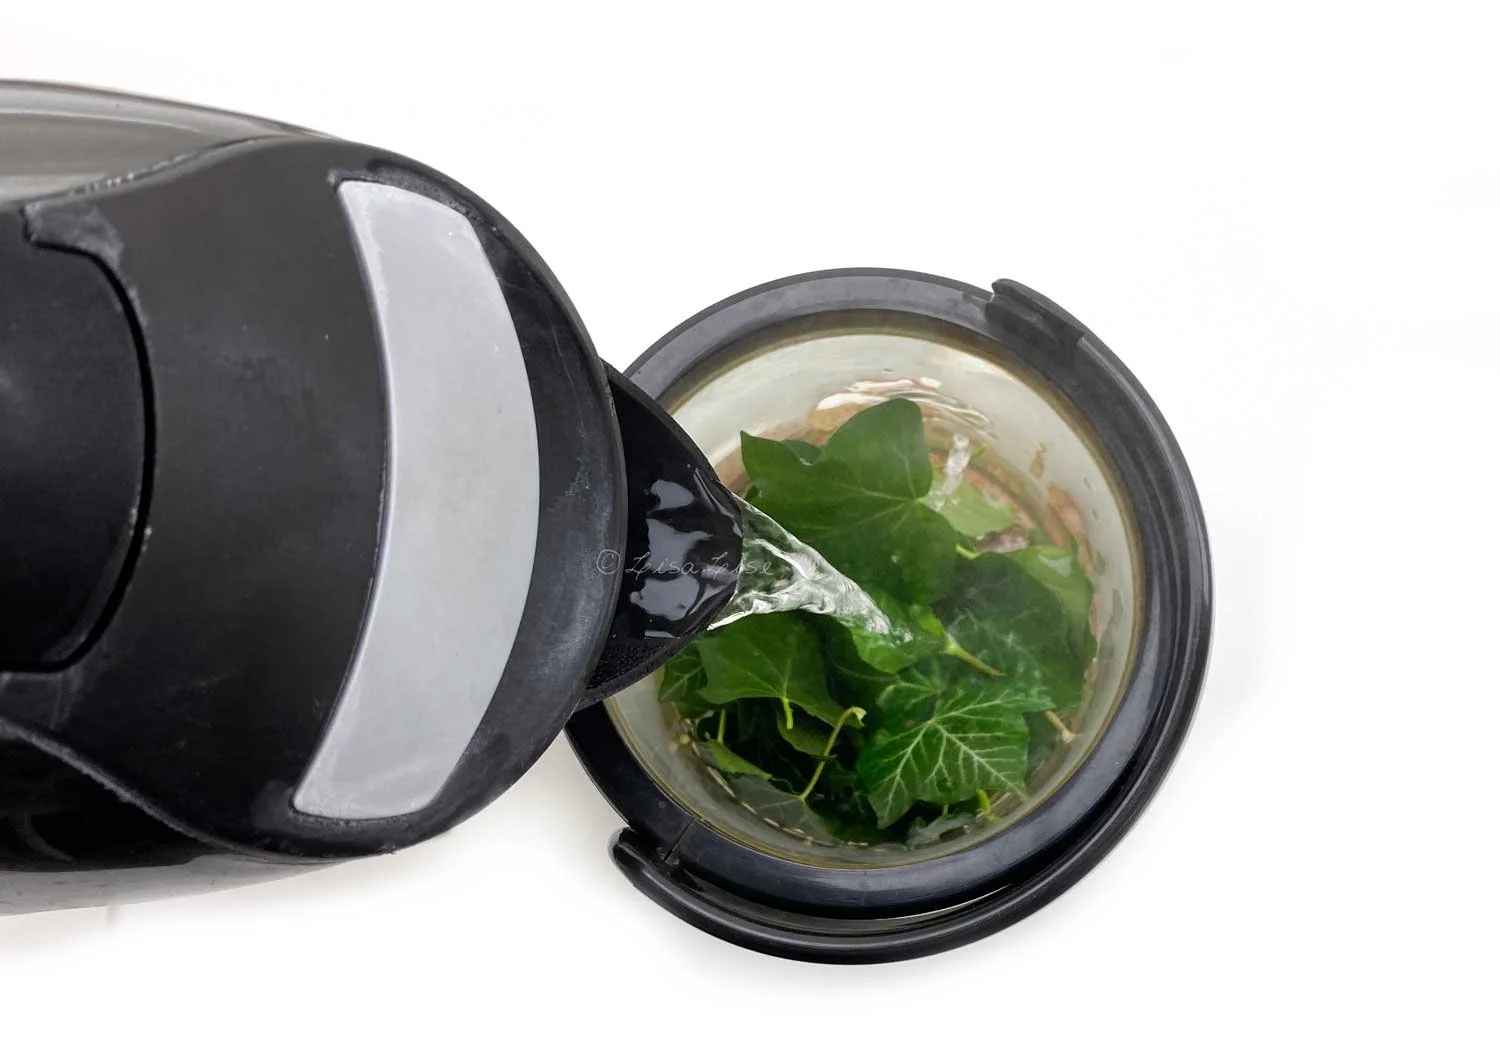
  2. Place leaves in container (do not pack them tightly, just drop the whole leaves into the container)

  3. Boil water

  4. Pour freshly boiled water over leaves

  5. Cover container and allow to steep until the liquid reaches room temperature

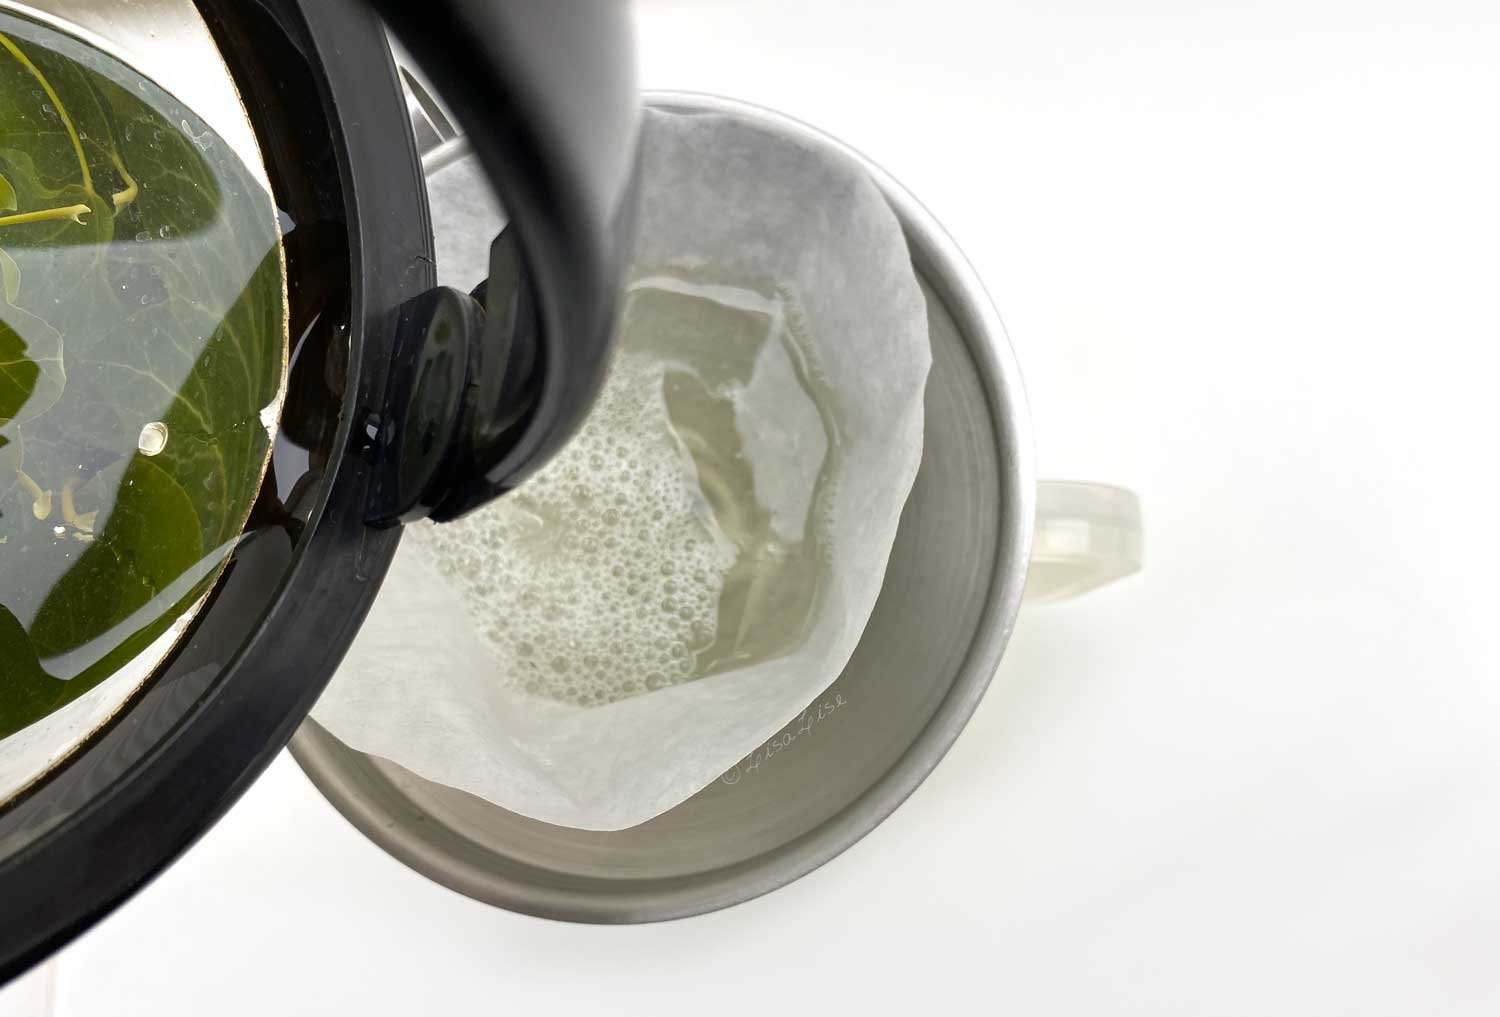
  6. Strain (and use same day if you made a single use portion). Otherwise continue with the next 6 steps below.

If you are making 1 liter:

  1. Weigh the strained liquid

  2. Weigh out appropriate amount of preservative and add to liquid.

  3. Stir to thoroughly incorporate

  4. Check pH (this infusion measured pH 6.0)

  5. Adjust pH if necessary (I generally add a splash of herb-infused vinegar to function both as pH adjuster and hair-shine booster)

  6. Bottle

I used phenonip as the preservative for this 1 liter batch.

How To Use the Ivy Leaf Hair Cleanser

  1. Enter shower

  2. Wet hair

  3. Apply about 100 ml of liquid (for short fine hair -- you may need more if your hair is longer/thicker)

  4. Massage scalp and hair lightly (as you would if you were using a shampoo).

  5. Allow the liquid to sit in hair for about 4-5 minutes (while you finish showering)

  6. Rinse hair

  7. Do a 'squeak test' on your hair. If it doesn't feel clean enough, repeat steps 2 and 3.

  8. Dry and set as usual

No Lather I Gather?

We’ve been taught for generations to equate lather with cleansing, but it is possible to cleanse thoroughly and completely without any lather or sudsing action.

This cleanser may foam up beautifully when you shake the bottle, but it goes on like water and rinses off like water.

Doing a squeak test will reveal that it really cleanses your hair. I’ve experimented a bit with how much it can handle, and can attest that this latherless cleanser even removes my pre-poo hair oil treatment with a mere 2 applications. The secret to optimal cleansing action is letting the liquid sit on the scalp for about 4-5 minutes after massaging and before rinsing off.

Enjoy!

Do Tell

If you decide to give this cleanser a try, I’d love to hear your feedback!

Find More Information

About Saponin Synthesis and Function (LINK)

Saponins and flavonoids in Ivy Leaf extracts (LINK)

Saponin content of ivy leaves (LINK)

Triterpenoid biosynthesis and engineering in plants (LINK)


If you prefer lather in your hair cleanser, then maybe the book below is for you.

How to: Green Beauty Soap-Free Facial Cleanser

Lise

We're going to be making a soap-free facial cleanser today. Even if you've never tried making your own skincare products before, this cleanser might be the perfect project to start with. And if you are a practiced artisan, you may still want to give it a whirl because it's such an effective and skin-pampering cleanser.

The green beauty cleanser features green clay, spirulina, green tea, and chamomile and is great for normal to dry skin types. I'm betting it also may perform well with combination skin.

Here's how to make 100g.

LisaLise's Green Beauty Soap Free Cleanser

Phase Ingredient % / Grams
A Cocoa Butter 8.0
A Refined Palm Oil 24.0
A Castor Oil 31.0
B Green Clay 12.0
B Chamomile Powder 8.0
B Green Tea Powder 8.2
B Spirulina 8.0
C Broad Spectrum Preservative* 0.8

*I used phenonip, but preservative can be optional - read more below

Method

  1. Slowly melt phase A ingredients over a water bath until they are thoroughly melted

  2. Remove from heat

  3. Add Phase B (dry ingredients), stir to combine thoroughly

  4. Add phase C (this can be optional - read more below)

  5. Pour into container

  6. Chill for 15-30 minutes until set

  7. Add a label (remember the date)

  8. Store at room temperature

  9. Use with unabandoned joy

About the Ingredients

This combo of fats and oils works beautifully on my (mature) skin, and also usually makes the perfect texture (not too runny and not too stiff), but you can replace these with your preferred combination of fats and butters. If you do make substitutions, expect to do a bit of tweaking to get the texture and spreadability to what you like.

The same goes for any clays and dry ingredients you want to replace. In cleansers of this nature, the dry ingredients are going to behave differently depending on what you are using, and the texture of the final product can change dramatically.

You'll have to experiment with what works best for you, but if you're brand new to making this kind of cleanser, I recommend trying the original formula first and then making any desired adjustments or changes in the second batch.

If you have no other options but to substitute one ingredient with another, replace with ingredients that have similar density and/or weight. Example: the refined palm oil might be substituted with illipe, sal or shea butter.

TIP: Be prepared that almost ANY replacement can affect the final texture.

Here’s the cleanser right after pouring up.

Preservative in a Water-Free Product?

Even though this is an anhydrous formula, I chose to add a preservative because of the intended use of this product: moisture does have a chance of being introduced to the mixture during use - most especially if you dip wet fingers into the jar.

If you are willing to be meticulous about using and storing the face cleanser so that no moisture gets in the jar, feel free to leave out the preservative.

I wrote a post about how to know when to use a preservative right here if you want to read more about this.

Using the Cleanser

For a single application, use approximately 1 teaspoon of cleanser

  1. Apply to moistened skin

  2. Massage gently using circular motions

  3. Wipe away with a moistened cloth or cotton rounds

Because there is no emulsifier in this formula, trying to rinse the cleanser away with nothing but water is going to be a bit of a chore (and won't do your water pipes any favours either). For best results, gently wipe off, then finish with a spritz of skin mist.

In my experience, using non-emulsified cleansers allows for a few extra (precious) moments of self pampering, and that just makes the whole cleansing process an enjoyable ritual.

Do Tell

Have you ever made and used a soap free cleanser? What did you think of it? PLease feel free to share in a comment below.

If you’re interested in making self-preserving cleansers and your own self-preserving glycerine extracts, you might be interested in the bundle offer below.

Course Enrolment for Emulsions Essentials at Tisserand Institute now open!

Classes start August 30th, so be quick as a bunny and click the button below to sign up and join me for this 4-week course on hand-stirred emulsions!

Footsie Tootsie Balm

Lise

Balms are often associated with cold and winter, but even in the heat of mid summer, a balm can be the best thing imaginable. This one has proven to be a fabulously foot-friendly product - perfect after a long day of holiday sightseeing.

After testing the blend of infused oils and macerated oils featured in this post, the ingredients proportions were tweaked ever so slightly and then made into this balm.

I can attest that it helps soothe my tired, achey and arthritic feet.

The working title of the original oil blend became the inspiration for the name of this product: Footsie Tootsie Balm.

Want to make your own balms? The book below can show you how.

How to Make a Lilac Sugar Lip Scrub

Lise

Remember the lilac sugar we made the other day? Well, get it out because today we’re going to use it to make a sweet lilac lip scrub!

This is a super simple process where you don’t need much in the way of fancy equipment. You can pretty much eyeball all the amounts (but it’s never a bad idea to take notes while you work so you can recreate your fabulous product).

Ingredients List

  • Lilac sugar

  • Oil(s) of choice

Equipment List

  • Bowl

  • Sieve

  • Spoon

  • Jar for your lip scrub

Method for Lip Scrub

  1. Place a small sieve over a bowl

  2. Transfer desired amount of lilac sugar to the sieve.

  3. With the back of the spoon, break up any large bits of lilac to desired size while sifting the sugar.

  4. Add oil and stir to desired texture

  5. Transfer to lip scrub jar

Tips and Tricks

If you want to eyeball everything but still be able to recreate, place the bowl on a scale and set the weight to 0. Add the sugar and note weight. Reset the scale and note the weight of each addition of oil as you work. You can do all the math later as long as you have the right information noted.

I like my scrubs a little on the dry side, while some prefer a very oil-rich mixture. The amount of oil to add is really down to personal preference.

Add a bit of extra flavor to the mix. For my scrub, I combined coriander seed oil, castor oil and a vanilla infused sweet almond oil. The result is very pleasing to use.

This lilac lip scrub makes a beautiful and very personalised gift for a special friend or loved one.

Do Tell

If you decide to make this scrub, please add a comment and share how you personalised yours.

PS: Want to make more scrubs? There are formulas for body scrubs (and how to customise them) in the e-books below.

How to: Fresh Strawberry and Rose Mask

Lise

Strawberry season is coming up in a tick and even though these fabulous fruits are so tasty it's hard not to pop them all in the mouth, all you need is a single strawberry to create this refreshing and super easy skin-hydrating face mask.

Surely you can refrain from eating ONE strawberry, can't you?

Excellent!

Then lets' get busy making this easy and effective fresh food face mask!

Ingredients

1 large fresh strawberry

Powdered rose (approx 1,5 teaspoon)

Kaolin clay (approx 1-2 teaspoons)

Raw honey (approx 1 teaspoon)

Method

Every ingredient in this mask is added 'to desired texture' (no need to weigh out accurate amounts).

The ideal texture is neither runny nor too thick. The mask needs to stay where applied and should be easy to layer on.

I've taken pics throughout the process so you can get an idea of my own mask.

Mash the strawberry in a small cup

Add Powdered rose and stir thoroughly.

Sprinkle in kaolin a bit at a time until you have quite a thick-sh mixture – a bit thicker than you would want to apply to your face.

Add approximately a teaspoon of raw honey and stir until combined.

The final texture should look a bit like this.

There might be a few lumpy bits, but that's okay. If you got the texture right (which I know you will), it won't matter a bit.

To Apply

Remove make-up and cleanse your face.

Pat dry.

See that spoon you used to stir your mask? The back of it is the perfect applicator.

Remember to include the neck when applying a face mask.

Here's what this fresh mask looks like on a face (I used mine for demonstrational purposes). This mask survived walking around (lumpy bits and all) with no dripping or mess.

Remove about 15 minutes after applying. You can pull out the spoon to gently remove the mask. Finish by rinsing thoroughly.

For skin-hydrating perfection, finish with a spritz of rose hydrosol

Enjoy!

Do Tell

Have you ever made a fresh food mask? Which foods did you use?

If you liked this how-to, you might enjoy the the e-books below (in English and Spanish) – they have a section on fresh food face masks!

The pH of Skin - What's Natural?

Lise

Our skin is built up of many layers that are all fascinating to learn about, but today we're 'just' going to scratch the surface – the protective layer – also known as the acid mantle.

Appropriately Named

The acid mantle is the outermost layers of the skin's surface that function as a barrier. The pH of the acid mantle is on the acidic side – more so than previously believed – but we'll get into that in a minute.

One of the advantages of having an acidic layer is protection – keeping bacteria at bay and shielding us from potential contaminants.

Men and Women Differ

A 2001 study showed that women have a significantly lower skin pH than men. So much so, the study concluded that "comparative studies on skin surface pH should be balanced with respect to gender". So, prior to what we used to believe, creating a pH-friendly skin care product that is equally suitable for men and women is going to be a bit of a compromise.

We're More Acidic Than Previously Believed

I clearly recall companies advertising the 'skin-friendly pH' of their products directly on the packaging in large lettering. It seems like it was just a few years ago that the accepted standard pH for skin-friendly was listed at pH 5.5 - 6.0.

But we now know that this is off the mark.

The International Journal of Cosmetic Science states the natural pH of the surface of skin is on average below 5 – more specifically around pH 4.7. (ref)

How Could They Get it So Wrong?

It all comes down to the way they previously tested – not so much the method of testing as the timing. To measure the correct and natural pH of skin, it has to have been out of contact with water, cleansing agents or anything else for many hours.

Our skin reacts immediately to the pH of what it comes into contact with. For example: when we bathe or shower, we are exposing our skin to the (more or less alkaline) pH of soaps, shampoos and shower gels. We then rinse off with a neutral pH (water has pH 7.0).

Just washing your face or bathing raises the pH of your skin measurably.

So, if a persons skin is tested for pH shortly after that person has bathed, the pH is going to measure incorrectly.

That's how they could get it wrong.

Knowing this, it suddenly makes sense why:

  • Aloe vera is so well-tolerated and recommended for babies. Its natural pH of 4.5 is close to skin.

  • Skin tonic can make such a difference in the way the skin feels after washing. A properly formulated skin tonic will not only remove any remains of cleanser, but also rebalances the skin and helps return it to its natural pH.

  • Even washing your face with 'plain old water' will knock it out of 'pH balance'. A balancing mist of hydrosol or toner can help rebalance and restore the skin to its natural pH.