Contact LisaLise

Please use the form on the right to contact LisaLise.

Majestic Court 5, St. Mary's Street
Mellieha
Malta

LisaLise offers online education of natural plant-based cosmetics via e-books and courses

LLBlogHEADER2020-3.gif

Shop Blog

A look inside the LisaLise natural cosmetics lab with free formulas, DIY how-to's, ingredients tips, sneak peeks, and more.

Filtering by Category: Soap

Pine Tar Soap

Lise

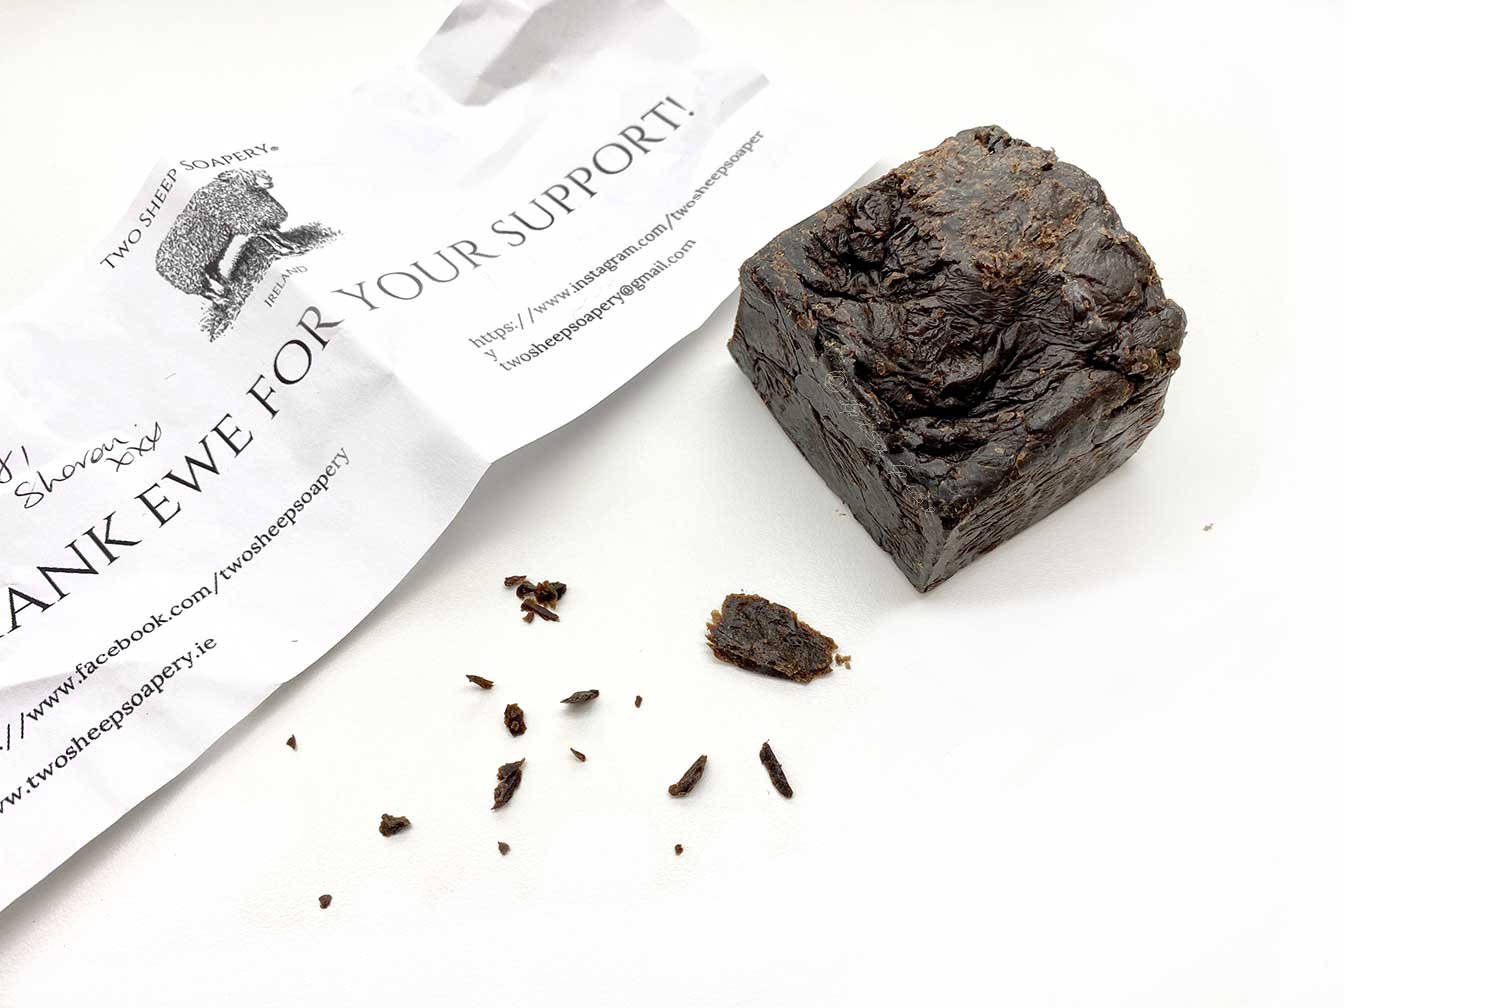
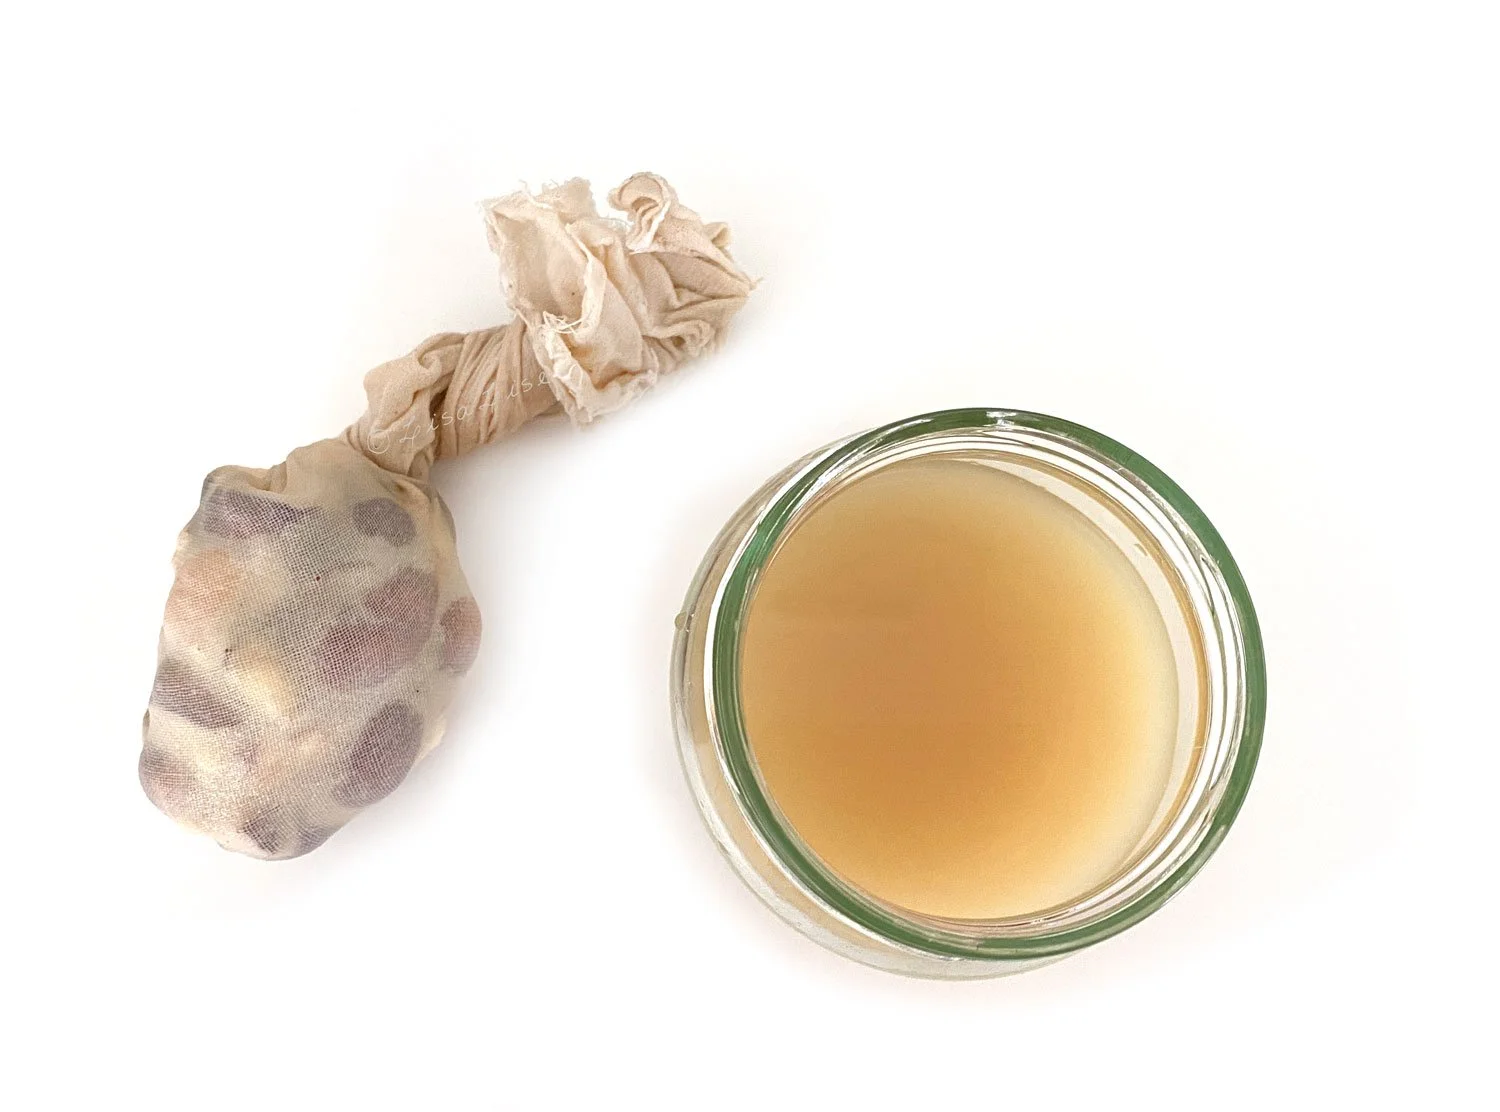
Pictured above is not a fudge brownie (although I can see how people could mistake this for something edible). What you are looking at is pine tar soap.

This particular soap has a very long history of use (over hundreds of years).

Pine tar is made by burning pine wood. It is a dark, sticky mass that has a decidedly smoky smell - similar to smelling concentrated campfire.

Pine tar was originally used to protect and preserve wood and has its roots in Scandinavia. Throughout history, it has made its way into - of all things - soap. Despite the rather 'medicinal' and pungent smell pine tar soap has, it is loved by many - especially those with sensitive skin.

Today, we're going to learn a bit about this soap from a maker of it.

Sharon O’Reilly is the owner of Two Sheep Soapery located in Ireland. A post by Sharon on social media about pine tar soap stirred memories from years gone by, so I asked if she would be willing to share a bit about how she makes her pine tar soap and help dispel a few myths about pine tar.

Please join me in welcoming Sharon to the blog!

Thank you for joining us today Sharon. You have been making handcrafted soaps and cosmetics for over 2 decades, but your pine tar soap is special. Could you share a bit about how you got started making it?

Thank you for inviting me. This is very exciting & I'm honoured you have asked me to join you today.

I have been making handcrafted soap & cosmetics since 2011. I've made my own Balms & oil blends since I qualified in aromatherapy in 1996.

I found out about cold process pine tar soap around 2012. It was in an online American soap group & it was being talked about for skin problems. Since having chemotherapy for breast cancer, my skin has become quite sensitive, even my sense of smell/taste changed, prone to dryness & I've become very allergic to insect bites which scar horribly. This was one of many reasons why I started to make my own products after my diagnosis.

Pine tar soap is really good for skin problems. Historically in European pharmaceutical products, pine tar has been used for eczema, dry skin conditions, psoriasis, dandruff, in veterinary preparations to aid healing & as a fly deterrent on any shearing abrasions in the sheep. I use it a lot on my farm here in Ireland & find it really useful.

It's very healing.

Is pine tar a difficult ingredient to work with?

When I make my pine tar soap, I just follow my usual cold process formula (you can hot process it too which I've done) & add pine tar to my warm oils including any FO/EO (fragrance oils/essential oils).

Pine Tar is like thick, sticky brown syrup. I measure mine out separately & keep to one side until needed. I am assessed to use 10% but some soapers use as much as 20%, others only 5%. Then I add the lye solution as last thing. I never stick blend, just stir with a spoon until emulsified because it only takes a few minutes to get really thick & you have to work really fast getting it in the mould! Please don't use a stick blender or it's instant soap on a stick! Lol.

The soaps look like beautiful chocolate brownies (so I get told all the time by people), but you really don't want to eat it....Yuck!

There are some studies that conclude wood tar preparations (including pine tar) contain carcinogenic constituents that may induce skin cancer, yet ironically, pine tar soap has a long history of use specifically for skin conditions. What has been your experience with this soap and how it works?

There have been various discussions regarding the safety of various tars etc. I think where people are getting confused is between the different tars.

Coal Tar is prohibited & can have carcinogenic substances in it.

Pine tar is perfectly safe which is the one I am assessed to use. I work with an amazing cosmetic chemist.

Are there any precautions people should take before making their own pine tar soap?

Do have a go at making this wonderful soap! Initially, the smell is very strong. Perhaps put it in a shed to cure or dry out. It has a very woody, smoky, little burnt smell.

After a few weeks of curing/drying, I think it smells like like the old fashioned medicated vosene herbal shampoo! I've had both men & women say that they like the smell & I think it's suitable for all skin types. It is a very gentle soap. I make mine with a tallow base.

Good luck to everyone who has a go making the soap & I hope you enjoy the skin loving qualities it brings you.

Thank you so much for sharing these tips and insights to pine tar soap Sharon!

Find Sharon and Two Sheep Soapery here.

More About Pine Tar Soap

Pine Tar; History and Uses (LINK)

Effect of Pine Tar on Disease severity in moderate-to-severe childhood eczema (LINK)

Topical Pine Tar: History, properties and use as treatment for common skin conditions (LINK)

Opinion of the Scientific Committee on Cosmetic Products and Non-Food Products intended for Consumers concerning Wood tar and Wood Tar Products (LINK TO PDF DOCUMENT)

Dr Squatch - Benefits of Pine Tar Soap (LINK)

How to Make Conkers Powder

Lise

Last Fall, I got busy collecting and drying conkers so I could play around with some of the different possibilites these all natural saponin-rich plants have to offer.

In this post, I showed you how to use the fresh (or dried) nuts as a laundry detergent. Today, we’re going to make conkers powder. Why do we need conkers powder? Think cleansing bars, shampoo bars, cleansers, masks, scrubs and more.

Although this is a teensy bit labour intensive, it is the kind of thing you can make in ‘larger amounts’ and then store to be used as needed.

Not to Be Confused with Chestnuts

Conkers are also known as Horse Chestnuts. Their botanical name is Aesculus hippocastanum. TIP: Don’t confuse conkers with edible chestnuts: castenea sativa. These are not the same plant and cannot be interchanged.

Step 1: Shell and Dry Conkers

To make conkers powder, you will need thoroughly dried conkers. This can be done by removing the outer hull, lightly crushing/breaking up the conkers, and placing them on a baking tray. Leave in the oven on low heat for a few hours until fully dry.

I have found that the thin brown outer layer can to some degree be peeled away during the initial processing, but this is not strictly necessary. In some instances, it will fall away as the nuts dry, but some can be almost impossible to remove. The more of the brown layer that can be removed, the smoother the result. If you can’t get the brown off, don’t worry about it — much can be sifted out at the end.

Above: lightly crushed dried conkers - ready to be processed.

Step 2: Whack Conkers

This can be done with any number of whacking implements. In this batch, I have employed my husband and his precision-whacking hammer.

To contain as much as possible, place the conkers in a tightly woven clean cloth, twist shut, place on a hard surface. Note: dried conkers are VERY hard and the act of whacking them can mar kitchen surfaces, so do take care to protect your tables/countertops.

The conkers need to be broken up as much as possible without pulverising them completely. Here’s what this batch looked like after whacking.

Step 3: Grind Conkers

If you happen to have a home-sized flour mill of some type, you might try placing the wacked conkers in the mill for final processing. This is something I have been trying to find in a decent (read: small enough) size for my own needs). If you don’t have a flour mill, use a dedicated coffee grinder for this next step.

Place the whacked conkers in the grinder. Start by pulsing several times, then grind as finely as possible.

Step 4: Sift Conkers

Depending on how much of the brown layer was attached to your conkers, this step may take a shorter or longer time.

Finish by passing the ground conkers through a sieve a couple of times to get as smooth a powder as possible. Any leftovers (like you see pictured below) can be used as a laundry detergent (see this post)

Step 5: Store Conkers Powder

Find a suitable airtight container for your and store the powder dry and out of direct sunlight.

Next Up

Next time we look at conkers, we’ll use the powder to make a shampoo bar.

Want to read more about natural cleansers on the blog? Check the selection of posts below.

The pH of Skin - What's Natural?

Lise

Our skin is built up of many layers that are all fascinating to learn about, but today we're 'just' going to scratch the surface – the protective layer – also known as the acid mantle.

Appropriately Named

The acid mantle is the outermost layers of the skin's surface that function as a barrier. The pH of the acid mantle is on the acidic side – more so than previously believed – but we'll get into that in a minute.

One of the advantages of having an acidic layer is protection – keeping bacteria at bay and shielding us from potential contaminants.

Men and Women Differ

A 2001 study showed that women have a significantly lower skin pH than men. So much so, the study concluded that "comparative studies on skin surface pH should be balanced with respect to gender". So, prior to what we used to believe, creating a pH-friendly skin care product that is equally suitable for men and women is going to be a bit of a compromise.

We're More Acidic Than Previously Believed

I clearly recall companies advertising the 'skin-friendly pH' of their products directly on the packaging in large lettering. It seems like it was just a few years ago that the accepted standard pH for skin-friendly was listed at pH 5.5 - 6.0.

But we now know that this is off the mark.

The International Journal of Cosmetic Science states the natural pH of the surface of skin is on average below 5 – more specifically around pH 4.7. (ref)

How Could They Get it So Wrong?

It all comes down to the way they previously tested – not so much the method of testing as the timing. To measure the correct and natural pH of skin, it has to have been out of contact with water, cleansing agents or anything else for many hours.

Our skin reacts immediately to the pH of what it comes into contact with. For example: when we bathe or shower, we are exposing our skin to the (more or less alkaline) pH of soaps, shampoos and shower gels. We then rinse off with a neutral pH (water has pH 7.0).

Just washing your face or bathing raises the pH of your skin measurably.

So, if a persons skin is tested for pH shortly after that person has bathed, the pH is going to measure incorrectly.

That's how they could get it wrong.

Knowing this, it suddenly makes sense why:

  • Aloe vera is so well-tolerated and recommended for babies. Its natural pH of 4.5 is close to skin.

  • Skin tonic can make such a difference in the way the skin feels after washing. A properly formulated skin tonic will not only remove any remains of cleanser, but also rebalances the skin and helps return it to its natural pH.

  • Even washing your face with 'plain old water' will knock it out of 'pH balance'. A balancing mist of hydrosol or toner can help rebalance and restore the skin to its natural pH.

How to Make Your Own All Natural Laundry Detergent

Lise

This funny looking orb is commonly called Conkers or Horse Chestnut. The botanical name of this plant is Aesculus hippocastanum. Fun fact: when a plant includes the name ‘horse’, it is generally not suitable for consumption. These nuts are no exception.

Although they may look almost identical to the chestnuts that can be roasted and enjoyed with a dab of butter and sprinkle of salt, consuming conkers will result in a very upset tummy.

But they are useful in other ways.

For example, they can be used to do load of wash. This is because conkers have a natural content of saponins. (saponins = soap). They have an all natural, built in ability to cleanse things.

Although I have known about conkers saponin content for ages, it wasn’t until last Fall when they were in season I finally got serious about collecting enough to get busy working with them.

They make quite an effective laundry detergent (and are useful for several other things that I will be getting into in future posts).

Today, I’m going to show you how I have been using them to do laundry.

How to Make Your Own Laundry Detergent with Conkers

This method can use either fresh or dried nuts. I (peeled, chopped and) oven-dried all of the ones I gathered to have enough to last me a while, so the pictured batch is with dried nuts.

This amount will make detergent for 1 load of laundry.

You Will Need

  • a heat-tolerant jar that holds about 500 ml (17 fluid ounces)

  • a piece of muslin/cheesecloth

  • a handful of hulled conkers (the green outer hull is discarded)

Method

  1. Lightly crush or roughly chop the conkers (no need to remove the brown ‘skin’ but you can if desired)

  2. Place the cheesecloth/muslin in the jar and pop in the conkers. The conkers should fill about half of the jar

  3. Boil water and pour over conkers to fill the jar.

  4. Steep for 30 - 60 minutes (alternatively: start a brew the night before and allow to steep overnight)

  5. Lift out cloth and wring to extract as much liquid as possible

  6. Discard conkers (if you have a compost area in your garden then toss them there)

  7. Pour the liquid into the washing machine with your load of laundry and start the wash program.

Here’s what the liquid looks like when it’s ready for use.

In my research on conkers laundry detergent, I have come across comments from folks that it is not ideal for washing whites if the brown skins are included when steeping the nuts. The brownish liquid tends to turn whites unto a dull color over time. If I had had the presence of mind to try and peel the brown skins off while the nuts were fresh, it might not have been a problem, but it is almost impossible to remove after the nuts have been dried.

I have so far only used this detergent for colored fabrics and it works well - quite comparable to doing laundry with soap nuts.

Compared to soap nuts (that produce quite a vinegary scent that happily does disappear quite quickly), conkers laundry detergent is quite neutral in scent and easy to use.

Do Tell

Have you ever tried doing laundry with conkers? Please share your experiences in a comment below.

How to Make Easy Scrubby Bath Bags

Lise

These super skin-friendly scrubby bags are the easiest thing in the world to make and if you have kids, this might be a perfect family project you can have fun making together (and maybe even get your bath-resistant kids a little happy about bathtime).

The idea for these came about when I was making a DIY version of 'oat flour' and had a generous portion of oaty bits that were too big to pass through the sieve, but truth be told, you can use rolled oats right out of the package for these bags.

If you happen to make your own soap, then this little how-to is a double bonus!

Let's get started!

Ingredients and Tools

  • Small (single portion) muslin or terrycloth bags that can be shut tightly

  • Grater

  • Bowl

  • Oats that couldn't pass through the sieve (or rolled oats)

  • Bits of your favorite soap

How to Make the Bags

  1. Place oats in bowl

  2. Grate soap

  3. Place soap in bowl

  4. Mix

  5. Transfer approx 2 tablespoons of the mixture per bag

  6. Shut bag tightly

I like making a few at a time (and storing them dry) so it’s easy to grab one when needed.

How to Use a Scrubby Bath Bag

Simply replace soap with 1 bag per shower or bath. The oats are extremely skin-friendly – even for super sensitive skin. Try squeezing the bag when it is wet — all kinds of oaty soapy goodness will ever so gently cleanse and pamper skin.

Why Single Portion Bags?

Because there is no added preservative and we are mixing water and oatmeal, it is best to discard the contents after 1 use. (Otherwise you’ll have a kind of smooshy awful pasty mess that might decide to grow nasties to deal with)

To empty the bags: untie the bag, turn it bag inside out, and discard the contents. Rinse the bag thoroughly and let it dry before filling again.

Tip: empty the oats into the trash, not your sink or tub.

Enjoy!

Green Clean Surfactants - Here’s One

Lise

foam-1500.jpg

I wrote about this surfactant some time ago, and while updating this post (as I am in the process of doing for my entire blog), I discovered that the creators (and manufacturers) of this ingredient appear to have revised/expanded, and updated it.

Spoiler alert: it looks to be even greener than it was before.

The Name

Ingredients manufacturers will sometimes just use the INCI name (which can be rather long and boring), but this particular surfactant has gotten a bit of love in the name department. If you try and pronounce the INCI name, you’ll see why this one has been graced with a common name.

Common name: Suganate 160NC

INCI name: Sodium Laurylglucosides Hydroxypropylsulfonate

CAS number: 742087-49-6

The Technical Stuff

Suganate (which is kind of a cool common name) is a series of products that the manufacturer describes as ‘high foaming sulfonated surfactants’. These are based on (naturally derived) alkyl polyglucosides (or APGs).

APGs are a class of non-ionic surfactants derived from sugars and fatty alcohols and are popular with companies focusing on natural.

Suganate 160NC has plant-based origins – namely coconut and corn.

The manufacturer Colonial Chemical is based in the USA, has been around for about 3 decades, and provides these points about Suganate 160NC

  • Sulfate free

  • Non-irritating to skin and eyes (think foaming baby wash or shampoo)

  • Safe for environment

  • Biodegradable under any conditions (!)

  • 100% based on natural sources

They back up their claims with documentation.

While they're not lying, you could also say the same thing about a few other surfactants. The term 'naturally derived' (or natural sources) means the ingredient has all natural origins but is chemically altered in order to become what it is.

Is it Green Enough for You?

Now, if you're a hard-core stickler for ‘all natural’ and ‘as unprocessed as possible’, then this ingredient might (still) not be green enough for you.

However.

The fact remains that you can't really make a surfactant without doing 'chemical alterations'. So unless you want to disregard everything except plant saponins such as soapnut and soaproot, chemical alterations are part of surfactant life.

If you are looking to formulate low-irritation shampoo and body wash products with foaming ability, this surfactant definitely fills the bill.

The part that really interests me about this ingredient is what it does after it gets washed down the drain. Suganate 160 NC appears to tick all the right boxes in that it is biodegradable under any conditions.

I still haven’t worked with it and admit it has been on my to do list to procure a sample of this ingredient and give it a try for longer than I care to admit, but it warms my heart to see more manufacturers taking a holistic approach to making natural and environmentally friendly ingredients.

Manufacturer Free Formulations

If you are interested in working with this surfactant (along with some of the other products by Colonial Chemical), visit their formulations page for free inspirational formulations for loads of personal care products, pet care products, and more.

Speaking of Bathtime

Want to make your own bath products with essential oils? The book pictured below can help. Just click the picture for more information.

This post does not contain any affiliate links.