Contact LisaLise

Please use the form on the right to contact LisaLise.

Majestic Court 5, St. Mary's Street
Mellieha
Malta

LisaLise offers online education of natural plant-based cosmetics via e-books and courses

LLBlogHEADER2020-3.gif

Shop Blog

A look inside the LisaLise natural cosmetics lab with free formulas, DIY how-to's, ingredients tips, sneak peeks, and more.

Filtering by Category: Lab Peeks

Dandelions and Skincare - What Does Science Say?

Lise

When I started researching dandelion’s possible uses for skincare some years ago, I was pretty impressed at what this common plant has to offer.

Useless weed?

Ahem.

Think again.

Even science has declared dandelions 'warrant further study'.

(Science usually says this kind of thing when it finds evidence that traditional remedies aren’t all fairy tales and fantasy). I seem to be seeing that happening more and more these days.

And the truth is, there is a wealth of hidden treasure in this multifunctional and bountiful plant.

Shall we take a closer look at dandelions?

Dandelions Have Healing Properties

Science agrees the chemical composition of Taraxacum officinale (that's the botanical name for dandelion) makes it helpful and useful for numerous medical conditions and ailments.

Dandelions are

  • Antioxidative

  • Anti-inflammatory

  • Antimicrobial (to some degree)

  • Diuretic

  • Tonic

All this medicinal magic from a 'weed' most homeowners are busy trying to banish from their gardens.

Extraction Methods are Up for Discussion

The most up to date scientific articles I have found on dandelions seem to be focused on examining which plant part has the most to offer in the way of actives.

Some studies are focused on the root while others are studying plant parts and their constituents in correlation to what time of year they are harvested before extraction.

Extraction methods are also being studied to determine which is most efficient. Ethanol extraction seems to be getting the most attention in the scientific community, although there are a few scientific souls looking into oil extraction. Check the links below for more information.

LisaLise Soothing Dandelion Balm Experiment

Pictured here: side-by-side infusions in 2 different oils. On the left, dandelion blossoms in sunflower oil and on the right, leaves-and-stems in sweet almond oil.

I combined the 2 finished macerations with a few other other plant-based soothing ingredients in a test balm (pictured at the top of this post).

This is a bit typical of the way I work - a combination of research, trying out ideas, and experimentation.

What started me on this dandelion research was a comment about dandelions for pain relief. Admittedly, the commenter was taking dandelion internally (by the drop as a tincture), but the idea of trying it in topical application was the basis for the infusions and a foot balm for tired aching feet.

You know when you have been on your feet all day and your feet start yelling at you to sit down? That kind of tired and aching.

I got such a great response from my extensive test team (foot left and foot right) that I have done many batches since and have even handed out a samples to a few willing testers.

Dandelion TIP

If you want to get max bang for your buck, try doing oil extractions with the alcohol intermediary method using all plant parts. I split up the parts of the planet so I can also combine oils.

Do Tell

Do you use dandelions in any of your skincare products? Please share what your experiences are in a comment below!

More About Dandelions: Nerdy Stuff

Dandelion (taracum officinale and T Mongolicum), Erik Yarnell, Kathy Abascal (LINK)

Taraxacum Officiale herb as an Antiinflammatory Medicine, American Journal of Advanced Drug (LINK)

Taraxacum- a review on its phytochemical and pharmacological profile (LINK)

Anti inflammatory evaluation of the methanolic extract of taraxacum officinale in LPS stimulated human umbilical vein endolethial cells (not oil extracted, but still interesting) (LINK)

Topical herbal Therapies and Alternative and Complementary Choice to Combat Acne (LINK)

Taraxacum: an overview (Science Direct) (LINK)

Qualitative and Quantitative analysis of phytochemicals of Taraxacum Officinale (LINK)

If you want to make a few balms with me, please check out the ebook below.

How to Make a Glycerite with Fresh Cucumber

Lise

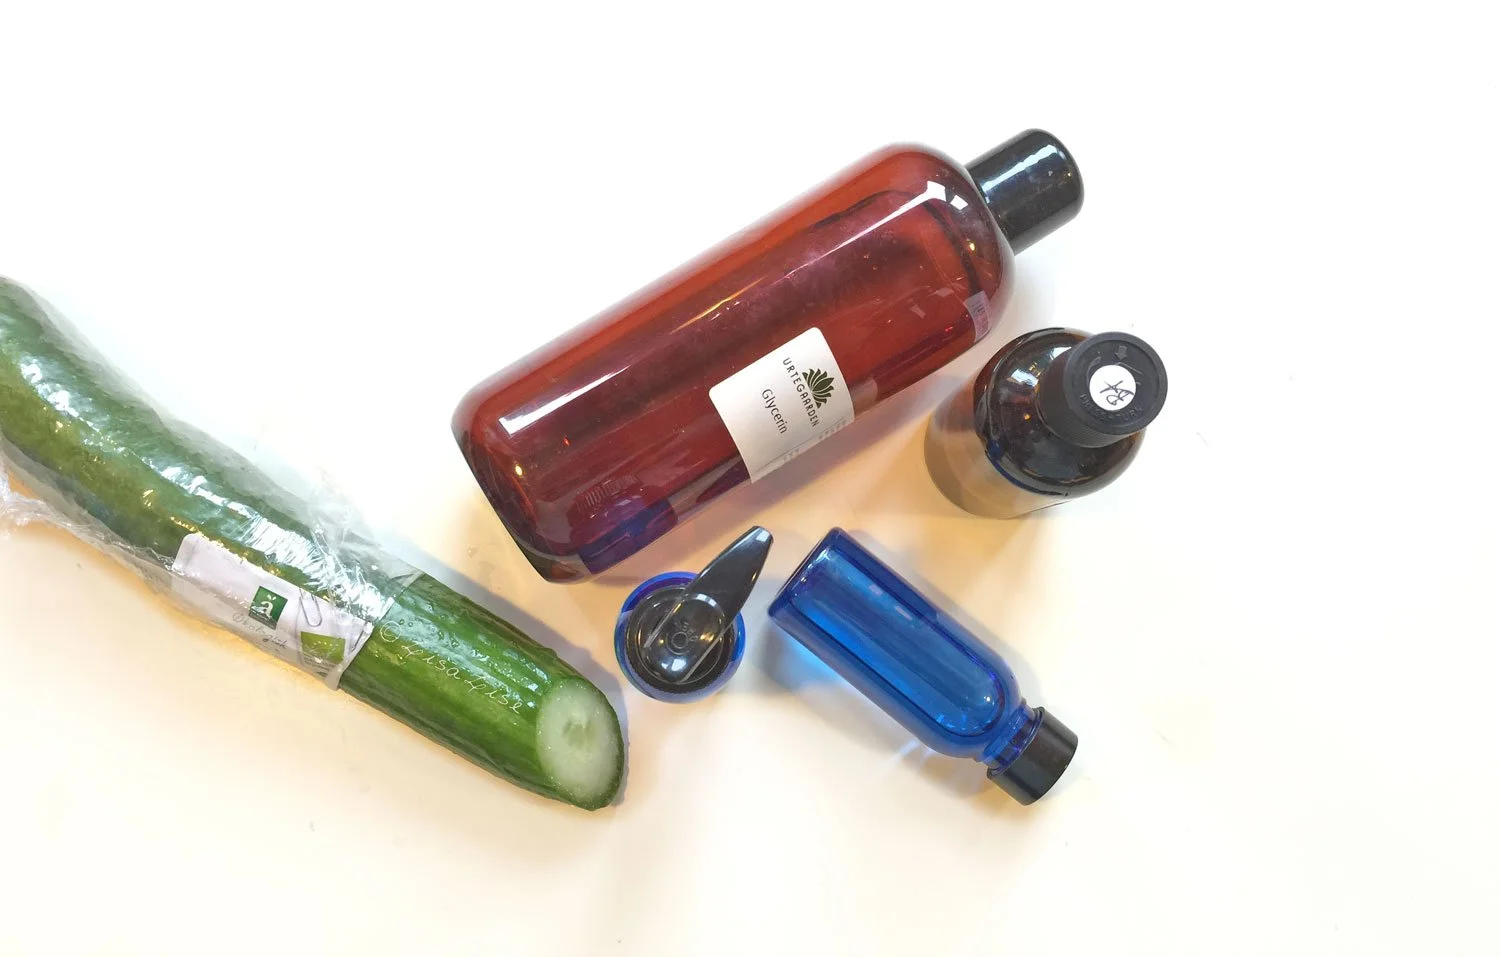
Today we’re revisiting one of the first glycerites I shared on the blog and a kickstarter to my passion for making and using glycerites with fresh foods in my cosmetics. I’ve pepped up the original pictures and added a few extra tips, so let’s get started!

Why Glycerites?

Glycerine extracts (or glycerites) are useful alternatives for folks who may not want to use tinctures (alcohol extracts) in their products, but glycerites also have additional advantages. Glycerine (also spelled glycerin) is an excellent humectant that doubles as an ideal solvent for many botanical constituents.

In short: a glycerite is glycerine with 'added botanical power' – the perfect addition to your lotions, creams, skin tonics and mists, serums, cleansers, and more.

Let’s make a fresh cucumber glycerite!

Water to Glycerine - How Much?

If you follow classic herbalist glycerite making instructions, you’ll find a common ratio of water to glycerine is 50/50, so for this batch, we're going to take our inspiration from there.

Fresh cucumber is about 96% water, so the percentages for this batch are

  • Glycerine 50.0 %

  • Cucumber 49.4 %

  • Preservative 0.6 %

Calculate the Batch

I am making a relatively small batch here (200 grams), so my batch amounts look like this.

  • Glycerine: 100.0 grams

  • Cucumber (organic): 98.8 grams

  • Preservative (I used benzyl alcohol): 1.2 grams

Method

  1. Sanitize your workspace, containers and equipment and pop on protective gloves

  2. Peel and slice the cucumber (I peel even organic cucumbers - but that's just me. Feel free to include the peel if you like. Remember to thoroughly wash/rinse the cucumber before slicing if you include the peel)

  3. Weigh cucumber

  4. Weigh and add glycerine

  5. Weigh and add preservative

  6. Give the mixture a stir

  7. Place lid on container

  8. Keep container away from direct light in a not too warm area

  9. Agitate daily for 5-10 days

Straining

If you used cucumber slices as I have here, you’ll notice that the slices start looking a bit shrivelled. That’s a good sign that your glycerite is ready for straining.

Before straining, be sure your equipment and containers are sanitised. (the funnel you are using is equipment too!)

  1. Place a funnel into a container and line the funnel with a filter. Coffee filters are fine but you could also use a finely woven piece of muslin/cotton. In this picture. I am using a doubled-up piece of silk jersey.

  2. Strain the mixture

  3. Bottle

  4. Label

Storage and Use

Store your glycerite cool and dark and use in your cosmetics within 6 months of making.

Glycerites can (and will) last much longer if made and stored properly, but I generally recommend using a handcrafted glycerite within 6 months of making.

Why?

Because when it is used as an ingredient in a cosmetic, that cosmetic is expected to have a certain shelf life.

Enjoy!

Want more glycerite making information? The book below might be just the thing you’re looking for.

Cherry and Hibiscus Vinegar Tincture

Lise

Combining botanicals for vinegar tinctures can make for some fabulous results.

This is a combination of dried organic cherries with hibiscus flowers. The result is a rich, luscious red color with a fragrance that has all but ‘disappeared’ the pungency of the vinegar.

I use vinegar tinctures (acetums) in numerous things: hair rinses, bath products, shampoo bars, and sometimes a tincture will even make its way into the kitchen to be drizzled over a salad.

This one did.

Do Tell

Do you make your own vinegar-based infusions? Which are your fave ingredients?

PS. The e-books below both have sections on making vinegar tinctures.

Testing an Ingredient Blend

Lise

This little bottle doesn’t look like much, but the contents is about effect more than anything else. As you may guess from the name on the label, this has been created with feet in mind. To be more specific: tired and arthritic feet.

This is a mixture of macerations and essential oils with herbs/botanicals that include comfrey, daisy, black pepper, eucalyptus, meadowsweet, and wintergreen (to mention the main players).

If you are used to blending essential oils, I’m betting you can already tell this is not a deliciously intoxicating perfumed fragrance, but more of an earthy-herby medicinal type of scent - definitely not something you want to be applying on a face.

But that’s ok for this product.

When I’ve tested this to my satisfaction, these ingredients will be adjusted (if needed) and used to make a soothing balm for a special and very loyal client.

Do Tell

Do you make test blends of ingredients before committing to making a balm? Please share in a comment below.

How to Make a Lilac Sugar Lip Scrub

Lise

Remember the lilac sugar we made the other day? Well, get it out because today we’re going to use it to make a sweet lilac lip scrub!

This is a super simple process where you don’t need much in the way of fancy equipment. You can pretty much eyeball all the amounts (but it’s never a bad idea to take notes while you work so you can recreate your fabulous product).

Ingredients List

  • Lilac sugar

  • Oil(s) of choice

Equipment List

  • Bowl

  • Sieve

  • Spoon

  • Jar for your lip scrub

Method for Lip Scrub

  1. Place a small sieve over a bowl

  2. Transfer desired amount of lilac sugar to the sieve.

  3. With the back of the spoon, break up any large bits of lilac to desired size while sifting the sugar.

  4. Add oil and stir to desired texture

  5. Transfer to lip scrub jar

Tips and Tricks

If you want to eyeball everything but still be able to recreate, place the bowl on a scale and set the weight to 0. Add the sugar and note weight. Reset the scale and note the weight of each addition of oil as you work. You can do all the math later as long as you have the right information noted.

I like my scrubs a little on the dry side, while some prefer a very oil-rich mixture. The amount of oil to add is really down to personal preference.

Add a bit of extra flavor to the mix. For my scrub, I combined coriander seed oil, castor oil and a vanilla infused sweet almond oil. The result is very pleasing to use.

This lilac lip scrub makes a beautiful and very personalised gift for a special friend or loved one.

Do Tell

If you decide to make this scrub, please add a comment and share how you personalised yours.

PS: Want to make more scrubs? There are formulas for body scrubs (and how to customise them) in the e-books below.

Another Self Preserving Honey Cleanser

Lise

I don’t believe I will ever grow tired of making these self preserving cleansers. The combination possibilities are quite literally only limited by ones imagination. And since these are my regular morning instant mask and cleanse, I do go through quite a few of them. I generally apply to hydrosol-misted face and neck a few minutes before entering the shower, then rinse off as the last thing before leaving the shower. This gives the ingredients maximum time to do their skin-loving magic.

Combining honey with glycerites and botanicals in the perfect proportions means they function as an excellent moisture boost and facial cleanser.

It’s hard to believe something like this could be so easy to make and offer so many ways of customisation.

The pictured cleanser is made with spirulina, chamomile, and rosehips powder. I used the formulation guideline in the Natural Cleansers book linked below.

Do Tell

Do you make your own honey cleansers? What are your favorite botanicals to add? Please feel free to share in a comment below.

Want to make your own self preserving glycerites too? Check the bundle offer below.